
Alright, picking up where we left off! This is Day 1.5, because I pulled a double on the first day and it nearly killed me, so I’m pacing myself in an effort to make it through these five spaces–the master closets (2), the girls’ closet, the boy’s closet, the linen closet and the coat closet in the hall–by New Year’s Day. I’ve already got a massive pile of things to donate waiting in the (freeeeezing cold) garage, and I want to make one enormous trip and be done with the whole thing at once. (Funny story: you know how I know I’m not the only doing this? Last year, on December 31, the local Goodwill wasn’t taking donations inside like they usually do–they had ordered a tractor trailer to be pulled up out front of the store, and were hosting a drive-through donations line, because they had too many coming in on New Year’s Eve to take them the usual way. Totally true.)
The Larger Master Closet
Step 1: Evaluate and assess
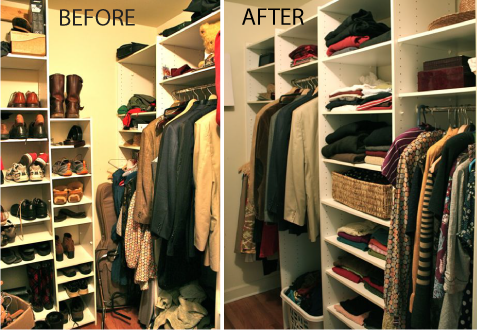
Let me begin by pointing out that it is insanely difficult to take photos inside a closet. I’ve done my best on these, but give me some rope on my photos skillz today. Had to bust out the fish-eye lens on a couple just to get some perspective that was useful for you.
This closet was installed by one of the former owner’s many wives (he had five, not at the same time). I love that it has so many nooks and so much space, but the shelves themselves aren’t terribly high quality–in fact, on the left, you can see that these are organizer shelves plopped on top of the original shelving installed in 1968. Beggars and choosers, though, and unless we gut the master bathroom and closet (which is on the fantasy list but won’t be happening any time soon), we’re delighted to have the chance to make the best of this one.
The issue in here was really that we moved in on a rainy day, and had big boxes and piles of things that we didn’t really know what to do with. Because this closet had so many shelves, a lot of those things got shoved on shelves and left there–for a YEAR. We never adjusted the shelving, or quite frankly even considered that it needed adjusting–we simply slapped our hangers on the rods and called it a day.
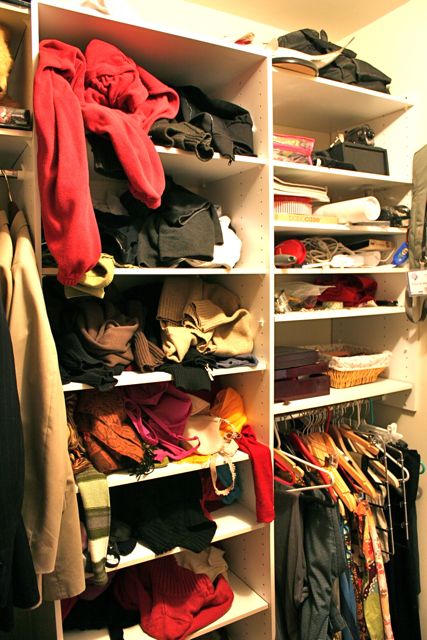
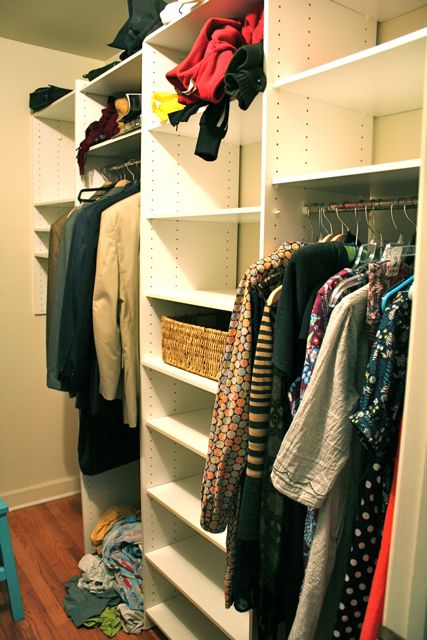
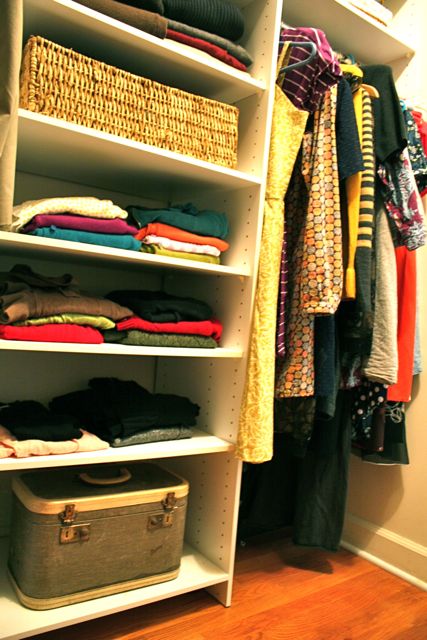
You can see in this “before” photo that a lot of electronics–including baby monitors, cases, extension cords and the like–got pushed into these shallow shelves and left to get dusty. Below those, I have my skirts and pants, because the rod was low and that’s what was most logical to put there. Then the tall shelves got our knits (if you are hanging up your knits, including Polo shirts, sweater dresses or dressy knit tops, STOP IT NOW–Martha would be furious), plus my growing collection of scarves. The highest hang rod, to the left here, gets my husband’s suits for work.
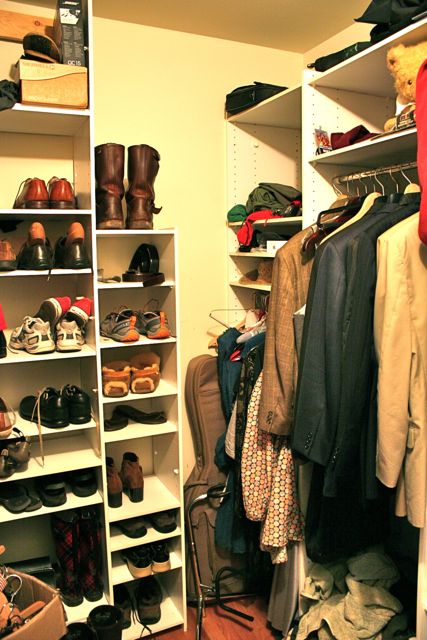
In this “before” shot, you can see my dresses, which are stuffed into the slightly higher hang rod toward the back–this is one of those spots where the closet design breaks down, because we have lots of “lost” corners that don’t make a ton of sense. But my task wasn’t to re-design the whole closet system, since we’re still hoping one day it won’t be ours any longer, but rather to use it more wisely. This weird little corner is actually what gave me the most inspiration–because one day, I realized it was ADJUSTABLE. I know, right? Why did I have my dresses shoved in a corner, some of them trailing the ground, off where I don’t see them (and consequently don’t wear them), but there’s a bizarre enormous SPACE above them that could totally be put to other use?
The evaluation was that the closet needed to be emptied, the shelves and rods adjusted to reflect OUR things (rather than the belongings of the people who used to live here), and then some storage solutions found for the itty-bitty stuff, like scarves and belts. Plus, the random boxes and piles needed to GO.
Step 2: Purge and empty
Emptying this closet was actually kinda fun, because as I was taking things out, I kept getting ideas for how we could re-arrange things and make it prettier and more useful. Here, I’ve emptied most of the knits from the shelves, putting all those things on the bed to sort and re-fold, and you can see I have already moved the bar for the dresses and shifted those over. Because once I realized I could, it was like an itch that hadtohadtohadto be scratched. The laundry–which often as not isn’t in a basket, because the basket is busy holding all the socks that haven’t been matched up–is still on the floor, but I’ve already brought in a thrifted basket that I picked up sure it would be perfect for something. And wouldn’t you know? It’s a perfect fit! And a great solution for belts and scarves, where it can work like a drawer right in the center of those shelves without us having to do a major construction project.
Step 3: Re-design
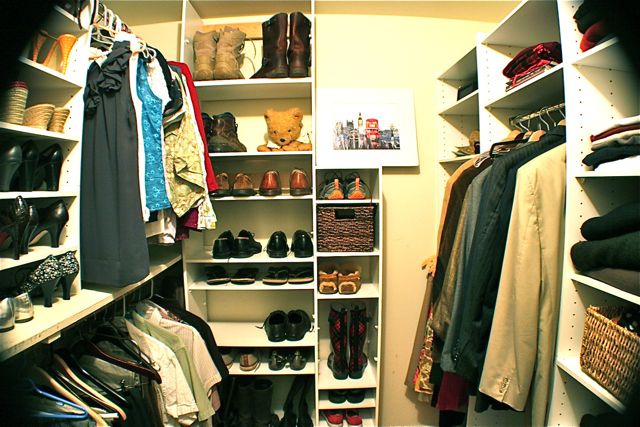
Lots of the shelves got re-arranged in here, to make more sense for us. Rods got adjusted and moved around, and ALL the things on top of the shelving were removed to other homes (like the basement or hall coat closet, which is where they really belonged to begin with). The left hand side of the closet didn’t get much attention in the re-design stage–it’s mostly a long, low hang rod which is used for my husband’s shirts and pants, and a shoe organizer above. I’m not convinced it’s the most efficient use of the space–that’s a lot of shoe storage–but it seems to work for our belongings. So that side got left alone, and my attention was focused on shifting things on the right side, instead.
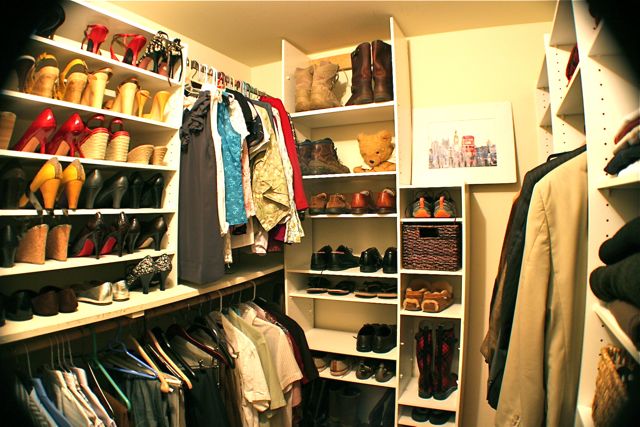
Over the long haul, I think we’d love to have someone else’s eyes come in and tell us how to use this space more efficiently–like that corner back where the one tall shoe organizer meets the hang rod, making about 24″ of rod totally inaccessible and wasting a whole chunk of square footage. You can see it in the image above–see how the shelving is at right angles to the shelf supporting the shoes, at the left? And how the depth of the shelving creates a weird pocket of wasted space there? Rubbermaid has a virtual closet design tool, but it doesn’t really make suggestions for how to organize the space better than it already is. Ikea has a series of room planners, but none of them seem to make much in the way of innovative suggestions, either. Does anyone know of a better closet design tool that might offer inspiration and ideas for HOW to use the space, rather than simply what products to put there?
Step 4: Organize and store
Putting things back in was tedious, but not hard–I did stop halfway through and make an emergency trip to Target for a basket, but other than that, everything we needed was on hand.
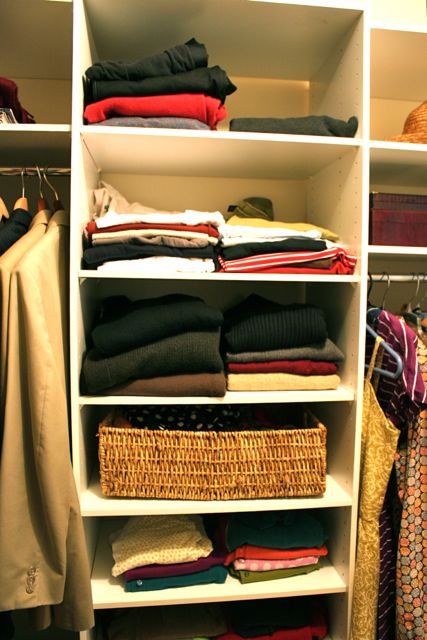
My husband’s Polo shirts are folded, along with his sweaters–in categories like Dressy Casual and Weekend and Sporty. My scarves and belts are in their new basket-drawer. My sweaters are all folded, in categories like Cardigan, Not Cardigan and Dressy Date Night.
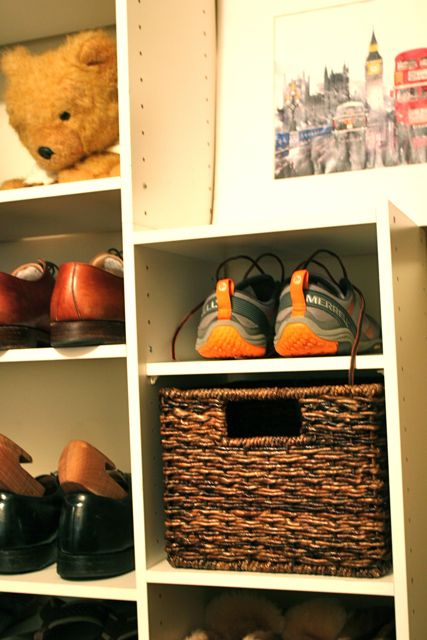
My husband got a new basket for his belts and shoe horn, along with the shoe bags he keeps around for…travel, I guess? I’ve never actually seen him use them, but he sure does like them, so they’re in the basket, too. Shoe shelves got re-arranged to make room for the basket, as well as to make space for boots–no reason to have one of my pairs of boots lying on its side when the shelves can just be moved, and yet they’d been like that for months. The art is on trial display–I don’t love this piece here, but I think there should be some piece of art in that spot. Just have to find the right one.
Below my sweaters, I incorporated a vintage train case in which I store my stockings and tights (in order to make room for my undies and socks in my dresser drawer), along with slips and things. These shelves also got moved around, to make sure that not only was there space for everything but that it also looked pretty and planned, and not as though I’d just shoved things places.
The four shelves above the hang rod that used to be stuffed with wires and plugs are now two shelves, with a basket for costume jewelry and a wooden box for keepsakes and nicer jewelry.
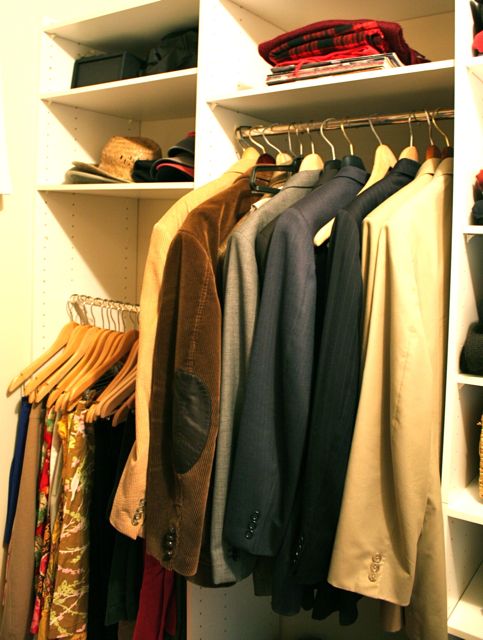
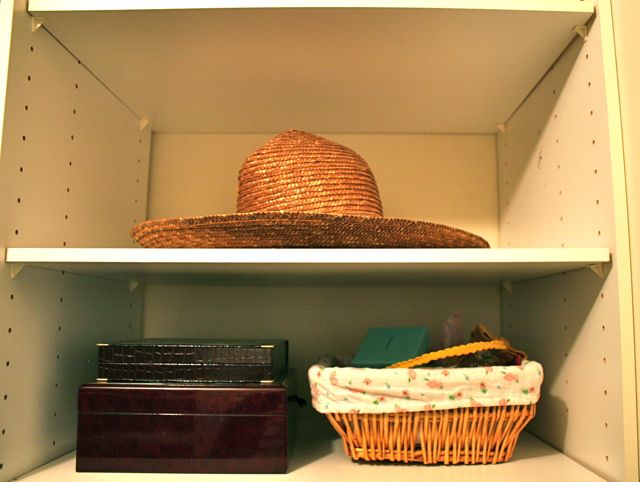
My husband’s suits stayed where they were, but the weird open wasted shelf above the hang rod in the corner went away, and the two shelves there now house his hats and outdoor gear. My skirts are in a higher position than they were before, but still lower than the dresses, giving a nice sense of levels on this side. And I happened to have a bunch of matching wooden skirt hangers leftover from when I used to manufacture clothing, and it makes all the difference–sort of a boutique feel over in the skirt department now, which I really like.
Not a ton of changes on the left, except that I ditched piles of clothing I didn’t wear, including some things I’d made but never hemmed or finished–and realistically never would. I did put my short-rod garments back into order according to my length-of-garment-length-of-sleeve-weight-of-fabric system, which gave me enormous nerd joy. And I rotated my shoes so that my summery shoes are higher up and my wintery shoes are lower down, which makes a lot more sense seasonally.
Step 5: Maintain
I’ve got to break my shoving ways, dude. That’s the only way this closet will stay looking as pretty as it does now. If I can avoid that, I’m golden. The other nice benefit from doing this space, along with my dresser drawers, is realizing where I have gaps in my wardrobe and where I should devote my sewing time. For example, I have over half a dozen A-line skirts in various fabrics, but only one winter dress. No need to waste fabric making another skirt–but I should probably bust out some wool and get to work on some nicer dresses with sleeves.
I think the boldest lesson from these two spaces is that less really CAN be more–although that is frequently contrary to my overly-verbal philosophy. We reduced the number of shelves in this closet by 5 and eliminated dozens of garments, and yet we’re likely to use and wear more of these things than we would have previously. Totally worth the time and effort.
Vital stats:
- total time invested (2 closets): 6 hours
- total donated bags: 4.5
- total donated garments: 78
- total donated shoes: 7 pair
- total cost (2 closets): $11
Next up: either the linen closet or the girls’ closet, depending on how strong I feel after naptime is over. Brace yourselves.
Miq
December 29, 2012 at 1:33 pmI am exhausted just reading this post…great job!
Kristen
December 29, 2012 at 3:32 pmLooks like you’re making great progress! It’s the best feeling when things are finally tidy and organized! You’ve inspired me to do a little organizing/cleaning out of my own over this long weekend. I’ve been meaning to do it for a while, but getting started has been the hardest part… now I have a list and will start crossing things off one by one. 🙂
As a side note, I got Stitch Savvy for Christmas and it just came in the mail. It’s lovely, and I can’t wait to work on some of the projects in there!