
Ever since I learned to install the “exposed enclosed zipper,” I have been minorly obsessed with them. They seem to work on, like, a zillion different projects, perfectly. I used one on the Prayer & Meditation Cushion, and in my Pockets e-Book I wrote about how to install one with a pocket on the back. These puppies fit on garments, pillows, handbags, you name it.
From a sewing perspective, these are actually pretty simple to install, even though they look like a million bucks. Functionally, it’s just a finished rectangle that measures 1/2″ wide by the length of the zipper. You pop the zipper in, with the zipper pull scooched super close to one end of the box, and then topstitch all the way around to anchor it in place. Nothing could be simpler!
A couple handy tricks can help to give you the best results when using this installation for a zipper:
Begin by marking the placement for the zipper on the right side of your fabric. Place a piece of scrap fabric over the spot you’ve chosen for your opening, right sides together. The scrap should measure at least 3″ by the length of your zipper PLUS 2″ (to allow margin at either end).
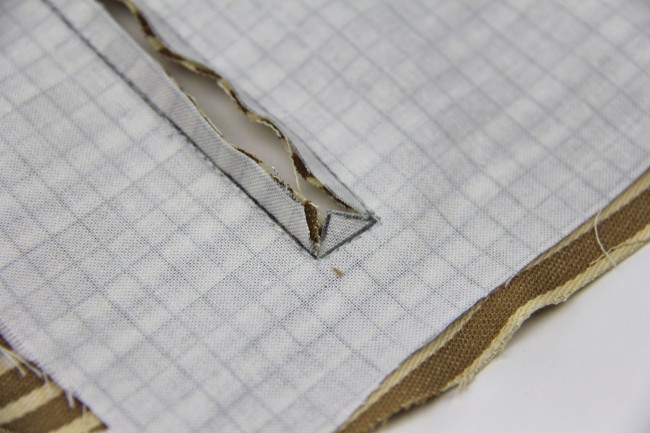
Draw–really DRAW, using water or air soluble pen for the best marking–the box. Start by marking a center line RIGHT where you want the zipper teeth to sit. Then, mark 1/4″ lines on either size of that center line. Connect those outer lines on the short ends to make a rectangle the length you want the opening to be, which will measure 1/2″ wide. Sew around the entire box outline. Along the center line, snip with scissors to open the box. At either short end, from about 1/4″ before the end of the rectangle, snip at a 45-degree(ish) angle INTO the corners–this step is super important to getting the nice, crisp corners on your final opening that you’ll want.
Push the scrap fabric through the opening you’ve created to the wrong side, so the fabrics have wrong sides touching. Press, press, press. Your opening should measure 1/2″ wide and look something like this.
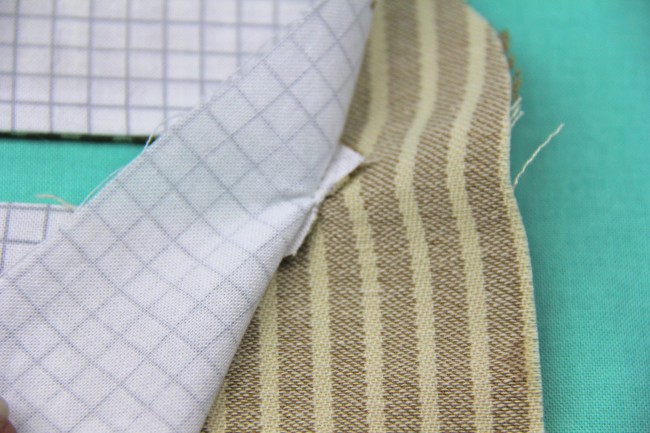
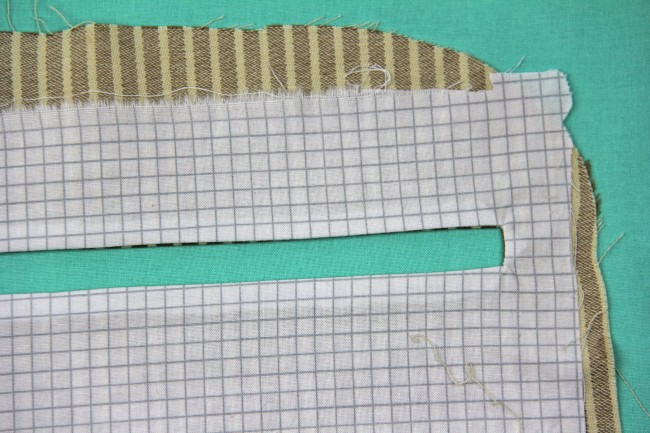
If you pull back the scrap fabric, you’ll see two tiny triangles, one at each short end of the rectangle, like this one. For best results with your final zipper, stitch THROUGH these triangles up and down parallel to the short end of the rectangle, through the triangle and scrap fabric ONLY. This will anchor the opening and keep it secure. This is an optional step, but highly recommended (if you can remember to do it, which I don’t always do–so if you forget, don’t sweat it).
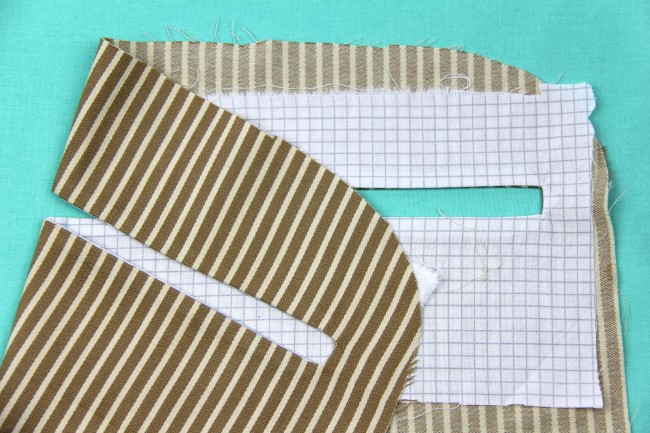
Since those optional stitches only go through the scrap fabric, you won’t see them on the public side of your project, which should now look something like this!
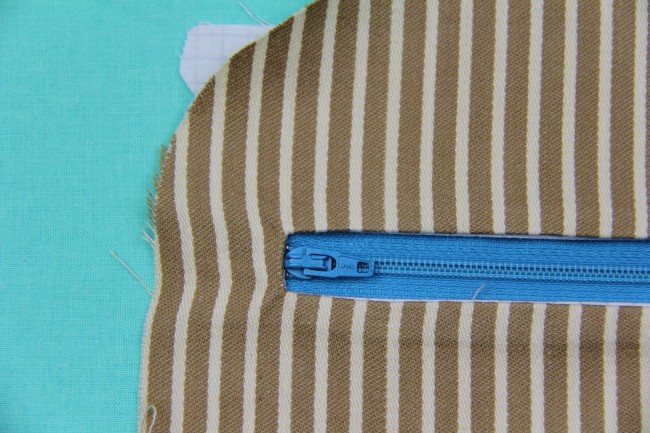
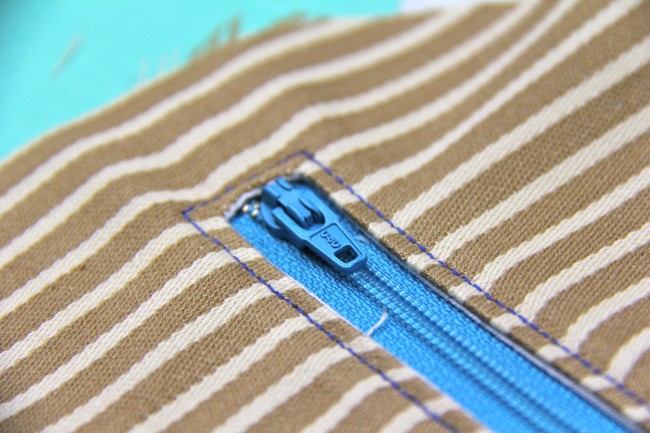
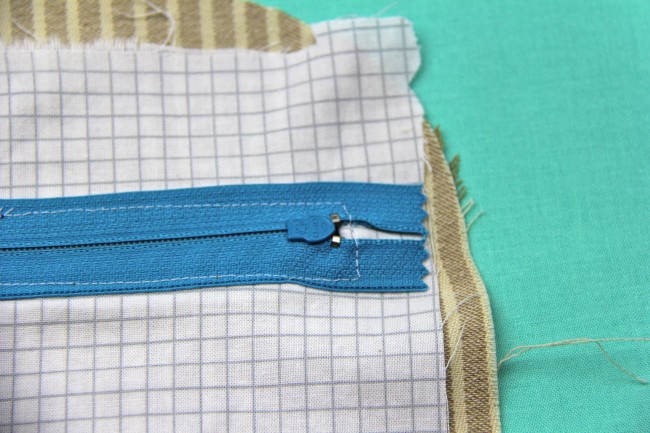
Now it’s time to line up the zipper. Lay the zipper face-up on your work surface. Lay your project on top of it, centering the zipper inside the rectangle. Be sure scooch the zipper pull riiiiiiight up into the short end of the rectangle, so there is no exposed space between the zipper tapes peeking through the opening.
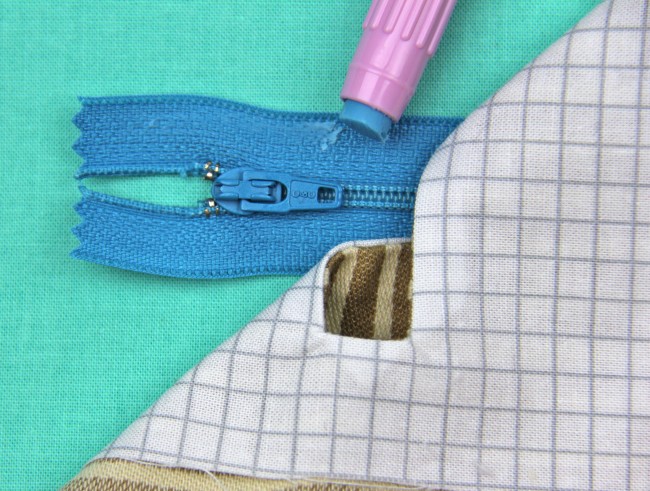
Since pins would be super awkward here, a glue stick can be helpful for anchoring the zipper tapes in place while you install the final stitches (see? we’re almost done!!). Pull back the project and apply glue stick along each side of the zipper tape, then re-align the zipper inside the opening, pressing along the tapes to secure. This is just a temporary hold, but will do the job while you’re topstitching in the next step. Again, it’s optional, but highly recommended for best-looking results!
From the RIGHT side of the project, stitch around the entire perimeter of the opening very close to the seamed edge–about 1/8″ inch away or so. These stitches will be visible in your final project, and go through all the layers: the main fabric, the scrap fabric, and the zipper tapes. Close the box and backstitch to secure when you get back to where you began.
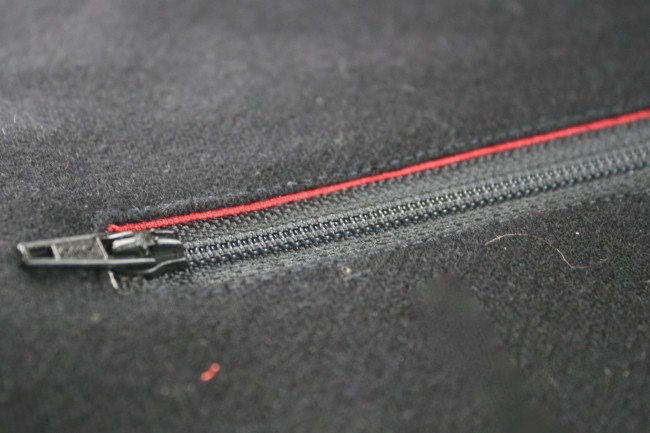
From the back, this is what your zipper will look like. It’s less important that the stitches be perfectly spaced on this side than that the appearance on the right side of the project is clean and centered.
And that’s it! Simple and straight-forward technique for clean, classic exposed zippers anywhere. See my Prayer & Meditation Cushion Pattern for an example of where to use this on a pillow (to utilize a pillow insert) and my Pockets e-Book for an example of how to use this technique in a garment with a pocket behind it! Both are just $5 and a great way to add new skills to your toolbox.
Happy sewing, everyone!
Cherie
June 29, 2015 at 6:02 pmAs usual, you are the guru of teaching sewing techniques! Thank you!
Deborah
June 30, 2015 at 8:18 pmHaha! I just love zippers and pockets, really. My e-book has this same zipper with a pocket bag behind it, so you can use it on handbags or totes or even garments, and it’s one of my favorite applications of a closure ever!