
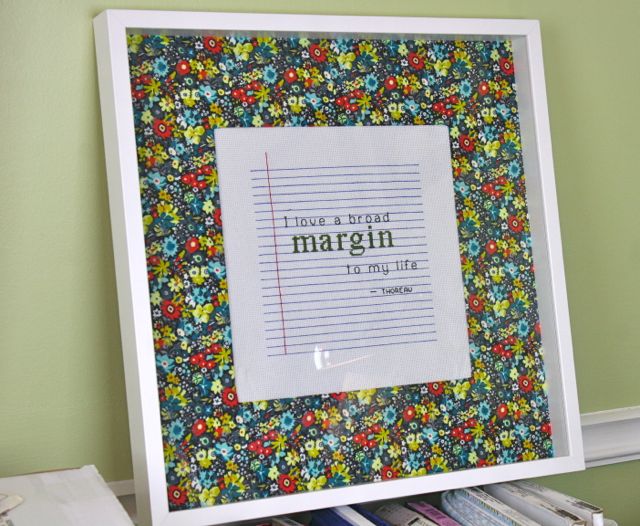
My margin cross stitch has long since been completed, but is not yet hanging on my wall. And I even went out and bought a frame for it. It’s just that the frame was…boring.
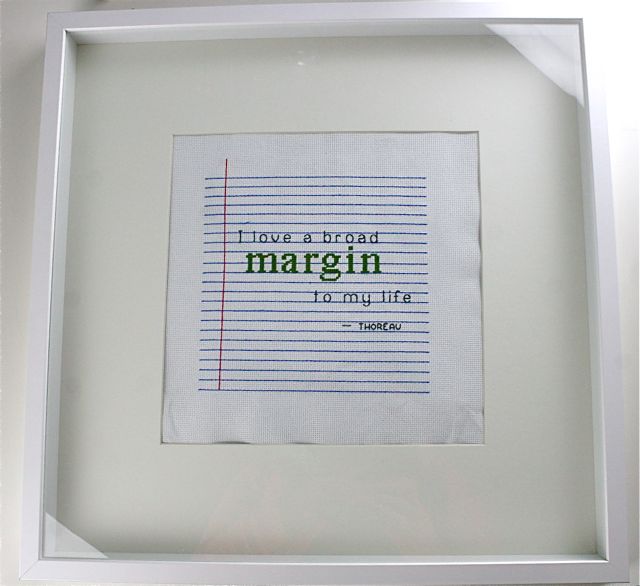
See what I mean? Totally dullsville. It’s a lovely deep shadow-box frame (from Ikea), but the white mat with the white frame with the white Aida cloth? Snoozertown.
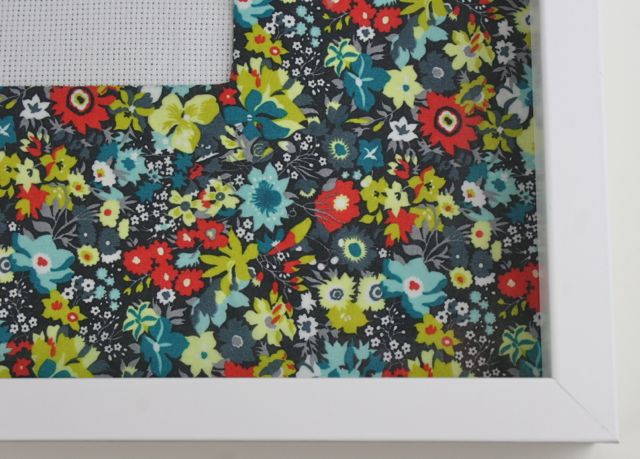
Thus I was inspired to upgrade my frame with a little Liberty. Because when has Liberty ever steered you wrong? Never, that’s when. Not once time since 1875.
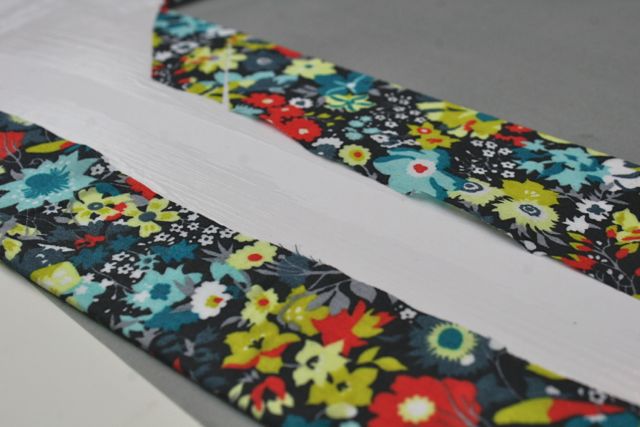
The idea was, I’d cover the mat with some fabric, wrap it right around the cardstock and bring some color and depth to the whole frame. I stocked up on (read: wildly splurged while up far past my bedtime) some Liberty lawns a few months ago, and they were all washed and dried and waiting for me to turn them into dresses–but since I haven’t drafted the pattern I have in mind for those dresses just yet, now’s as good a time as any to slice into this yumminess.
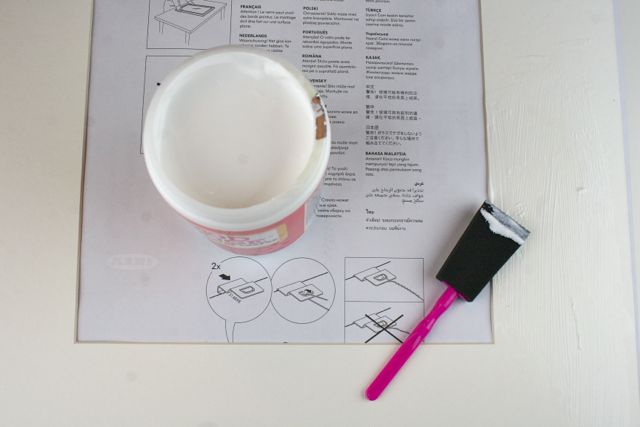
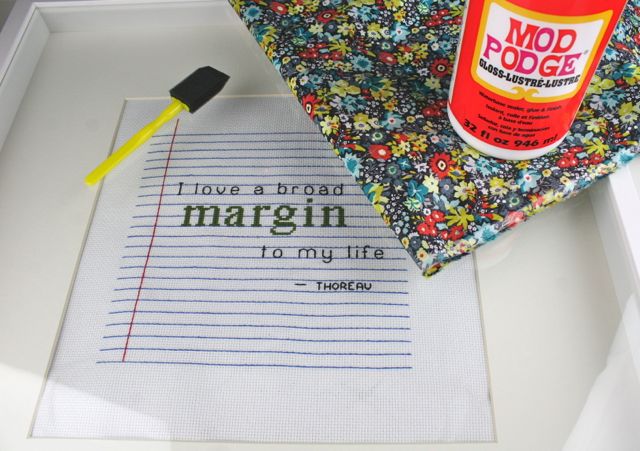
I opted to use Mod Podge as my medium for anchoring the fabric to the mat. I thought about a spray adhesive, but since the mat is really just paper, I was worried it would curl from the moisture in the spray. Since the frame isn’t flat–it’s a shadow box, which leaves space between the mat and the glass–I didn’t have the advantage of pressing the mat flat later, so I wanted to be cautious in my choice of materials. I used a basic foam brush to spread the Mod Podge on the right side of the mat. I didn’t work too hard to make it even, just to make it smooth and not too thick. It’s easy to go back and add more later, but once the paper starts to buckle, it’s too late to take it back.

On the right side of the mat, all covered with adhesive, I pressed the wrong side of the fabric and smoothed it out–you have to do that pretty quickly, since the Mod Podge is super sticky and I didn’t want anything to get stuck in the wrong place, or to create any wrinkles or bubbles. With all the fabric in place and fairly taut, I trimmed the edges of the fabric to leave about 2″ or so of overhang along each of the four sides.
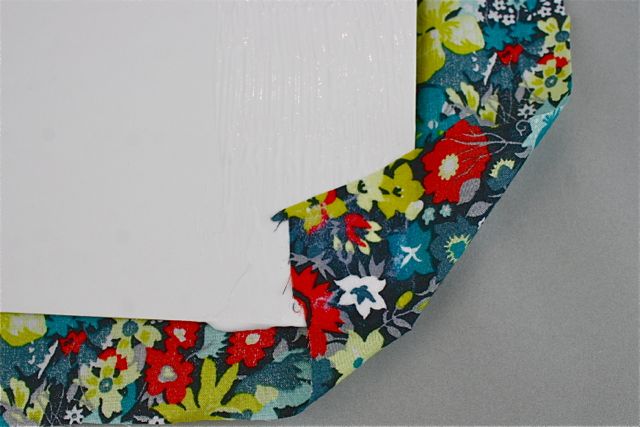
Flipping the mat over, I can anchor the fabric along the back side to totally wrap the mat all the way around. At the outer corners, I mitered the fabric in at a 45-degree angle. This kept it from getting too bulky when I folded the edges in, and kept it all nicely tailored for when the mat went in the frame.
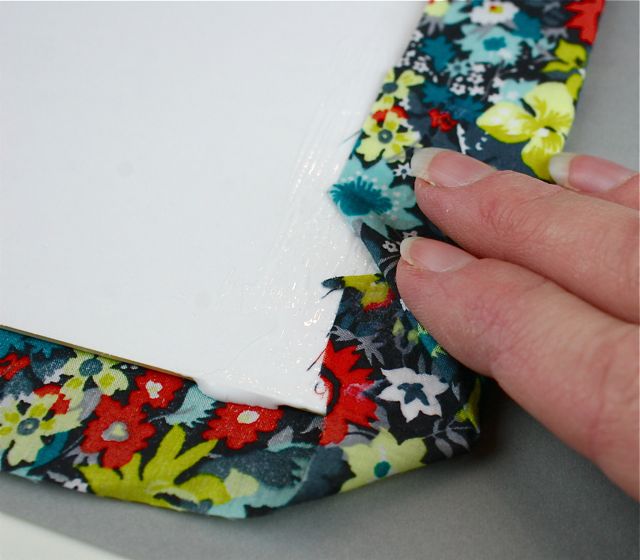
Once all the corners were mitered, I folded each side down and pressed it into some Mod Podge I had spread along the edges of the mat on the wrong side. You have to pull gently on each edge as you wrap it around, keeping the edges crisp and avoiding creating lumps or bubbles along the sides of the mat.
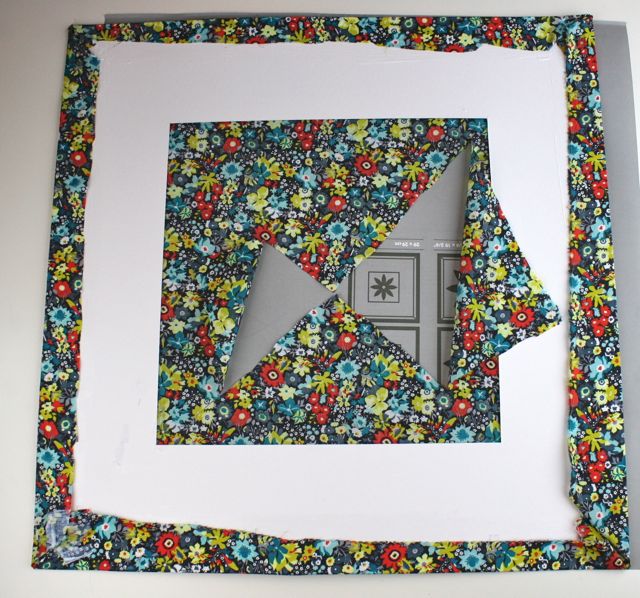
Repeating that step along all four sides, the whole mat is wrapped on the outer edge. At the inside of the mat opening, though, I still had a bunch of fabric that’s really getting wasted–and at $34 a meter, I don’t waste Liberty fabric. To open up the center, I cut a large X shape through the middle of the fabric so that I could fold the pieces back and finish off the inner edges.
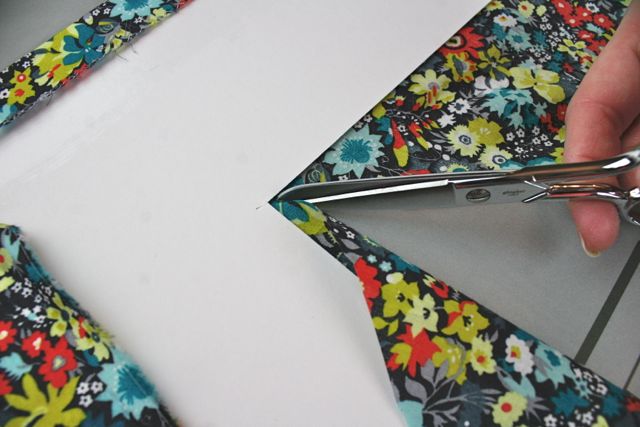
I snipped into each corner right up to the edge of the mat–leaving the snips too far away from the corners would make a bump and round out the opening, and I really like my squares crisp.
I trimmed each of the triangles along the four interior edges to limit how much fabric I was folding back–that way, I can save those scraps for alter. Score! Then I used more Mod Podge along the wrong side of the mat and pressed the interior edges in just like I did on the outer edges. My fingers were the teeniest bit sticky, but yours shouldn’t be super sticky, or you’re using too much adhesive.
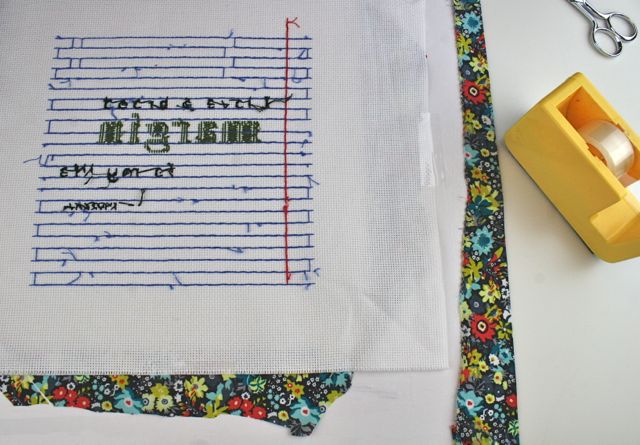
Now it’s time to affix the cross stitch to the wrong side of the mat. I centered the design, which has a pretty wide border of open white Aida cloth around it–that wasn’t intentional, actually. When I designed the cross stitch, I intended that the mat of the frame would come right up to the design, but in this case, I think it’s both aesthetically and symbolically fitting that I have this white space, this margin, around the stitching.
I used cello tape to hold the Aida in place, pulling just a smidge on the cross stitch to make sure it was snug. I don’t want it drooping inside my shadow box later.
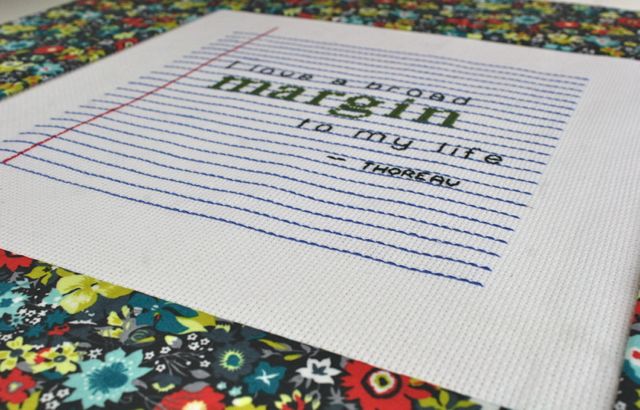
Once I flipped it over, I was STUPID happy with how it turned out. See how the cross stitching really POPS against the fabric? How it is totally set off and framed before it’s even in the frame? A zillion years better than it was before, and I haven’t even put it in the shadow box yet.

And there’s the finished product! Forgive the glare of the photo lights here–it’s tough to get a good shot of a frame with glass in it. But overall? I am really, really pleased with this piece.
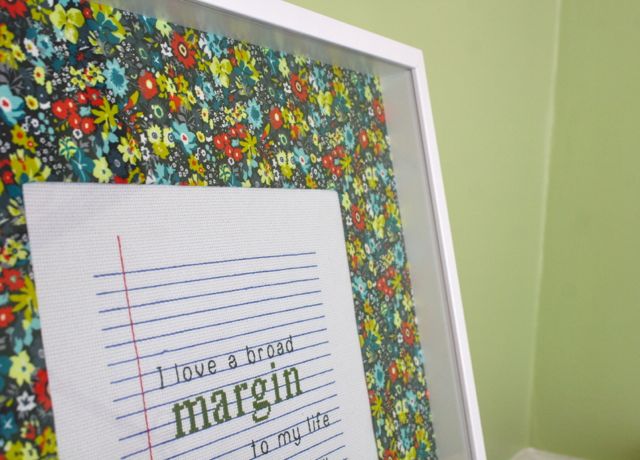
I didn’t even realize that this was a shadow box frame when I bought it. Isn’t that funny? I wasn’t looking that closely. But now I love the depth and symbolism of the space between the cross stitch and the glass. More margin. Gotta love that.
It doesn’t have a spot on the wall yet. It’s resting on a stack of fabric bolts against one side of my studio. I’m in the process of moving the furniture around–margin happens in lots of ways, and I’m a big believer that the physical space where you find yourself affects how you think and feel and how productive you can be. I’m feeling hemmed in right now, and I hope that by adding a table and moving some things around, I’ll have a little better organization, more space for my feet, fewer things on the floor, and a better breeze moving through this room. Margin helps us all fight entropy, y’all. And it can all start with a brainstorm and a little fabric.

Elisa
February 11, 2014 at 10:38 amBrilliant idea! Looks great. Now I need to go read about your OLW. I’m doing it too.
Deborah
February 11, 2014 at 2:02 pmThank you!! I’m sure it’s been done a zillion times before, but it felt like a flash of insight when I decided on it. I love it way, way more than the amount of time I put into it!
What’s your OLW? I love hearing what others have chosen… I’ve committed to doing a video each month this year, so you’ll hear lots more about how mine unfolds!
Akmal
February 11, 2014 at 10:47 amGreat idea! Will consider doing this when I have the right cross stitch design to frame.
Deborah
February 11, 2014 at 2:03 pmIt was so quick and really made a dramatic impact on how “wall-worthy” this cross stitch is. I liked it OK before, but I super loooove it now–so much prettier! Liberty makes everything magazine-worthy. 🙂