
We are surrounded by labels, of all kinds, every day. For many of us, labels on our clothing or the goods we purchase are that marker that divides the store-bought from the homemade. But I’d like to challenge you to think about your handmade yummies differently: I want you to value them enough to tag them, and mark them as professionally and prettily as anything you get from a shop.
 Image via NightOwlsMenagerie on Etsy
When I was designing children’s clothing, I labeled the garments I sewed and sold. It was obvious: to create a brand, and to remind customers of who you are so they can come back again, one must include a permanent reminder of who created the garment to begin with. I think a lot of us feel differently about things we make at home, for our own families. We think that because we won’t be selling something, there isn’t any need to add a tag or label. I wonder if that isn’t because we undervalue those handmade things just a little bit. Foolishly, if you ask me.
 Image via Obsessively Stitching
My mother always labeled the things she made for us, decades ago. And every time we put them on, we were reminded that she loved us and made something for us with her very own hands–maybe even letting us pick out the fabric or the pattern. It was this really warm feeling of happy that maybe we only truly feel as children who are completely loved. I think labels do the same for us today, and that by recognizing that something made at home can be worth MORE than something bought in a store, we give ourselves credit for the thought and feeling that go into sewing something from scratch.
 JHB Labels, available at major chains
There are practical reasons, too. Labels can be all kinds of things–including simple size labels. And when you have four kids, and insist on handing clothing down from one to the next, figuring out a way to label sizes so that when your handmade treasures come out of the attic for the next kid down the line you can actually tell what size they are–well, that’s pretty awesome.

Adding a note about who made it and where and when–it might seem silly to you today, but someday someone might really care quite a lot about the one garment you made that you cared the least about. Wouldn’t it be cool to find a dress your great-grandmother made, with her name sewn to the inside? Wouldn’t you love to know more about who made that vintage quilt you bought at an estate sale, and how long it took her to sew? How inspiring! How connected to those who have come before!
 Image via Skinny Chiquita on Flickr
There are about a zillion variations on labeling, but they come down to some basics: labels are washable tags that indicate the brand or name of the maker; the size of the garment/provenance of the quilt; and often the fiber or care instructions. They can be handmade, printed on your printer, or ordered from a company. Below, I’ve listed some sources and references for scoring your own (very unique) labels for the projects you’re stitching up–I think you’ll be surprised how your own attitude changes toward the things you make once you add your name and the date. You might not think so now, but even you might forget later when you made that little dress or who for. And who hasn’t heard some horror story about giving away a quilt only to learn that the recipient used it for the dog’s bed, or hand-sewing a lovely gown for a new baby only to learn it’s been given away to a complete stranger? Labels can make such a difference, and they only take a second to add.
Let’s start with the ones you can click and order, and work our way down to the ones we make ourselves. I ordered these from NameMaker, a company based right here in Atlanta.

They come either iron-on or sew-in, and are super simple and easy–here, I’ve ironed it on and used the adhesive to hold it in place prior to stitching it down (they can also be folded double, wrong sides together, and added to side seams). This particular style doesn’t involve uploading any graphics–you just choose your style and font, add your text, and you’re set! I chose the silver metallic thread, and came up with a name that’s a play on my husband’s nickname. These didn’t make it into production when I was designing, so we have a bunch leftover that get put into our boy’s things.
Dana from MADE did a great post about the labels she uses, which I love and are super popular (and great-looking).
 The company she uses, ClothingLabels4U, allows you to upload art and logos and get super fancy, if you want. I love their options for fabrication and colors, and while they’re a little pricier than some of the other options, they are crazy professional and cool.

You can also have someone make your labels on a small scale–some folks will even develop a logo or art for you prior to printing. Check out all the options for custom clothing labels on Etsy (like the ones above, from Inked Papers). I like these twill tape ones especially because they’re great for lots of projects–from clothing to knitting to crochet, even quilts. And because they’re made in smaller batches, you could customize your labels based on what kind of project and just how much info you want on each one.

Allison Hill has put together a great tutorial for those of us who want to make our labels ourselves, using computer-generated text or art. Hers (above) is a variation on a simple freezer paper technique.

Simply iron pre-washed and pre-treated muslin or Kona cotton (pre-treat with a product that will make home printer ink permanent, like Bubble Jet Set) to a piece of freezer paper. Cut to 8.5″ x 11″ and iron to bond the fabric to the paper.
 The paper makes a stable base so that the fabric can now be sent through your basic desktop ink jet printer! Since the fabric has been pre-washed, it won’t shrink, and pre-treated, the ink won’t bleed (but read Alison’s notes on the post linked above regarding the quality of your ink and the importance of washing your tags before adding them to your treasures). Easy! The super great thing about this technique is that if you enjoy making graphics on your desktop, you can translate them directly to your tags. You also have total control over the size and dimensions of your labels, which is great for unusually-shaped projects, or larger ones like handbags or quilts.
Want to make your own tags without the computer, and go totally handmade?
 Image via Ivy Designs
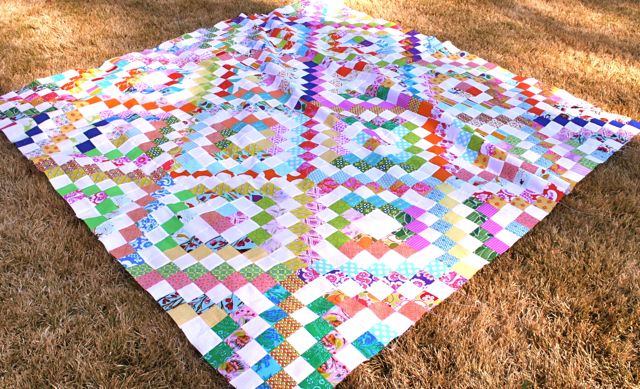
Check out the tutorial on Dollar Store Crafts from Obsessively Stitching (the results are pictured at the top of this post). A quick and very cool way to create tags–and one that, might I point out, could easily be done as a group activity with the kids. Our oldest has always wanted to sew enough things to take to a craft fair at her school–she really would feel motivated if she had her very own, handmade labels to put on them!
 Image via Lemon Tree Tales
Quilts are a special case, and really the reason I put this whole post together: I’m finishing up the binding on our boy’s quilt, and I know it’s not one he’ll have on his bed forever. I mean, I lovelovelove it, and I think he will, too, but really: it’s animals and letters, and I don’t see him hanging out with his friends in junior high with this particular quilt on his bed. I do want him to know why I worked so hard on it, and hope that he’ll hang onto it to pass on to his own children, and that they’ll care that Grandma made it by hand.

I used the freezer paper technique above to make this quick label. You can also easily add fusible webbing (like Heat-N-Bond or WonderUnder) to a piece of Kona or muslin, create a tag with a Sharpie, and fuse or whipstitch it on to the back of the quilt. I love the idea of adding details about the creation of the piece–ever since I saw a yo-yo quilt at a flea market where the maker had added her name, city, and the range of dates when she made the quilt (“Took 2 years to sew these yo-yos, 1936”). I loved the extra heart wrapped up in that tag, and want to imbue my own sewing with that love. See these tips for quilt labeling, and even download templates and outlines you can use to make your own.
I know it seems like a small thing, and by the time I’m done sewing, I’m always SO ready to be done so I can go play with my new things–be they knit, sewn, or quilted. But adding a tag can make a world of memories. You’ll thank me later.
Care
April 22, 2011 at 3:51 pmThanks for linking to my tags!
This post is an excellent reminder for me that I need to be more diligent in adding tags to my creations — for so many reasons. Thank you so much!
Cassandra
April 23, 2011 at 10:33 amGreat post! This is something I’m thinking about doing. Nice to see all the options.
Bridgette
April 26, 2011 at 12:41 amthank you! i was just talking to the hubby about how i need to do this. you did some of the work for me 🙂
Romney
April 26, 2011 at 9:23 amI dislike labels on quilts – too huge, they spoil the look of the quilt for me. But those twill labels are tempting. I take all the shop labels out of my own clothes, but sometimes it is useful to work out which way round to put them on!
Elizabeth
April 27, 2011 at 7:00 amYou read my mind – thanks for pulling together such a great range of options. Just found your blog…love it!
beki
April 28, 2011 at 9:32 amThanks for this post! I’m often asked where I get my labels, and truthfully, I order them somewhere different every time. Next time someone asks me this question (which I can never answer because I don’t remember), I’m directing them here!
dana
April 29, 2011 at 10:34 pmJust saw this. Thanks for including me! 🙂
jessica
August 23, 2012 at 1:36 amI make dolls and need a idea on how to put my name and email address on them?