
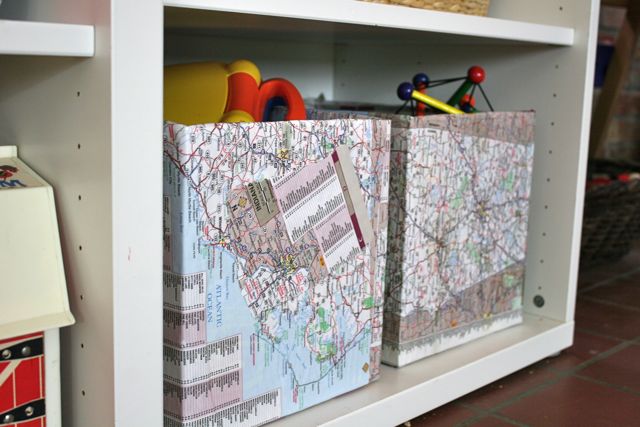
The vintage maps I decoupaged on my empty cardboard diaper boxes turned out really pretty, but the upper edges had a tendency to peel and unroll, and I was concerned that lots of tiny hands would make short work of flaking off all that hard work. As I was glueing, I was mentally calculating what a lining might look like on these boxes.
At first, I thought, “How cool would it be to sew something around the upper edge here?” But then I realized I was risking partial blindness when a needle snapped off while stitching through stiff cardboard and flew through the air right at my cornea. So, no dice on sewing through the boxes, y’all. I am not that brave.
Then I thought, what if it’s removable? That way, when the children inevitably make it filthy, it’ll be easy to pop it out and wash it up. Now, full disclosure, the odds that I’ll ever actually pop it out and wash it up are pretty slim–I’m waaaayyy more likely to shake the dust and crumbs out onto the patio and call it a day. But even that can be made easier with a little hook-and-loop fastener and a simple muslin lining.
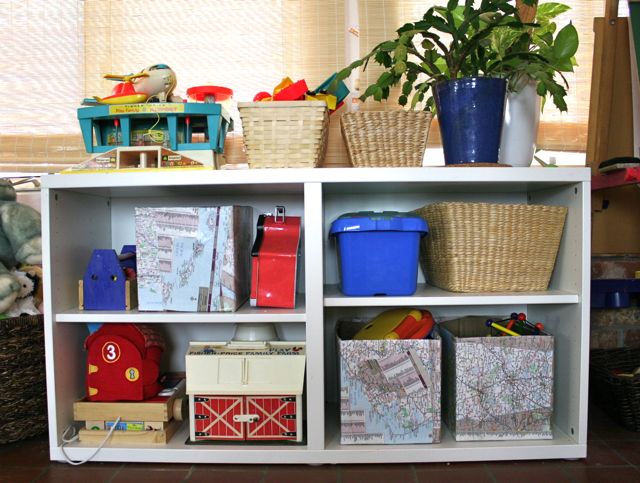
Now, since I started thinking about putting maps on the outside of these boxes, I’ve seen a bunch of different ideas for how to use a diaper box for storage. So many of us have dozens of them lying around, it seems wasteful not to use them. I love the ideas I’ve seen here and here and here, but wanted to stick with my decoupaged maps–they’re sleek and simple and very much in line with the look I wanted for the playroom. And while I am tempted by the idea of having the lining lip over the upper edge of the boxes (like in this mock-up image, which is not the finished version), I was pretty attached to the idea of having the lining stuck to the inner edge and not visible from outside. Plus, I’ll be able to move them to the shelves of one child’s closet later on and not have to worry about who gets them or how well they’ll match–heck, they can each have one! So making a linig that’s invisible and tucked away, but still comes out for cleaning, seemed like the most logical and straight-forward solution to me.
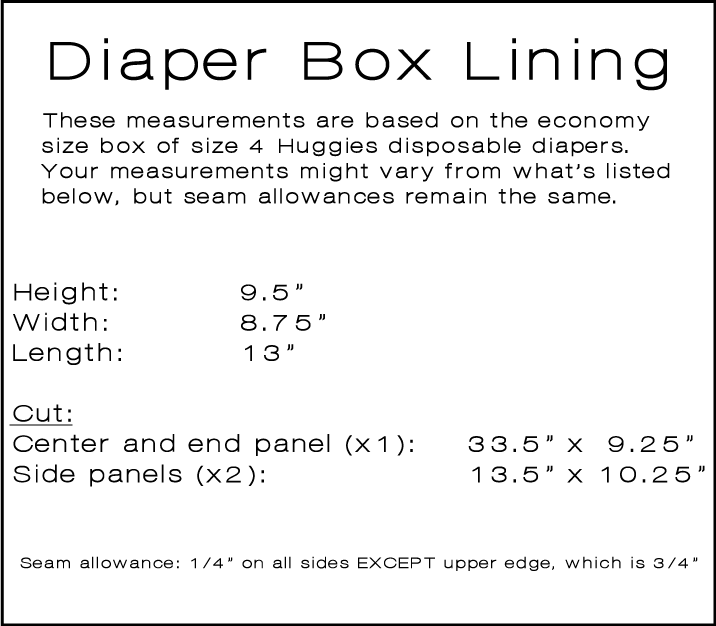
I based my measurements here on the Huggies boxes I had, the jumbo-size box of 72 in size 4. Box dimensions vary a bit based on what size diapers you’re using and what brand, so be sure to check on your measurements before cutting!
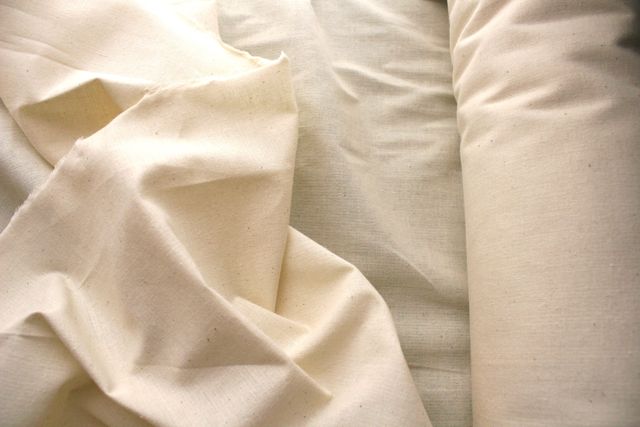
My lining bags (I think of them more as bags than as linings, just bags that attach to the inside of a box) are made of a heavyweight unbleached muslin. I originally bought this as muslin for pattern drafting, but it was heavier than what I thought I was ordering (blergh–totally didn’t see the fine print). It worked out, though, since I’ll be able to use it for the foundation for all our new bed skirts PLUS the not-quite-blackout lining for the curtains I’m sewing for our oldest daughter’s freshman dorm room this year AND for this project! Winning.
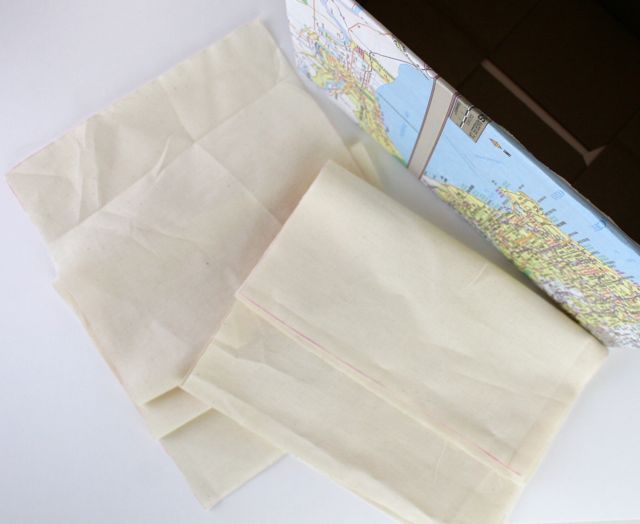
I cut my pieces in one thickness, using a clear ruler to mark the dimensions directly on my fabric with marking chalk. You ought to have three pieces, all rectangles, two of them identical.
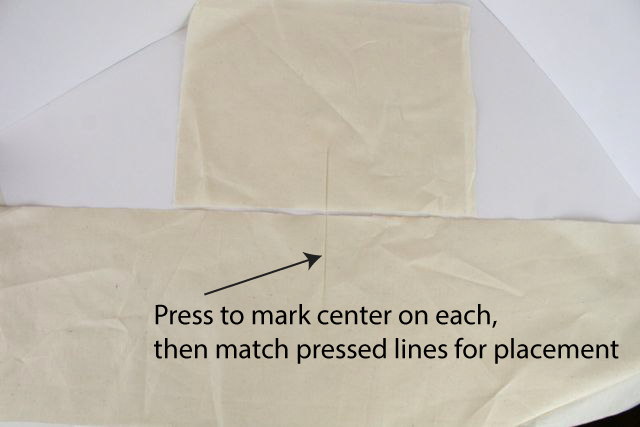
Begin by stitching the side panels to the center-and-end panel. The long rectangle is the two small ends of the box PLUS the bottom of the box; the two smaller rectangles are the sides of the box. We want to match the sides to the bottom at the center, and not sew the ends just yet. By folding each rectangle in half longways (like a hamburger, not like a hot dog, as they say in elementary school these days), you can finger press or press with your iron to mark center and match those pressed lines for placement. So much easier than measuring, y’all.
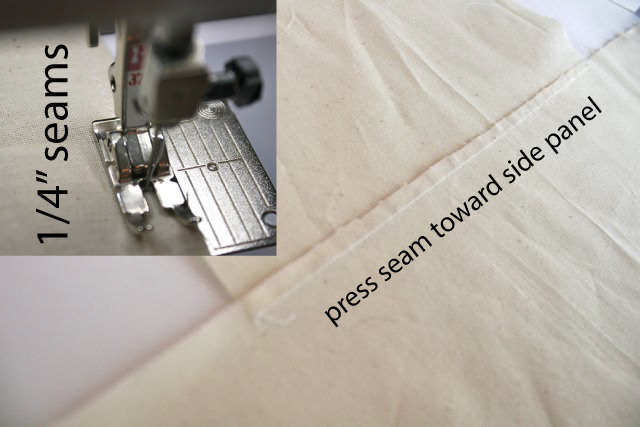
Use a 1/4″ seam allowance and press the seam allowances toward the side panel.
Next, fold up the four corners and stitch them from point to opening at the upper edge. Use a 1/4″ seam allowance, and take care to catch the seam that joins the center panel and the side panels in your new corner seam.
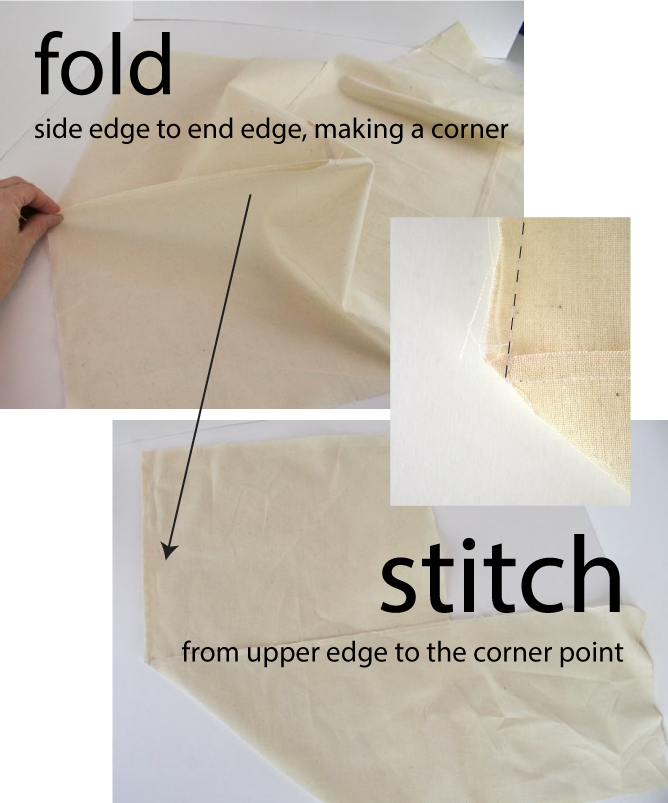
Repeat with all four corners until you have a boxed lining to insert into your storage box.
At the upper edge, I’ve added another 3/4″ to the height of the box so that I can attach some Velcro and fold the upper edge to the interior, making the attachment invisible. Now, in the interest of full disclosure–because y’all know I am all about the full disclosure–I was pretty tempted at this point to fold the edge over and make the lip and just be done with it. The sewing here had taken all of 15 minutes, and was pretty simple. I could easily have thrown in a narrow hem at the upper edge, folded it over and called it a day:
But I had committed to doing this Velcro thing, and honestly, I wanted to see it through. It’s not as though living with this particular “What if?” was going to torment me, but I really did want to get to the other side on this project and see what I thought about the results. I know y’all are feeling me on this one.
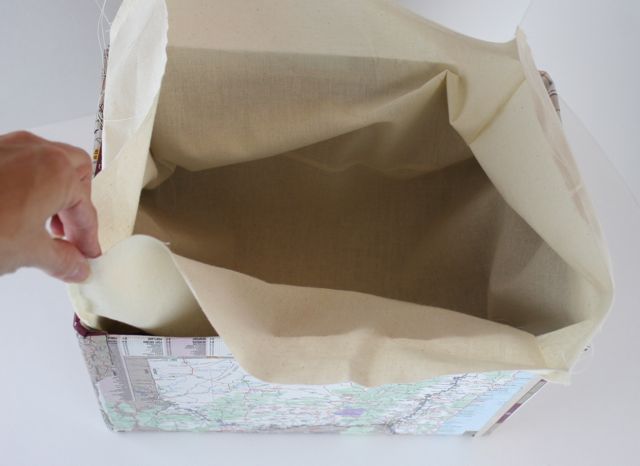
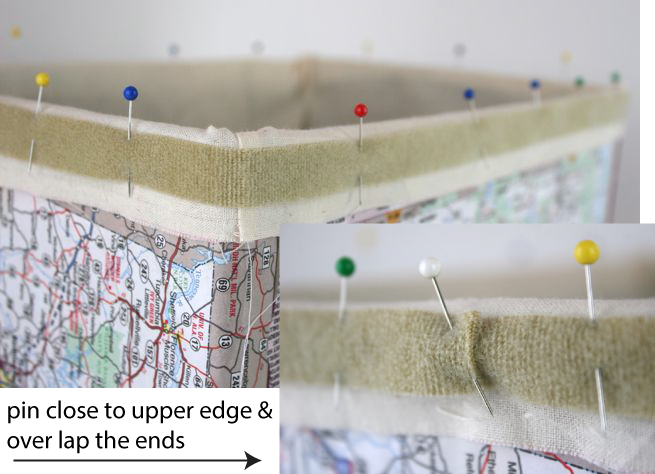
I’m working with a roll of beige sew-in Velcro that I happened to have on hand. You can easily use stick-on stuff, too, or even the iron-on kind, just know that either of those will almost certainly need some extra glue to hold them in place on the box (less so on the fabric). With the lining still flipped over the upper edge of the box, I pinned the fuzzy side of the Velcro in place, close to the edge. When I got to where the two ends met, I folded one under about 1/4″ and tucked it in so no raw ends were showing.
Just as an FYI, it’s always best to make the non-pointy side of the Velcro be the part that’s going to be washed–washing the pointy section can cause threads and lint to get caught in the plastic fibers, and then they don’t get as much oomph to their stick. (Another FYI: Velcro is a name brand; all non-Velcro versions of this product are technically “hook-and-loop tape.”)
Once it was all in place, I removed the lining from the box, and stitched super close to both sides of the Velcro to secure it to the lining. Thread color isn’t important here–you’ll never see the raw edge of the lining or the Velcro itself, and even the threads on the wrong side will be tucked away out of view.
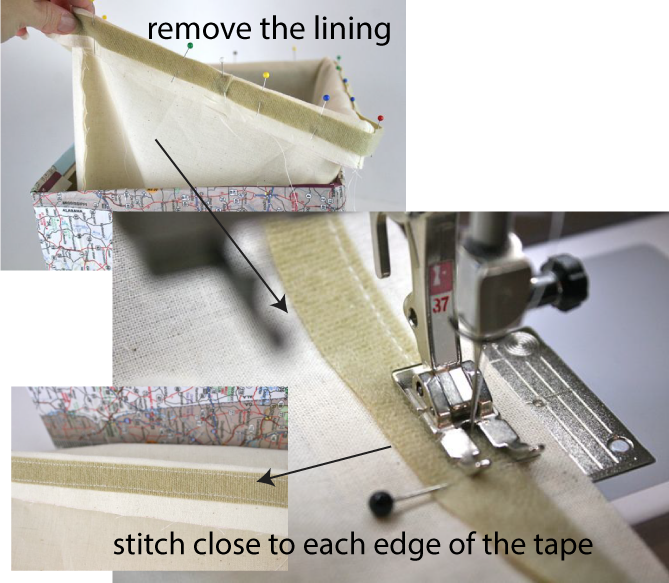 It wasn’t important for my purposes that the raw edge of the fabric be tucked under, because the Velcro was designed to flip to the wrong side of the lining bag and attach, meaning the raw edge will be out of sight, anyway. So the Velcro is sewn right at the raw edge, with the backing of the tape placed together with the right side of the bag. I used a very scant seam allowance and stitched riiiiight at the edges on both sides of the tape, all the way around the upper edge of the lining bag.
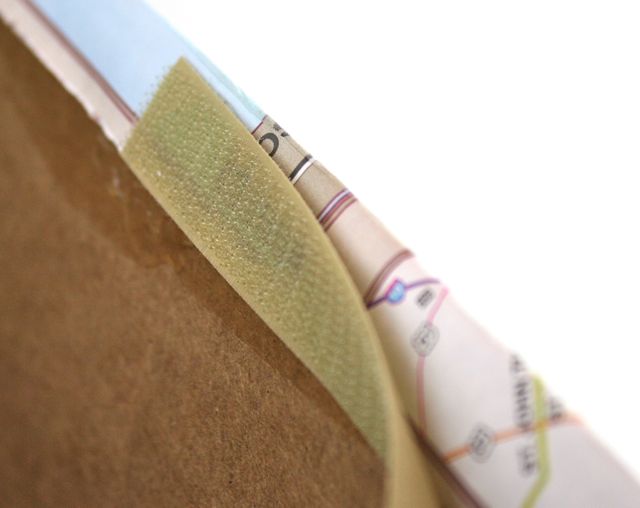 With that done, I hot glued the pointy, receiver strip of Velcro on the upper edge of the box. Just a little will do, and the strips don’t necessarily need to go all the way into the corners. Think about how much abuse your storage boxes might get, though, and know that the more length you have, the more strength you have–so more Velcro will make a more secure foundation for your linings.
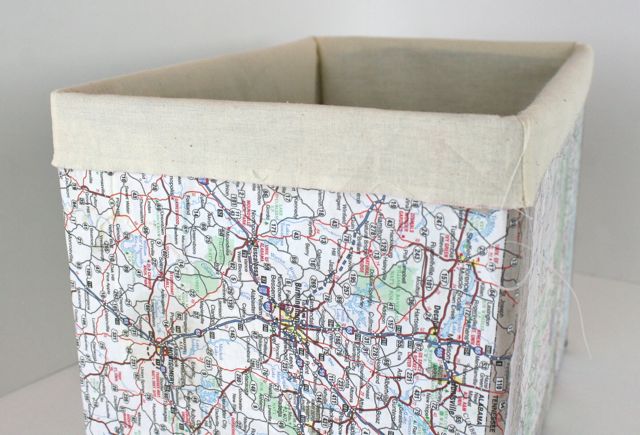
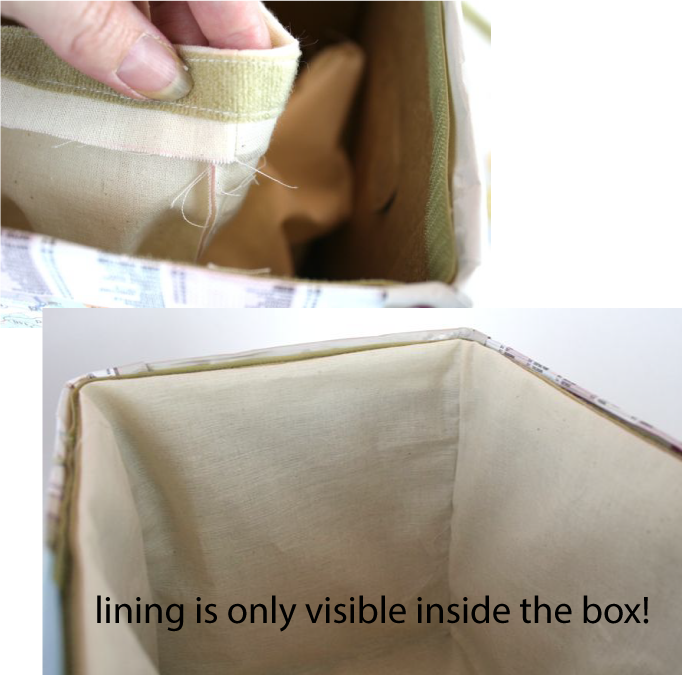
Once the sewing is done, and the hot glue has cooled, it’s easy peasy lemon squeezy! Just attach the two strips together by folding the upper edge of the lining bag over to the wrong side. It should pop into place, like a donut. If the bag isn’t perfectly sized, no big deal–using a stiffer fabric, like this heavyweight muslin, means that the weight of the toys will be supported by the bag and Velcro regardless of whether the corners of the bag fit all the way into the corners of the box.
And voila! Cheap and easy prettiness. This project cost me exactly $0, since I had all the supplies on hand, but it is about 1000x more attractive than just storing the diaper boxes on the shelf and calling it a day. If you’re forced to purchase heavyweight muslin (you can always use some fabric from your stash, if you don’t want to buy anything), you can get a yard for $6, enough to make three or four box liners.
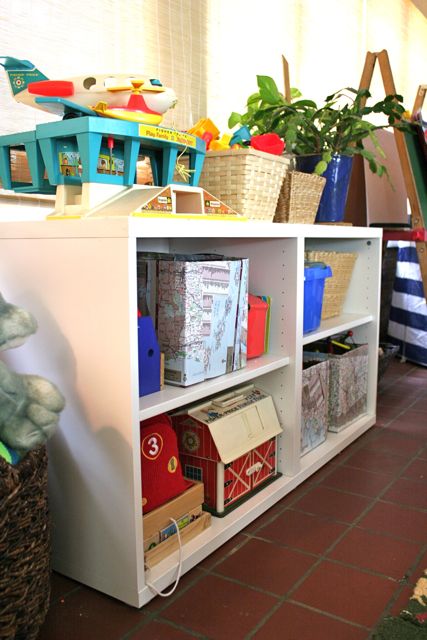
I’m off to re-categorize these toys. Should I be concerned that my kids are always putting Potato Head parts together with the Army men? Is there trouble brewing in Toyland? Film at 11.

Amanda Gaskin
August 17, 2013 at 9:42 amThe site looks beautiful! I navigated all around and had no trouble finding what I wanted to find. So many great ideas and beautiful photos! Wonderful job! I have been missing your blog and am glad to have you back. 🙂
Deborah
August 18, 2013 at 12:47 pmOh, thank you so much! There really was so much here that I had completely forgotten about–it was fun to go back through six years’ worth (!!) and re-discover some older projects! 🙂