
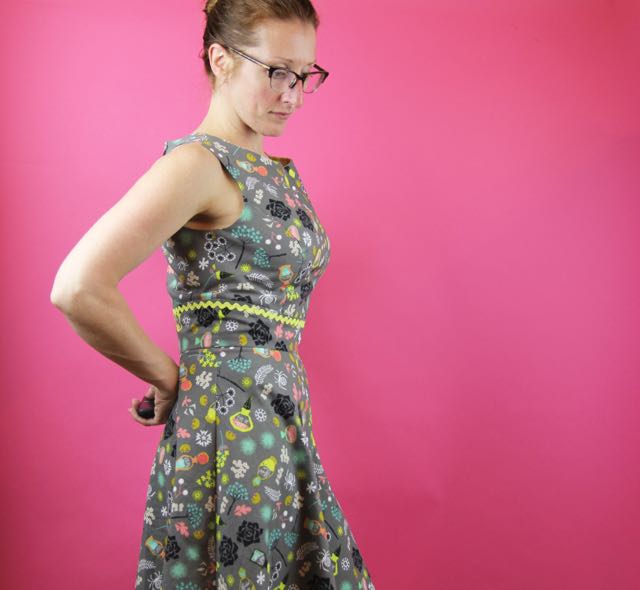
I have gotten into the habit of sharing finished projects, and hardly ever walking through the steps to getting from fabric selection to final garment. It’s just SO much faster. But this dress was an exception–I tried it on during construction, but with a center back zip, all those fittings (alone in your sewing room with a dimly lit mirror and no one else to help) are pretty rough approximations. It wasn’t until this final fitting before taking photos that I spotted An Issue.
This post was meant to be all about how great this dress turned out (and it did turn out really well, and I totally like the fit), except for one thing:

There’s, like, a TON of extra fabric at the neckline.
At first I thought I’d stretched it out before I put in the staystitching, but man, this is a LOT–way more than I’d expect just from poor handling. As I was test fitting along the way, I could get a great read on the waistline fit, but wasn’t paying much attention to the neckline. The shoulders seemed to fall where I wanted them, but since I couldn’t pin myself into the dress prior to installing the zipper, I literally never noticed all the extra fabric at the neckline until after the lining and zipper were in. Snarf!
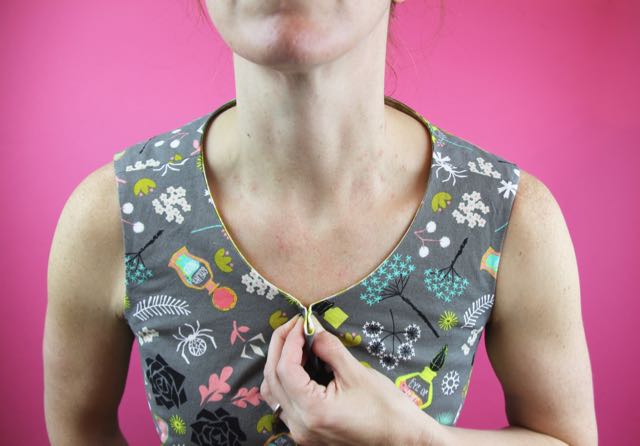
It’s somewhere in the neighborhood of 1.5″ or so–maybe even 2″ of extra fabric. Which is, you know, a lot of floppy almost cowl-neck neckline on a dress that is fitted everywhere else. Good news: it’s only at the front neckline, and can easily be fixed in a future iteration of this pattern by pinching the excess from the pattern piece before cutting. For the dress at hand, which I’m making so I can wear it to read Halloween books to our child’s class the week of Halloween, I have an idea for an after-market fix:
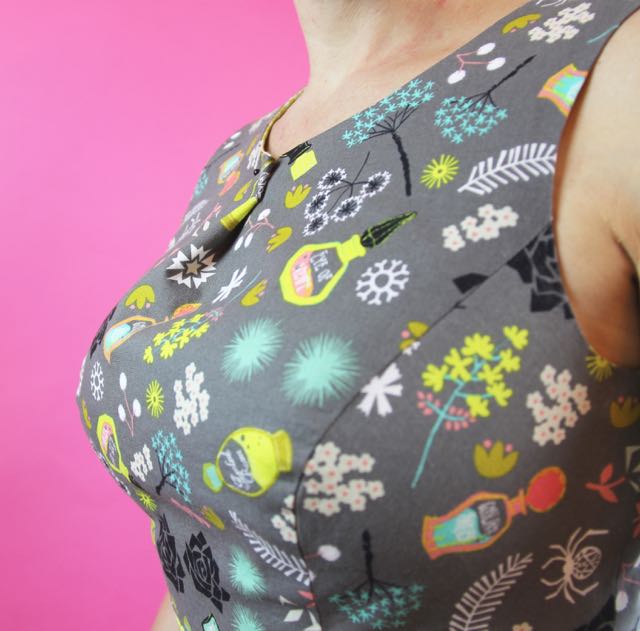
Pinching out the excess and hiding it in the pleat ought to work, I think. Maybe with a decorative flower or some such? Am playing with placement of the pleat(s) and their shape. I’ll also do some investigation into why my princess seams are slightly puckered here. Then I’ll see about coming back and sharing how I eliminate that excess fabric from the neckline on the pattern piece, because that seems like a good skill to share, and whatever it is I decide to do with this one–since disassembling the bodice and re-cutting the pieces is not on my agenda.
Rather than feeling disappointed, which I guess I feel like I ought to be, I actually love the process of puzzling out how to get JUST the right fit in a garment. Picking apart what pieces go where and how to shape them to my body really is an enjoyable process, if we let it be.
Mary K
October 16, 2015 at 8:41 pmI love your dress (even though that IS a lot of fabric at the neck)—and I love your positive attitude even more! I would have been sobbing throwing a wadder!
Breenah
October 16, 2015 at 9:20 pmLove that fabric. If pleating doesn’t work, maybe a keyhole?
Susan
October 17, 2015 at 8:10 amThe last picture, with it pinned together, makes me think that perhaps just a button would do the trick, making it look like an intentional neckline detail. I bet JoAnn’s or Hancock’s might have Halloween theme buttons.
Becky
October 17, 2015 at 9:08 amI too sew alone without assistance for fitting. I don’t have a fancy dress form but did manage at one time to have a friend come help me to make a duct tape dress form (look on YouTube for how-to) and this really helped with gappies at the neck. On my dress form I marked a Sharpie line on the top of the shoulders from neck to arm where the seam should go. Taking a page from Fit for Real People, I pin the bodice pattern pieces together at the shoulders and sides and then pin the shoulder seams to those lines on the dress form to check the fit across the front. It makes all the difference in the world.
You did a good job on the dress and it looks great. I agree about a large button over the pleat. Nobody will know. And princess puckers are my nemesis too. I usually stay away from them altogether.
Jean C.
October 18, 2015 at 6:11 pmI’m thinking an inside pleat or dart in the front (like you have it held) or two small darts on either side of the front area you have it held. It’s a challenge sometimes to get things the way we want them.
Good luck.
Diane
October 20, 2015 at 8:53 amYes, maybe a box pleat thing-y. I do like some symmetry.
Sabrina B.
October 20, 2015 at 11:15 amCute dress! I’m sure whatever you do to deal with the extra fabric will be super.
I have encountered this problem before and have diagnosed it as “narrow upper chest.” This won’t help you in fixing your current dress, but it might help you find guidance on how to modify the pattern for future dresses.
Deborah
October 20, 2015 at 8:22 pmWell, I definitely prefer your diagnosis over “fallen bosoms,” which seemed the other likely culprit. :/
How To Get Smooth, Professional Princess Seams | Whipstitch
October 28, 2015 at 2:11 pm[…] I looked at the photos I took of my Halloween dress, I noticed some puckering at the princess seams that made me feel […]
Patty
October 31, 2015 at 2:34 pmWhat about threading tiny elastic cording through the entire neckline to snug it up? I don’t know exactly how it would look but since you only have 1.5 inches or so, spread out across the entire neckline, maybe it wouldn’t even look like a gather.