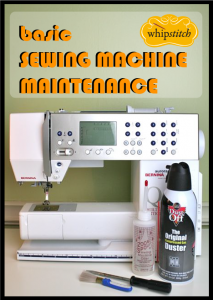
 If you’re following along, we’re having an exciting week of CLEANING! I know how it sounds. But really, it is exciting to clean your sewing machine–seeing it all shiny and happy is much more satisfying than 20-year-old me would have ever guessed. Plus, it has the added benefit of making your sewing better and your machine last longer, so it’s totally worth the very few minutes that it takes to get the job done.
Today’s machine is a top-loading Brother, one that’s super common on the market and a great starter machine. I will apologize in advance for not having found one that was filthier for all of you, so you could really see where the lint gets and how threads can get caught and abandoned–but I think you’ll get the idea.
Have fun, and keep it clean, y’all!


Miq
June 26, 2012 at 1:08 pmI was told by my machine guy not to use compressed air to clean the bobbin assembly. His logic is that eventually you may end up cramming all of that lint into the mechanics, which could result in a sizable repair bill. He recommends using a vacuum. I found an attachment kit for sewing machines at my fabric store and I use a mini shop vac to clean mine.
Deborah
June 26, 2012 at 1:13 pmIn the back of my head, I’ve always felt like that was the logical extension of the canned air, but I’ve been told and read that it isn’t a real issue. Having said that, if I could find this magical attachment for my vacuum, I’d far prefer to vacuum than to spray with compressed air! My friend who has the itty-bitty shop vac swears by hers, and I keep saying I’m going to spring for one… Maybe now I’ll be motivated to do it! 🙂
Penny Harman
June 26, 2012 at 3:27 pmThanks for walking me through cleaning my machine. The feed dogs were pretty gross. Now I’m practicing safe sewing.
Deborah
June 29, 2012 at 2:26 pmWoot! I am always amazed at how QUICKLY the feed dogs get icky! Glad yours are all squared away!
Megan
July 2, 2012 at 11:47 amThank you so much for these cleaning tutorials! I have this same machine and although I’ve cleaned the bobbin area several times, I’d never taken the throat plate off (yes I did wonder why those screws were there) and whew was it dirty under there! 🙂
Sasha
July 2, 2012 at 1:50 pmThis video is perfect!! My machine is setup exactly like this one. I did have some thread that had broken off and tangled up in the tension mechanism. I actually had to unscrew the side of the machine to get it all out. I also took it to the sewing machine shop for a good cleaning after that. Here’s a picture of all the thread that was in the tension mechanism…
http://stitchedbysasha.blogspot.com/2012/03/look-what-i-found.html
I make sure to check everything now when I clean my machine!!