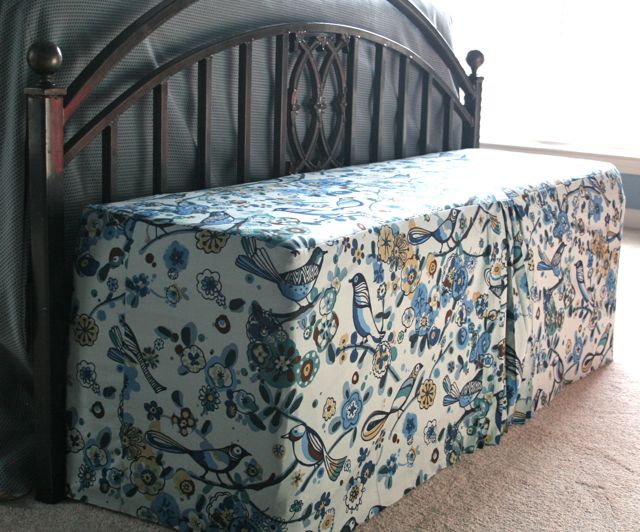
Thanks for all the nice words about the covered bench! I feel quite certain that it is THE KEY to selling this house. Will keep you posted on its magical qualities.
A few of you commented or emailed to say that you’d love to have some specifics, so I whipped up some quick sketches of my math whilst making this bad boy. Making a slip cover is pretty straight-forward in terms of the sewing, but there has to be some math on the front-end to figure out what things to sew together. My goal is, as always, to avoid making it harder than it needs to be. I do the math, figure out what size pieces of fabric I’ll want, and then I eyeball the rest.
Like any other largely-rectangular sewing project, making a slip cover is mostly about measuring and then figuring out the best order of operations. Although when I write it like that, it makes me think maybe a bit more than I’d like about algebra class, which probably doesn’t sell most of you on making slip covers.
The Measuring
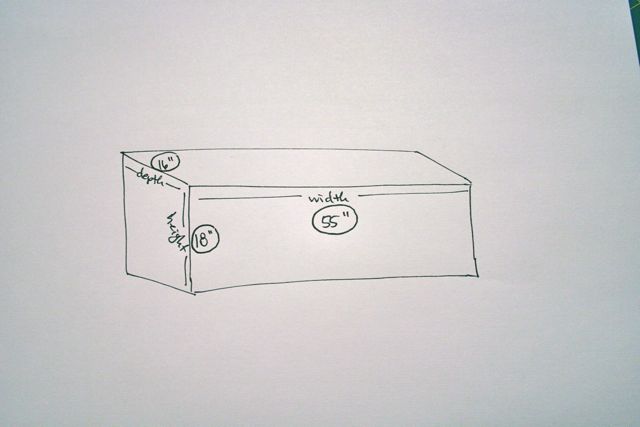
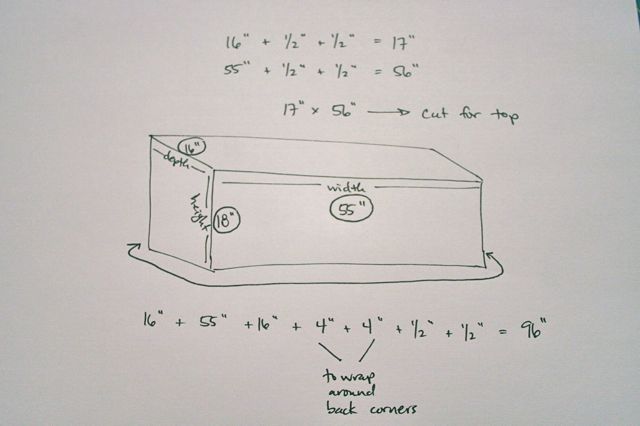
Begin by taking the measurements of your object-to-be-covered. For our purposes here today, I’m assuming you’re doing a bench or ottoman or something of that nature (mine is an Ikea storage bench with padding that I no longer see on their site). That means I’ll need the depth of the bench, from front to back (at the top), the width of the bench (from side to side, also at the top), and the height* of the bench (from top to bottom, to figure the length of the slip cover so it will reach the floor).
So for this project, I measured 16″ deep, 55″ wide, and 18″ high.
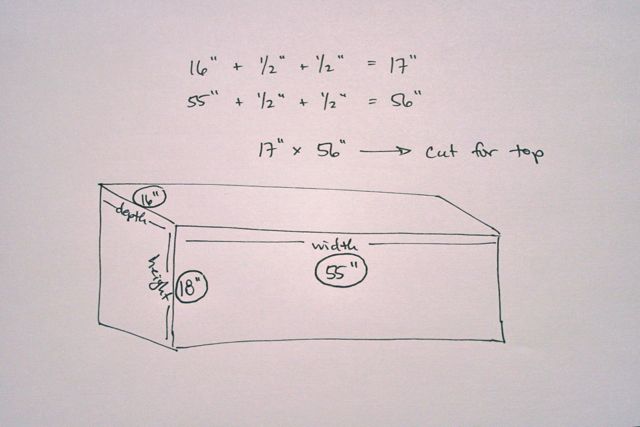
The top of the bench will be covered by one piece of fabric, cut to the dimensions you recorded when you measured it, PLUS a seam allowance on all sides. I use 1/2″, since that makes the math easiest.
If the bench is 16″ deep, plus a half inch seam allowance on both sides, I need the depth of the top piece to measure 17″. If the bench is 55″ wide, plus a half inch seam allowance on both sides, I need the width of the top piece to measure 56″.
The front and sides will be covered by a single piece that wraps around to the back, plus seam allowances. This will be stitched at the upper edge to the top piece we just finished measuring.
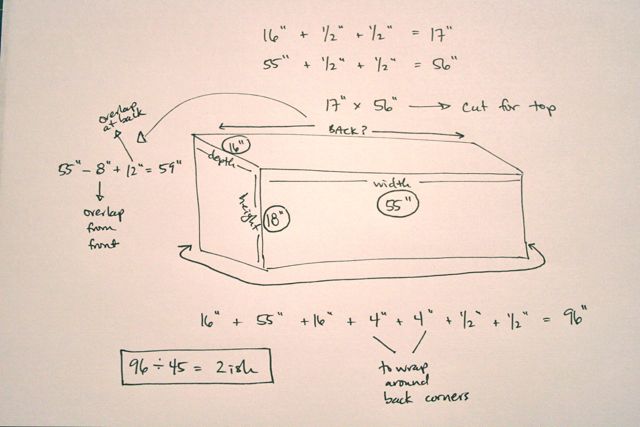
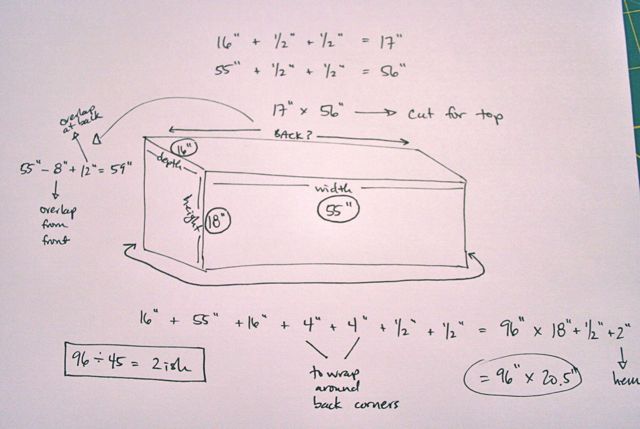
So if the depth of the bench–the measurement at the sides–is 16″, and there are two sides plus a front, I need to add 16″ + 55″ + 16″. Then, I’ll want at least 4″ on either side to wrap around to the back so there’s no seam at that back corner, which makes 16″ + 55″ + 16″ + 4″ (left side) + 4″ (right side). Then, add seam allowances for both sides: + 1/2″ + 1/2″. Total to cover the bench horizontally, across the front and sides: 96″ of fabric. Make sense?
I also want to calculate how much fabric it will take for me to cover the back of the bench, where it will be hidden by the foot of the bed or the wall or whatever. So I take the width, subtract the extra I allowed at the front for overlap, then add a little more so I can create a flap where the left and right sides overlap one another at the very back–that allows me to put it on and take it off easily, and will give some ease when big bottoms sit on the bench to avoid too much strain on the seams.
The part that throws most people is NOT the measuring. It’s calculating yardage. Let’s walk through how to determine HOW MUCH FABRIC I need for this bench so you can see the (bootleg) method I use, shall we?
I am using an Alex Henry print that measures 45″ wide. I know that for the front piece, I need fabric measuring 96″ wide. If I divide 96″ by 45″, I know I need a little over 2 panels of fabric that are selvage-to-selvage in order to equal 96″. Yes?
If I know I need 2+ panels, I’ll have to determine how long each panel is before I cut it. My height* is 18″, plus a half inch seam allowance at the top, plus a 2″ hem at the bottom. So I want to measure my panels to 20.5″ long. For the front piece, that comes to one panel at 45″ x 20.5″, a second panel at 45″ x 20.5″, and a smidgen cut of 8″ x 20.5″. That means I’ll need yardage of 20.5″ + 20.5″ + 20.5″ (because even though the smidgen panel is only 8″ wide, it has to be the full 20.5″ long, and I can’t buy a section of a yard) = 61.5″ or 1.71 yds. Which means, not including the top cut of fabric, I need to purchase at least 1 3/4 yds.
Add in the top piece, now: I know I need it to measure 56″ x 17″. Divide 56″ by 45″ (the width of my fabric), and I know I need more than one selvage-to-selvage panel. But look! I have a piece leftover from cutting the top that measures 37″ x 20.5″! So I take one panel that’s 45″ x 17″ and cut the rest of the bench top from the remainder piece after cutting the front. That means I’ll need an additional 1/2 yd of fabric (since I can’t buy 17″ cuts). Total yardage so far: 2 1/4 yds.
Yes?
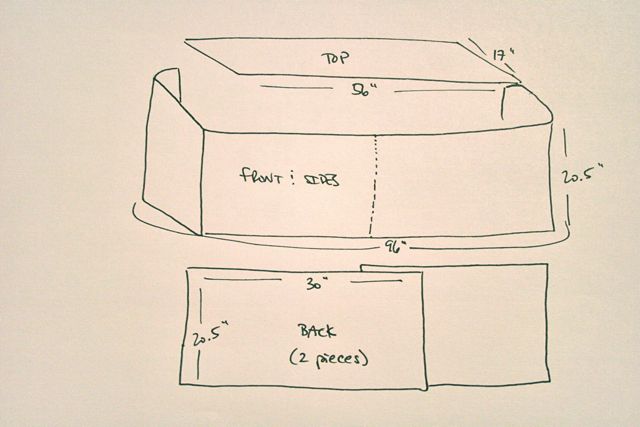
Let’s look at how the whole thing will be assembled. I’ve got my front piece, which will have at least two seams, and probably three: joining the two full-width panels, plus joining the smidgen panel in either one or two bits. I’ve got my top piece, which will have one seam. Then I’ve got the back, which is really two separate pieces that overlap. I know that the back pieces have to measure 20.5″ high (to be the same as the front piece), and I did the math to see how wide it ought to be, but honestly: since I plan to have them overlap at the back, it’s easiest just to eyeball those bad boys and use a whole width of fabric (45″), then trim if it seems too huge when it’s all pinned together. I used stash fabric for this, but if you’re buying new and calculating yardage, you’d need two panels selvage-to-selvage that measure 20.5″ high, so 41″ total, or 1.14 yds = a purchase of 1 1/2 yds for the back.
The Actual Sewing
First, I stitch a seam to join the two full-width panels for the front of the bench. I added the 8″ smidgen panel as one piece, so that’s a second seam, giving me a piece of fabric that measures 98″ wide (a littler extra than I need) with two seams. Next, I stitch a seam to join the two pieces that will make my top, which measures (when sewn) 56″ x 17″.
Then, I stitch two seams to join the back pieces to the front, one at each side. At the ends of these back pieces, I throw in a hem from top to bottom, just so I have a clean edge. I now have a huge, long piece of fabric that will wrap all the way around the bench and overlap itself, made from two different prints, and a smaller rectangle that will cover the top of the bench.
It’s now time to finish the final seam, and be done with this! Remember, a slip cover is just that: it slips over whatever it’s covering. It should mimic the shape of what’s beneath it, and while you can embellish it, really shouldn’t get caught trying too hard.
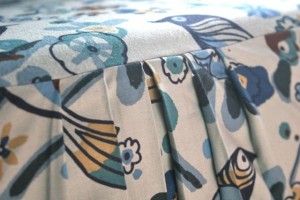
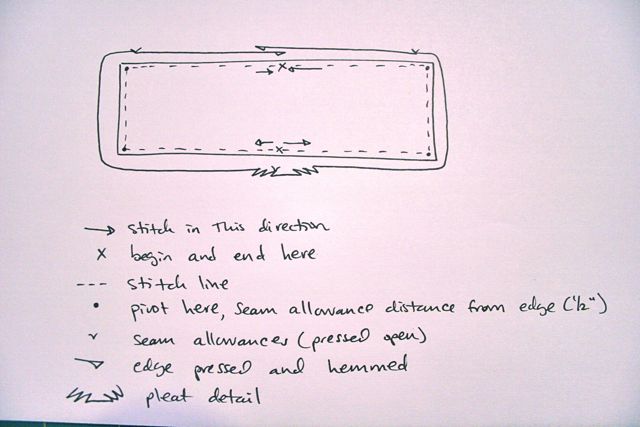
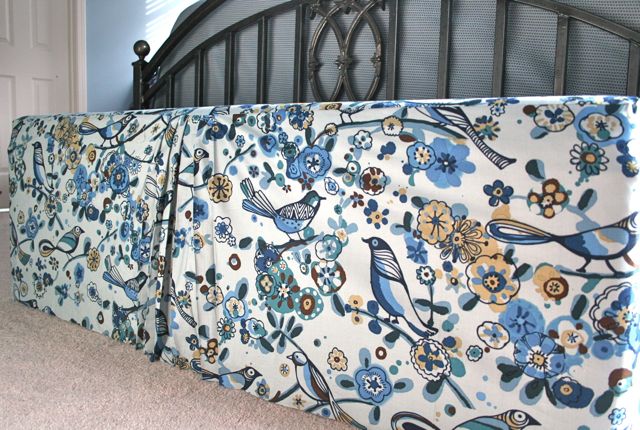
To attach the front and sides of the slip cover to the top, follow the diagram above. I wanted to mask the seam in the front so that it wouldn’t be so visible, so I added a pleat at center front where the seam can be tucked away in a fold and made more invisible. Then I started stitching at center front, making my way down the front, pivoting at the corner 1/2″ from the edge, down the side, pivot again, and around to the back. The overlap at the back was pinned together, so I stitched through those layers as one, stopping at center back. Then I began again at center front and repeated on the other side–by always starting at center front, I guarantee that if I screwed up the math at all, any bubbles or flaws will be pushed to the back where they won’t matter as much as they would if they were right out front for the world to see.
Finish with a double-turned hem, and you’re done!
Alternate Method
Is all this math freaking you out? I feel ya. I do the math so I’ll know how much fabric to buy for a project, without too much leftover. I think that’s the biggest challenge, and the part of the tutorial that I think is most useful. If you super hate the math, then you can absolutely throw some fabric at your footstool/ottoman/bench and see what works. There are no rules here. It’s a bench, y’all.
Go get ’em!
*Pet peeve alert: there is NO SUCH WORD as “heighth.” No such word. Not in English, anyway.



Tweets that mention Simple Slip Cover Tutorial | Whipstitch -- Topsy.com
February 15, 2011 at 2:40 pm[…] This post was mentioned on Twitter by Deborah Moebes, Ryan Walsh. Ryan Walsh said: RT @whipstitch: Today on the blog: a simple slip cover tutorial, with tips for estimating yardage! http://tinyurl.com/4eocuw4 […]
Kim
February 15, 2011 at 4:48 pmHeighth. My pet peeve, too, along with irregardless and it’s (when the writer means its). Great sewing AND grammar. Thx!
Ana
February 15, 2011 at 5:36 pmGreat tutorial! Thanks so much!!
Kim Kruse ~ The Sassy Crafter
February 16, 2011 at 10:25 amI used a similar technique to cover my trusty Rubbermaid foot locker that lived in my college dorm room. It made what was otherwise an eyesore into a functional piece of furniture.
Also, I was wondering if you were ready to announce the winner of the “Inspired to Sew” book?
amber
February 16, 2011 at 7:11 pmthe math definitely hurt my brain, but i plan on carefully reading through the part on how to figure the correct amount of fabric since that’s always my biggest dilemma. thanks for the help!
Brenda
February 17, 2011 at 5:45 amLove the slipcover! What is the fabric? It’s so cute.