
The Flip Flop Dress pattern started out, years ago, as a style my mother manufactured when she made children’s clothing for her cottage company back in the late 80s and early 90s, back before people had cottage companies. It is a simple, classic, adaptable pattern for girls sizes 2T-6.

Because she was manufacturing, she wanted a pattern that was as versatile as possible, but that didn’t require a zillion pattern pieces. It’s a simple but genius idea that means less to store, less to manage, and more variation from the same pattern pieces. The original pattern that my mother used was destroyed in a house flood years ago, but the concept behind the pattern pieces was so clever that I wanted to include it in the re-design and launch of this pattern.
I named this pattern the Flip Flop Dress because that’s what you do with the pattern pieces: depending on what style you want to create, you can FLIP the pattern pieces to re-arrange them and alter the final appearance of the dress.
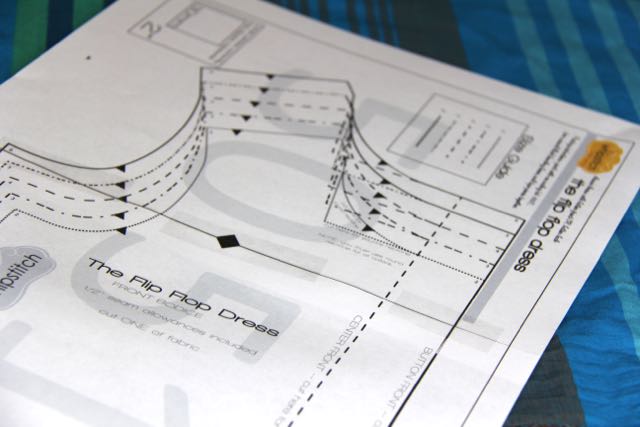
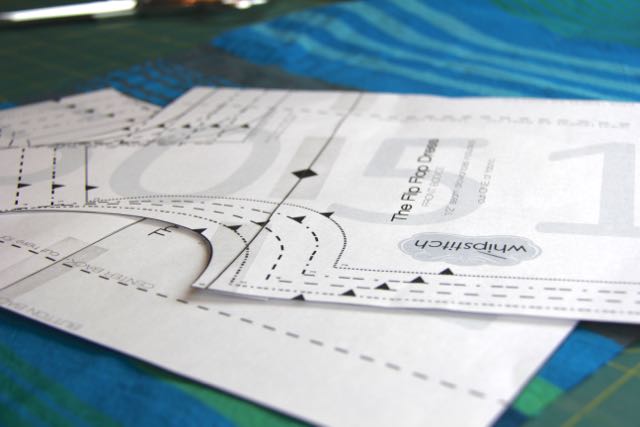
This is the front bodice pattern piece. Running along the straight edge is a line. This line represents center front. Center front on the finished garment is in the same place whether it fastens up the front or fastens up the back, right? When a button front version is closed, for example, the buttons are placed at the center front, and the two sides overlap. When a button back version is made, center front is still in the same place, but with no buttons.
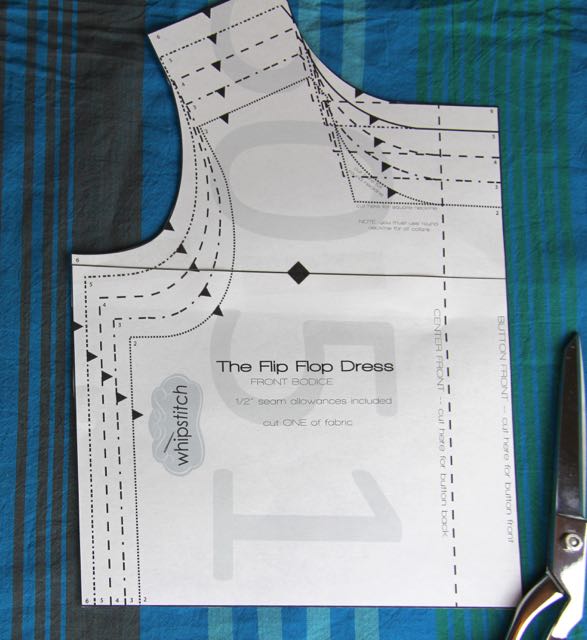
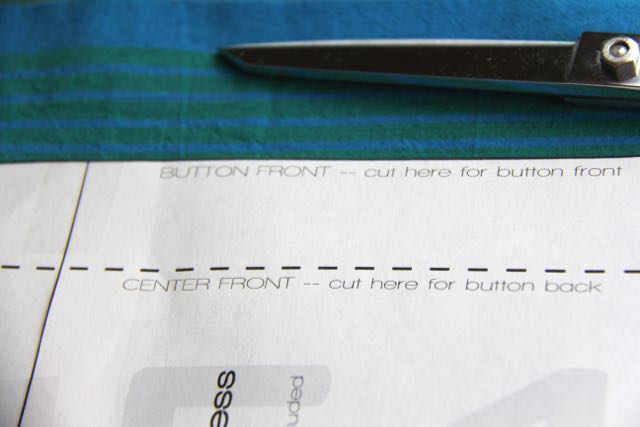
If I want to make a version with a button front, I place the front bodice pattern piece on the fabric, and cut around all the edges. This gives me a right front and a left front with edges that are open along the center front, where I can put buttons. This includes a margin for the buttons.
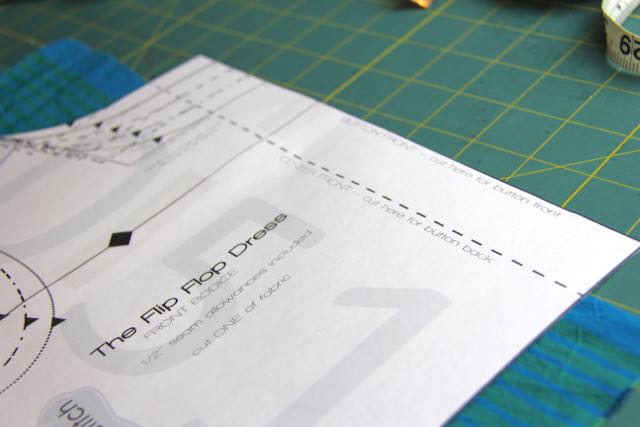
If I want to make a version with a button back, on the other hand, I place the front bodice pattern piece on the FOLD, and leave the margin for the buttons excluded when I cut around all the other edges of the pattern piece. This leaves no opening, and makes one front bodice piece, cut on the fold as a mirror image. The closures will be in the back of the dress for this version.
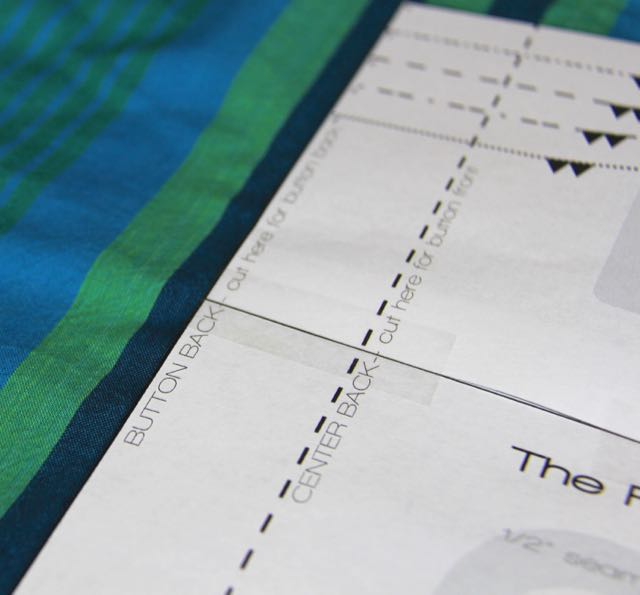
The bodice back works the same way–all I have to do is remember that if I have buttons on the front, I cut the back on the fold; if I have buttons on the back, I cut the front on the fold. Simple!
Designing the pattern this way, especially for a PDF printable pattern, means a few things. First, it means fewer pages to print. With a single front and a single back bodice pattern piece, I don’t need to have a front button version and a back button version of each (four pattern pieces), which would require more pages to print out. It saves ink for the user (and since I use my own pattern exhaustively, that means less printing for me, too).
Second, by designing the pattern this way, there is less to store. No matter how organized you are in your pattern storage system (assuming you have one at all–ahem), pieces can go missing. How irritating to want to use a pattern you’ve used previously and find that you’re missing one key piece! With only two bodice pieces, that likelihood is greatly reduced, meaning less RE-printing for you.
Finally, this pattern emphasizes some basic ideas about how patterns function and how to alter a pattern to suit your vision. Lots of folks have never thought about how the center front would work or how to move buttons from the front of a garment to the back. I believe deeply in creating patterns that have a long life span, that teach you as you work with them, and that inspire you to create just what you imagine. I think this design is true to that ideal, and encourages you to dream and work with patterns in a new way.
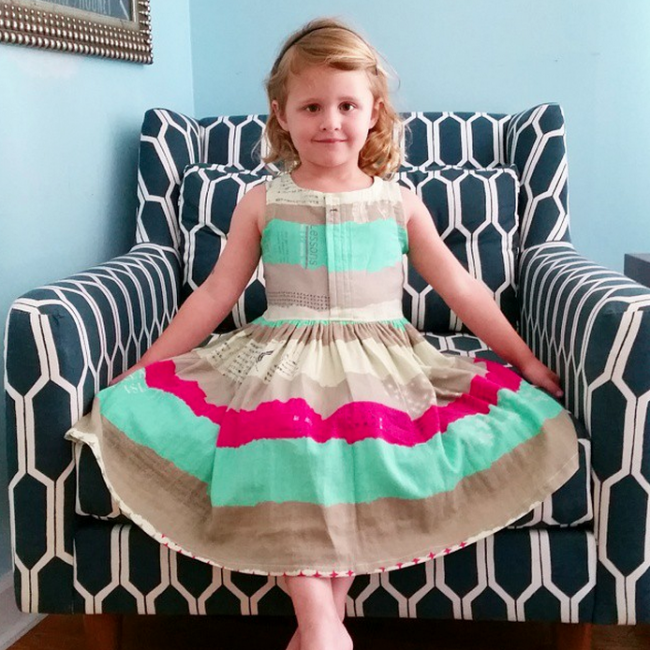
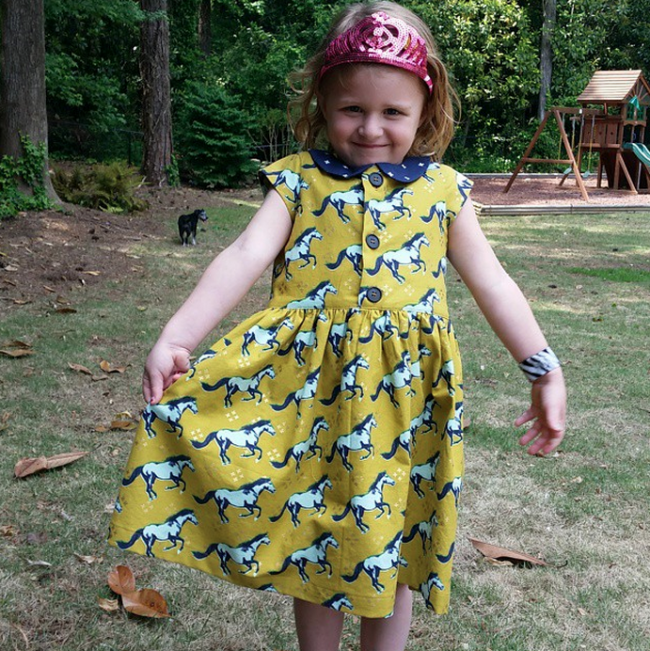
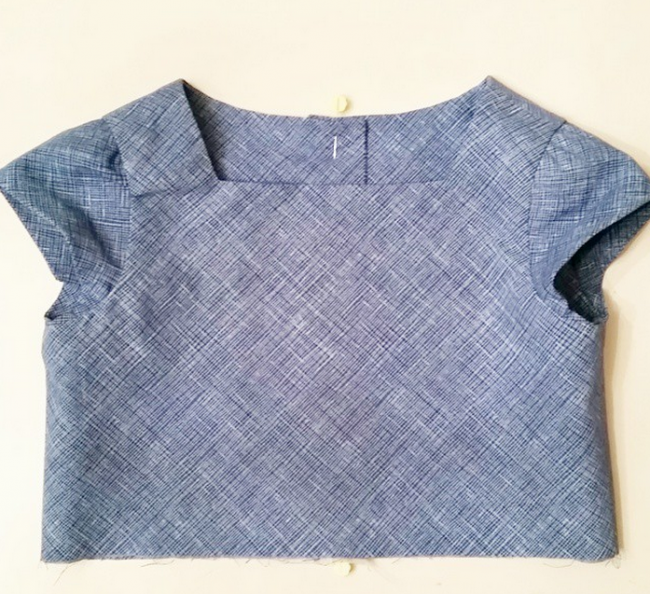
I can’t wait to share more images with you, and to show off some of the variations I’ve sewn for my daughters! The basic pattern includes a lined bodice with a cap sleeve and a Peter Pan collar–and I’m also including lots of fun goodies to allow you to make an unlined bodice, a longer sleeve, an alternate collar, and to mix and match details to get JUST the dress you want.
Looking forward to hearing what you think!
The Flip Flop Dress: Classic style for girls | Whipstitch
July 23, 2015 at 10:14 am[…] The Flip Flop Dress features a lined bodice that can button front OR button back, with either a rounded or a square neckline, and a full gathered dirndl skirt. The bodice hits about an inch above the natural waist, and the skirt falls just below the knee. There is an optional lined cap sleeve, and an optional Peter Pan collar, meaning you can make dozens of variations of the dress from the core pattern alone! […]
The Flip Flop Dress Pattern NOW AVAILABLE! | Whipstitch
July 27, 2015 at 1:14 pm[…] more details about what makes the Flip Flop Dress special, see this post. For more about the basic pattern and the two views it includes, see this post. For more about […]
How to Sew a Quick + Easy Dress Waistline Seam | Sew Mama Sew | Outstanding sewing, quilting, and needlework tutorials since 2005.
September 16, 2015 at 9:55 am[…] of the dress is nicely finished–the pattern pieces are designed to allow you to sew the dress with the opening either in the front OR the back, and either way, every seam allowance an edge is hidden from view. The fully lined bodice means that […]
How to Sew a Quick + Easy Dress Waistline Seam - Nofilter.ink | The Storytelling Network
September 16, 2015 at 10:09 am[…] of the dress is nicely finished–the pattern pieces are designed to allow you to sew the dress with the opening either in the front OR the back, and either way, every seam allowance an edge is hidden from view. The fully lined bodice means that […]