
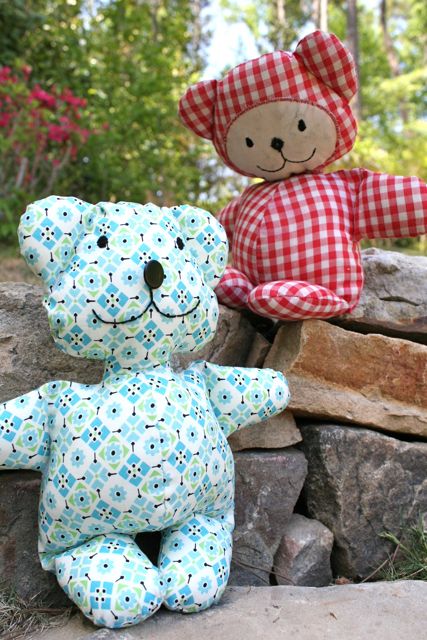
Hooray!! FREE pattern today for the vintage-style teddy bear I made based on the bears my mother sewed for me when I was teensy tiny (turns out she made them when I was a baby in Germany just after I was born, which makes this gingham bear older than I generally talk about in polite company). I drafted the pattern using the original as a guide, but of course they’re not identical–I’m sharing it with you because I love the bears so much, but please keep in mind that this pattern is for personal use and not to be duplicated, manufactured or sold in any way.
You can download the pattern as a PDF document to print. It comes on two pages and requires NO taping or assembly; the pieces are each isolated to a single sheet, so it’s a quick little pattern to print out and get started with. Pages look like this:
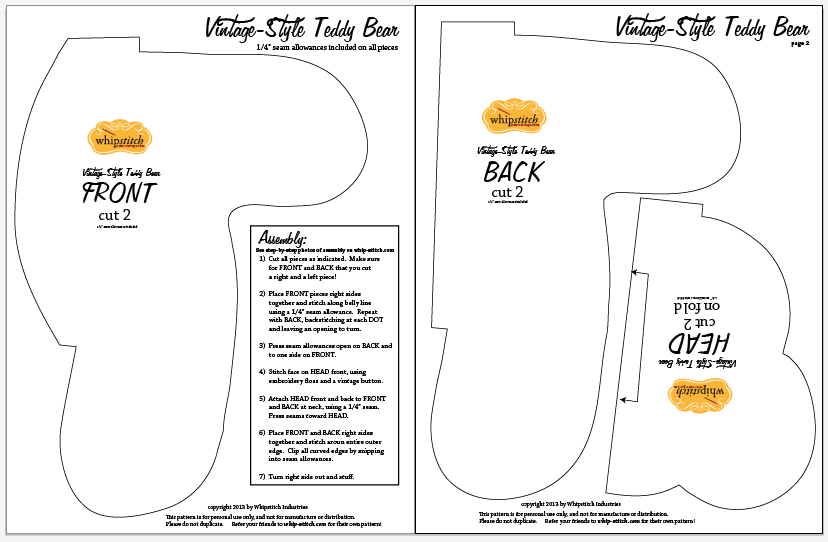
You’ll notice that the printed pattern includes notes and assembly instructions, but also directs you to find step-by-step photos here on the blog. Wanna see them? Here they go!
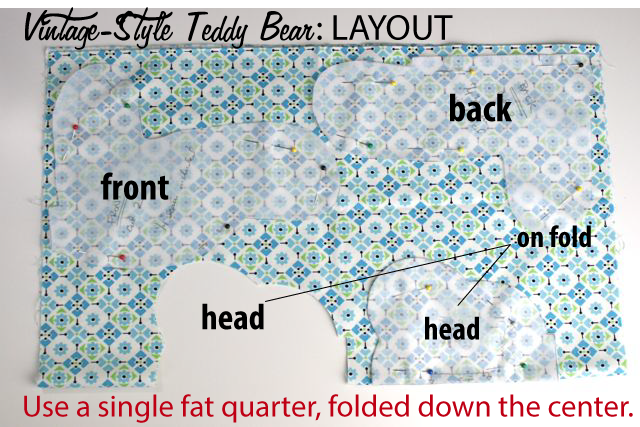
Begin by printing and cutting the pattern out–regular 8.5″ x 11″ or A4 paper will do the trick. Print at 100% for the bear size seen above, or adjust the sizing to make smaller and larger bears–make your own bear family! Working with a fat quarter of quilt-weight cotton, fold the fabric in half so that the folded piece measures approximately 18″ x 11″. Lay the pieces as shown above, taking care to place the head on the fold once, cut, then move and cut again, also on the fold.
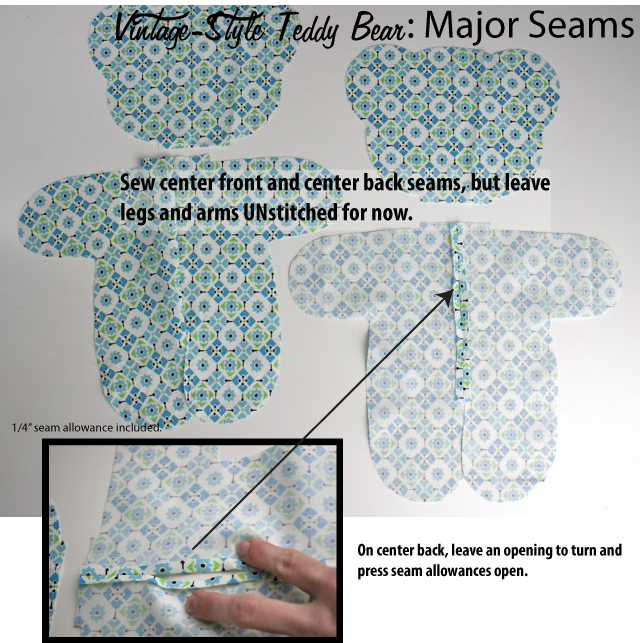
Place the two front pieces right sides together and stitch the center front, along the belly line. JUST the belly, now, not the arms and legs; we’ll get those later. Then, repeat on the center back, but stop and start at the dots by backstitching so you can leave an opening to turn it right side out later.
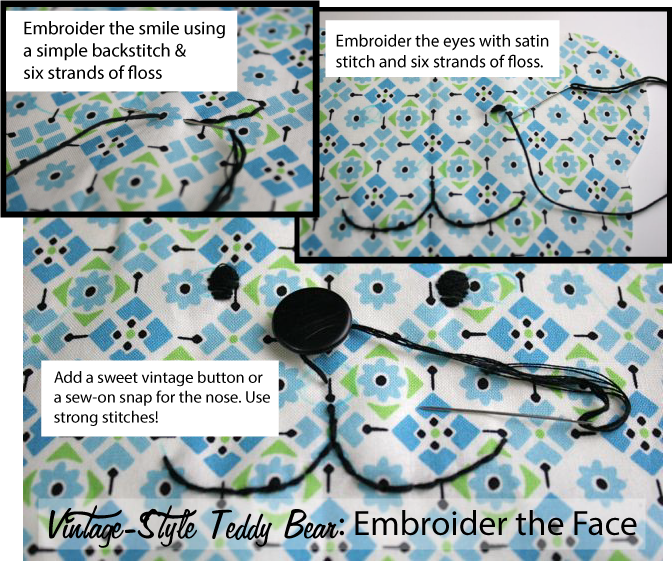
With the major body pieces sewn, turn your attention to the face! I pulled a major space-out moment and totally neglected to add the sweet oval of solid white on the face that the original bear has–if you want to throw that in, knock yourself out. It looks very sweet, and is a simple machine applique using a wide zigzag stitch. For the facial features, trace on the mouth and eye shapes using an air-soluble pen or chalk–I did these free-hand, and since my ink was air-soluble (disappearing) ink, I just drew and re-drew until I was satisfied with the shape and placement. On the mouth, use a backstitch to trace over the line you drew; on the eyes, use a satin stitch. (Sublime Stitching has some great online tutorials for these stitches that make it super easy!) Add a vintage button for a nose, or use the male part of a sew-on snap, like my mom did on the original bear.
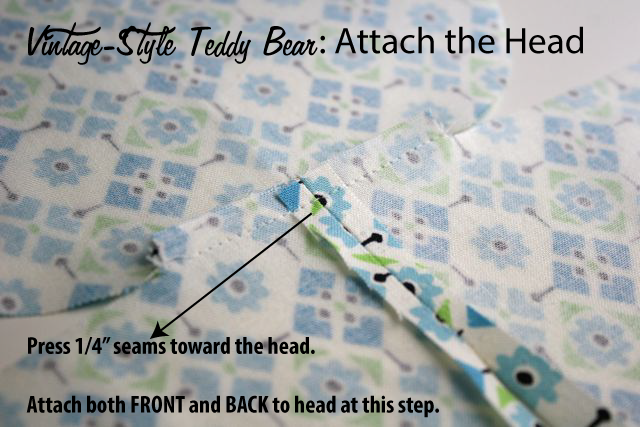
With the face sewn on, we can move ahead to the last major step: attaching the head pieces. Make sure you sew the FACE to the FRONT of the body, and the remaining head piece to the BACK of the body! Otherwise: awkward.
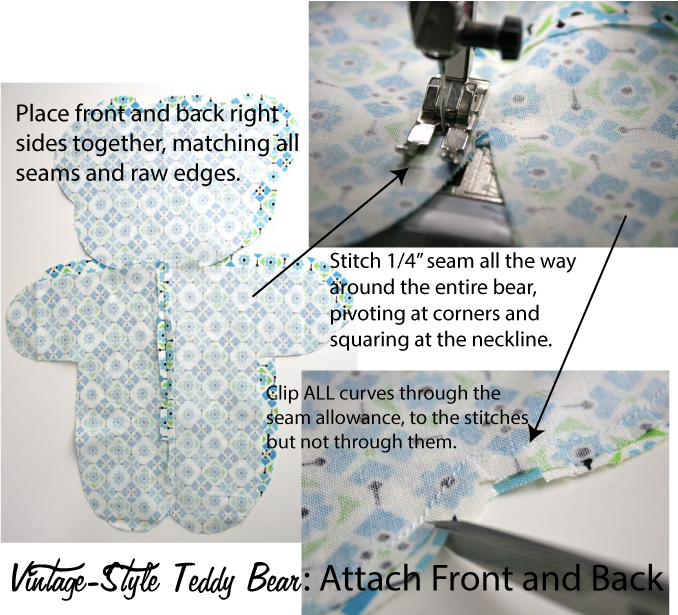
Now you should have a bear front and a bear back, with the face sewn on and the head attached. Place the front and back right sides together, making sure the neckline seams match, and lining up all the raw edges. With only a 1/4″ seam allowance, you really do want to keep things as accurate as you can at this point. Stitch the entire perimeter of the bear, all the way around, leaving no opening. When the seam is sewn, go back and SNIP the seam allowances along all the curves to release the fabric and prevent puckering. Snip up to the stitching but not through it. At pivot points or corners, snip in at a diagonal.
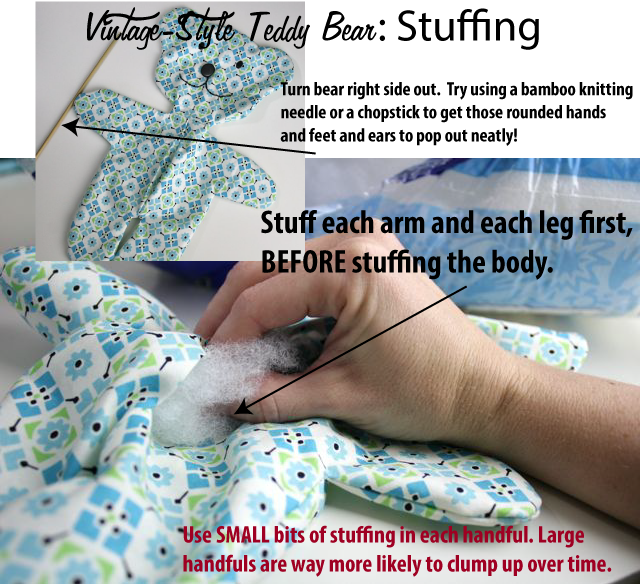 Now we get to MOVE THAT BUS! Turn the whole bear right side out and use a pokey stick to get all the edges nice and smooth. Then, use polyfill to stuff him up! A lot of folks like to use giant handfuls to stuff with polyfill, but the secret is using TINY handfuls. That way, the stuffing is less likely to clump up over time. For this little bear, we’re going to stitch seams to define the arms, legs and ears, so begin by stuffing ONLY the arms, and then we’ll sew that seam. After that, we can move on and repeat the step with the legs and finally the ears.
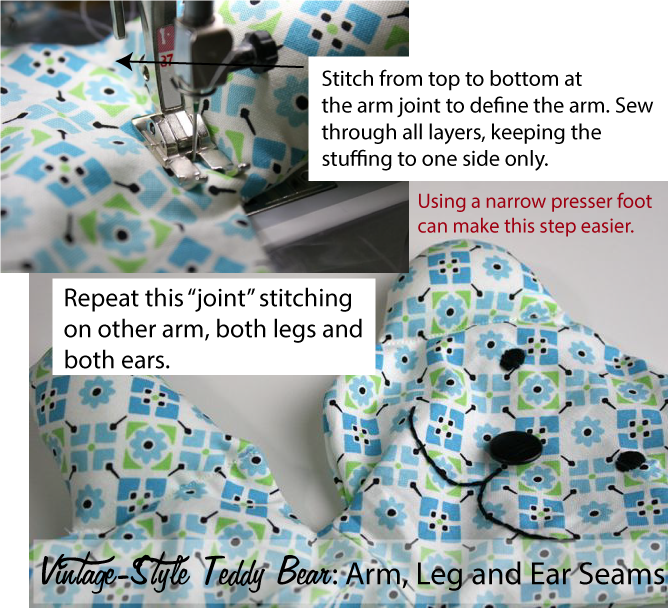
As each arm, leg and ear gets individually stuffed (a little more firmly than you might think necessary–I like them really plump), you’ll sew a seam through all the layers, catching the stuffing to one side, to make a “joint” that defines the appendage. I do one at a time, and sew each seam after I stuff, then go back for more stuffing. Make sure to backstitch at the end of every seam!
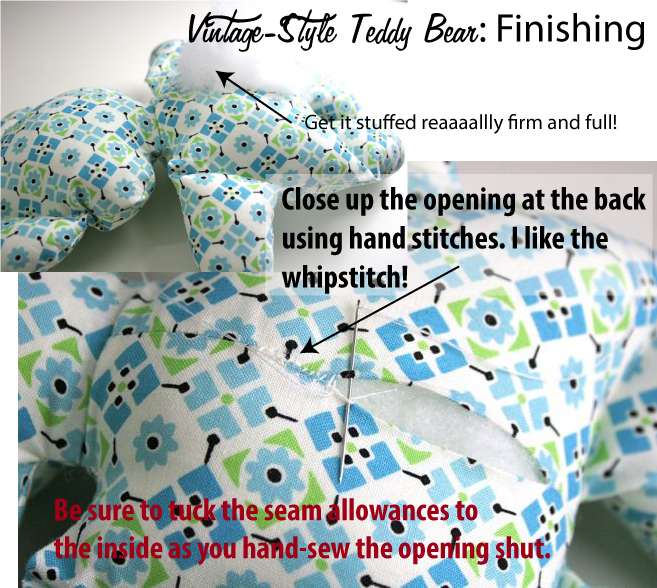
Once all the stuffing is in place, you can hand-sew the back opening shut. I like the whipstitch, obviously, but you can certainly use any number of hand stitches for this step. If you’re accustomed to hand-sewing your quilt bindings on, for example, you can use a slipstitch here and that’ll do just fine.
And voila! Magically delicious and super cute teddies all day long.
Add your finished teddy bear to the Whipstitch Flickr group so we can all get inspired by your variations on the theme!

Sparrow
April 27, 2013 at 7:45 amSo, I showed my son the picture of the two bears together and asked if he would like me to make him one like that. He said “I want the red one!” Too funny! Thanks for sharing the pattern! <3
Judy
August 12, 2013 at 9:46 amOH, thank y0u for this tutorial. It is so cute and the perfect “extra” gift for my friend’s first baby!!
INTRODUCTIONS & ALOHAS! | SingleHandedKnits
March 24, 2014 at 11:00 am[…] can download free patterns for Deborah’s vintage-style teddy bear or her free A-line skirt pattern. And if you’re feeling like doing some sewing, try her […]
Geri Krott
May 5, 2014 at 5:19 pmThank you so much for this pattern. I love to make a teddy bear to go with a baby quilt but I hate complicated patterns. This was PERFECT! And a good workable size. I would love to send a pic of my adorable bear but can’t see that as an option.
Deborah
May 6, 2014 at 12:22 pmOh, I’m so glad you liked it! Check the right sidebar, about halfway down, and you’ll see a button for the Whipstitch Flickr group–I’d love to see you photos added there! 🙂
Jen
August 5, 2014 at 6:22 pmMy Grandmother made me this same bear when I was young! I believe the original is McCall’s 4714 the bear family. You may already know this, but just in case you wanted to find the original pattern your Mom made you. Your replica is awesome!
Deborah
August 5, 2014 at 9:58 pmOh, thank you!! I actually went hunting for the pattern shortly after I made this one, and found it on eBay. The plan, last Christmas, was to make her a hand towel with the image from the pattern transferred on it. Uh….that’ll be THIS year’s Christmas gift, looks like. 🙁
Love that you had one of these, too! My kids loooove theirs, and I love that thread from me to them. 🙂