
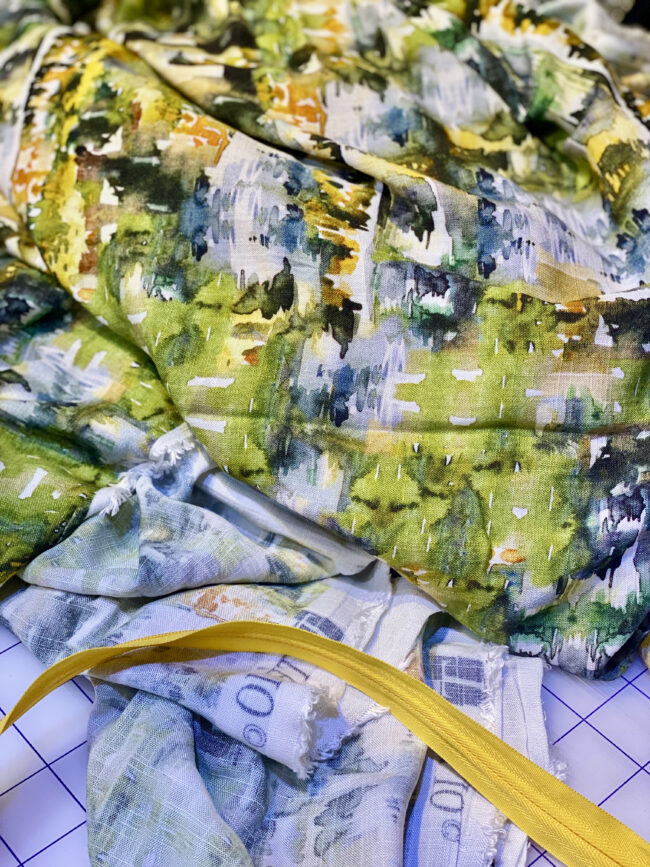
I’ve had a copy of McCall’s 7774 for years, and love the shape of it. I found this incredible rayon blend in this funky tie-dye-ikat-nutty fabric and they seemed like a match made in heaven. The drape alone!! Oh, my.
But: when I looked at the pattern envelope, I ran into two snags. I purchased this about 30 pounds ago, which means that I had the wrong size range–and even in my correct size range, the finished garment measurements vs the body measurements led me to believe that the amount of wear ease would be far more than my preference.
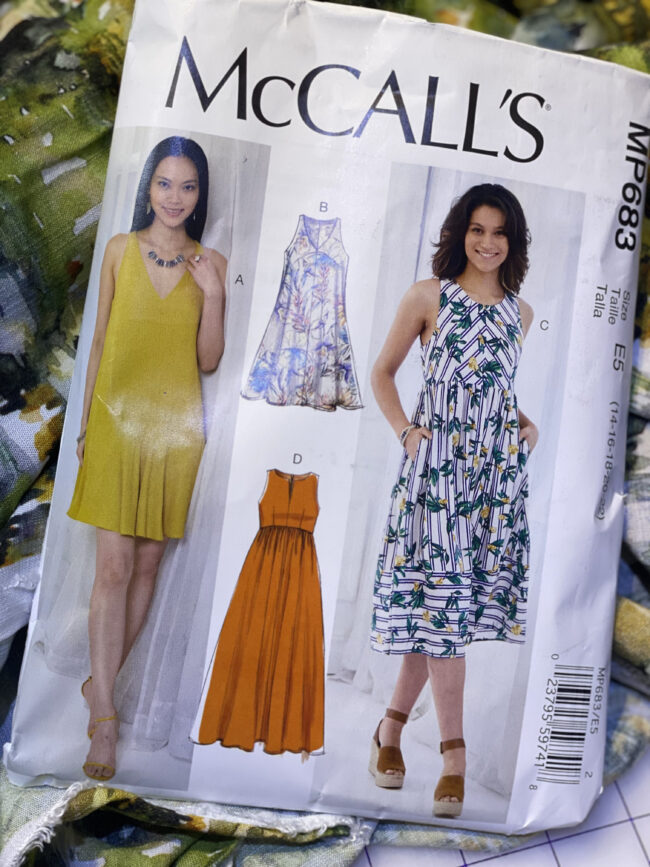
This is an idea I used to talk about in my garment sewing classes, and that I wrote about in both Stitch By Stitch and Stitch Savvy: “finished garment measurements” are just what they sound like, the width in inches of the garment at bust/waist/hip after sewing; “body measurements” are the assumed dimensions of my body wearing undergarments only. The difference between these two measurements is called WEAR EASE, that space between the body and the garment that makes room to sit or stand or walk. (There’s also an amount of space called DESIGN EASE, which accounts for the designer’s vision, i.e. loose and baggy vs fitted and body-conscious, but since this garment was described on the envelope as “closely fitted” that’s not relevant here.)
My on-going problem is that I lean toward fairly tiny amounts of wear ease in a fitted garment. I don’t want an inch or three extra at the underarms or side seams, I want the bodice in particular to skim pretty close to my rib cage. Since there was a difference of about two inches here, AND the pattern is in the wrong size range, I set out the make a MUSLIN.
To clarify: in the size range I have on hand, my body measurements put me in the 14, the smallest pattern size in the package. But the finished garment measurements led me to believe I wanted the 10, instead. Making a muslin, a test version of the garment before cutting into my fancy fashion fabric, was a way to test my hypothesis that what I really wanted was the smaller size. I mean, I could be wrong, you know?
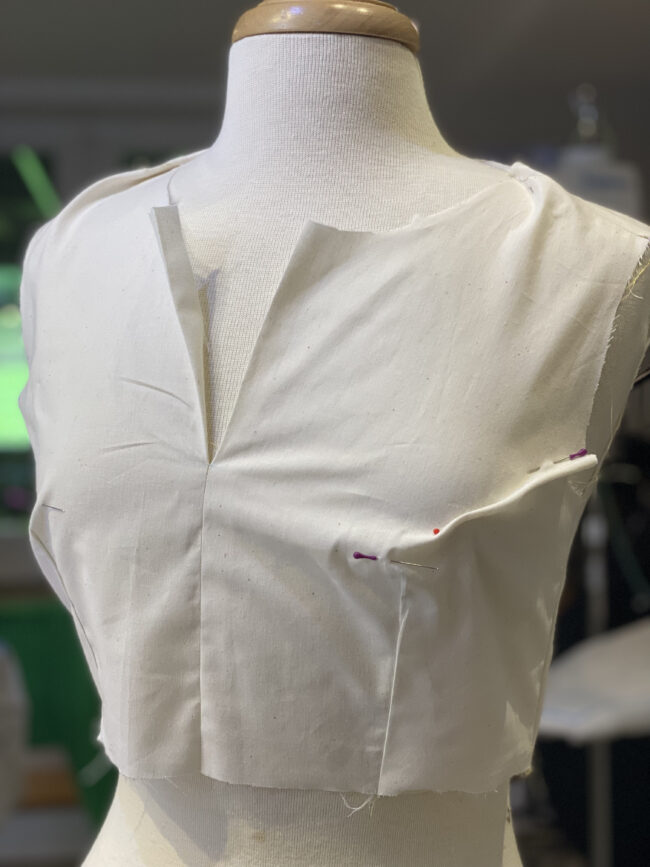
So I started with actual muslin fabric, which I purchase by the bolt when JoAnn has those 60% off “one cut” mega-coupons, because an entire bolt counts as “one cut” AND they’ll ship it to my house. Pro tip. I sewed according to instructions BUT since this is just the trial version, only did the major seams and the closure: the shoulders, the side seams, the darts, and the invisible zipper. I didn’t do a facing or any finishing like running it through a serger, since that won’t affect the fit. Then I tried it on.
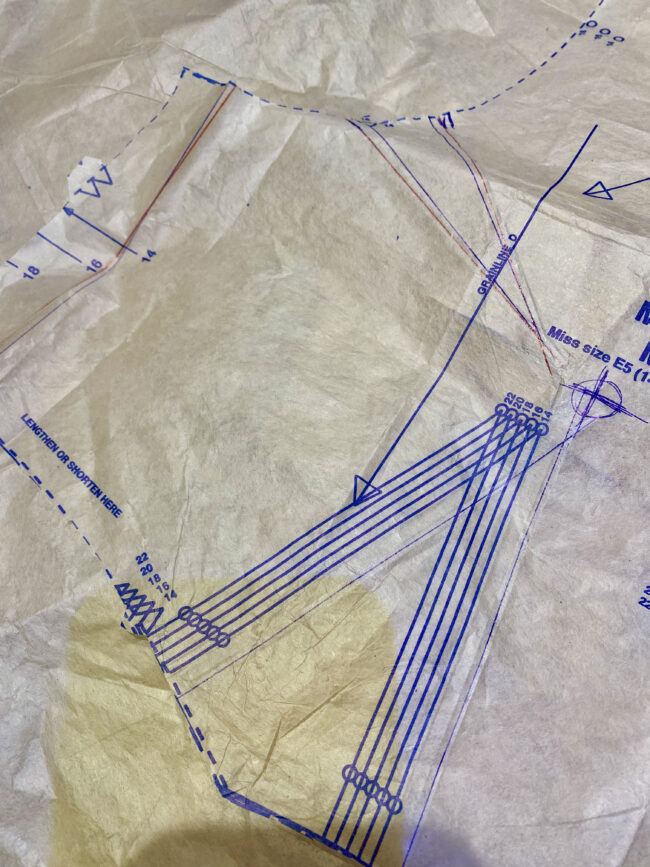
Immediately, I knew I needed to remove a ton of fabric at the side seams–equivalent to two sizes, or from the 14 down to the 10. There was just so much fabric, and I was swimming in it. As I suspected, using the FINISHED GARMENT MEASUREMENTS as my guide to select the size was more helpful than using the body size chart. I also realized the bust points didn’t line up with my bust apex, which makes sense: they’re spread wider for a larger size, and I was going down to a smaller one. So I re-drew the bust darts. Then I tackled the gaping at the armhole, which I solved by adding a side bust dart to remove the excess fabric. My alterations went on the muslin fabric, and when I took off the muslin, I transferred them to the pattern tissue.

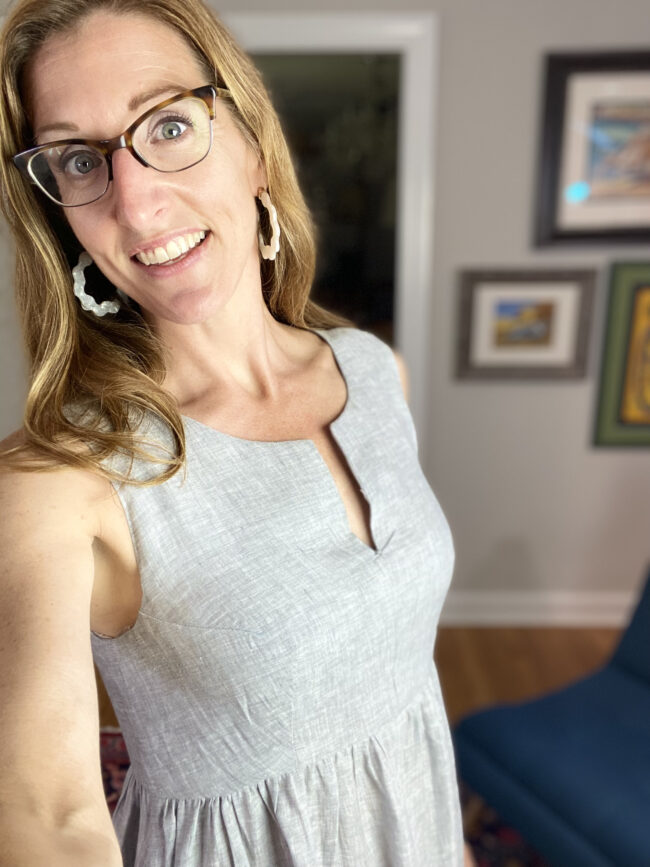
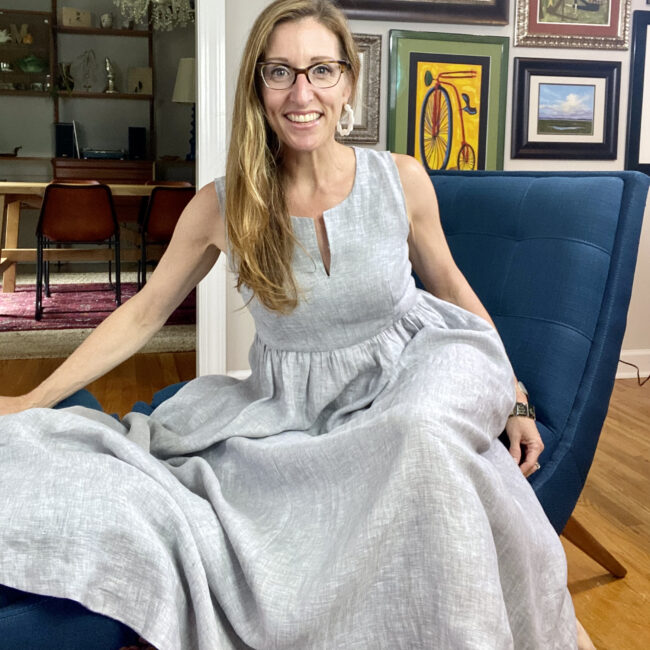
Then I opted to use a grey linen I’d had out on my cutting table as a potential Ogden Cami to make a WEARABLE MUSLIN: another practice version that can be worn in public if it works out, but where the fabric isn’t all that precious, just in case it doesn’t. And now I might not make the rayon version at all?? Because I love this linen one so much.
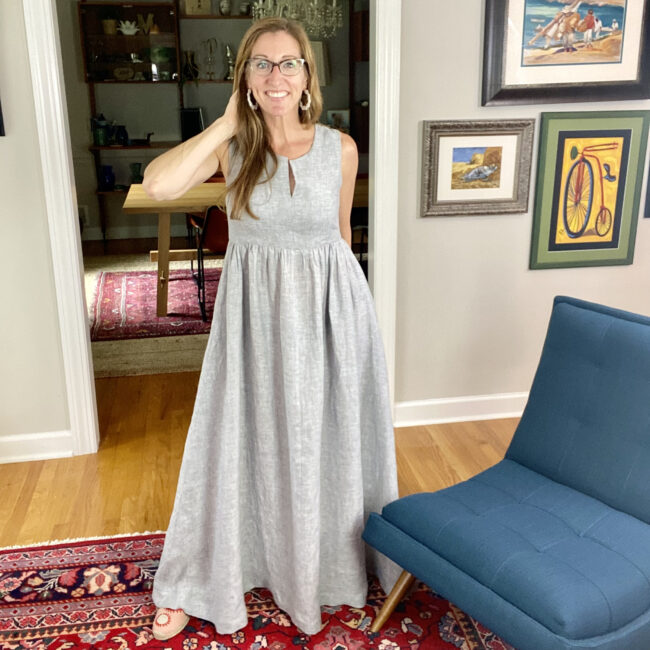
This is View D, and the fitting was ALLLLL in the bodice. The skirt is cut on the size 14 and left as-is, more or less, so there’s a fantastic fullness to it. The linen was pretty crisp with a tendency to unravel alarmingly as I worked, but now is softening to something like an old hankie? And it crisps back up when ironed but then softens as I wear it, and oh my. Please forgive the wrinkles in these photos, I’ve been wearing it all day and it’s just dreamy.

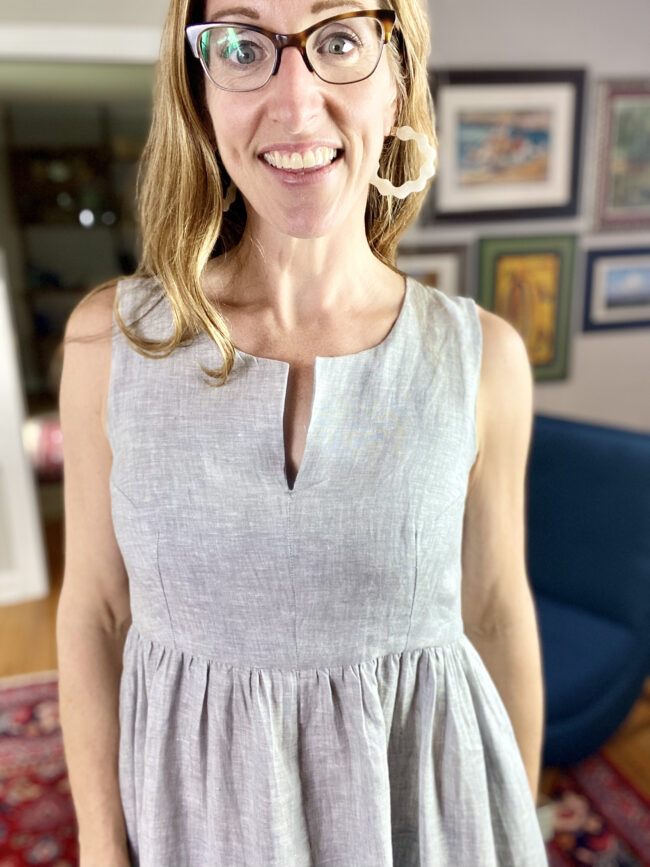
I’m super happy with the bust fit I got in the end. The darts extend a little further than they ought to, which could have gone pretty Ann-Margret-pointy if I hadn’t pressed them and steamed them over a press ham, but I did do that and I can report that they eased into a nice curve.
The entire bodice is self-lined, and you’ll be proud to know that I even did the hand stitching to attach the lining at the interior waist to cover the seams where the gathered skirt meets the bodice. I often do that step on the machine, but determined that if I went to the extra trouble here, the whole dress would be elevated and look that much “nicer.”
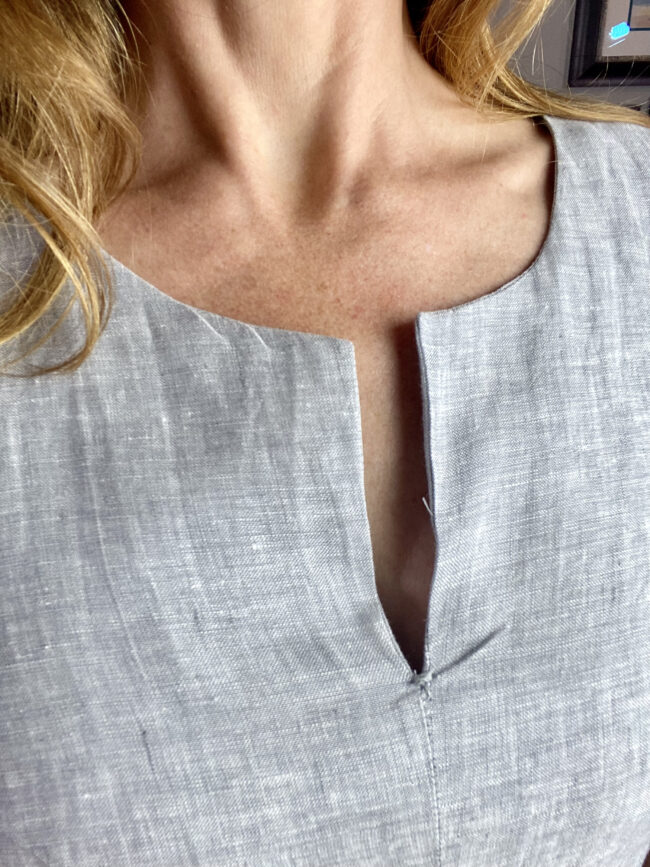
I love the slit at center front. It’s a little wrinkle-floppy here, since I’ve been moving around all day, but I’m confident the wear won’t pull on the seam since I added a bar tack at the bottom where the two bodice fronts come together. Linen is weaker when wet, and I intend to wear this dress in humid, Southern-summer conditions, so any reinforcement I can introduce that will help it to wear longer and better seemed like a good idea.

People! It has pockets!! I contemplated whether to do these with French seams, like in my tutorial from a few years ago (which seems to have gone missing off SewMamaSew??), but instead opted to serge the edges of the side skirt fronts separately, then stitch them together with the serged pocket pieces. It means the seams are never “closed” with the finishing, but it’s the simplest and quickest construction method.
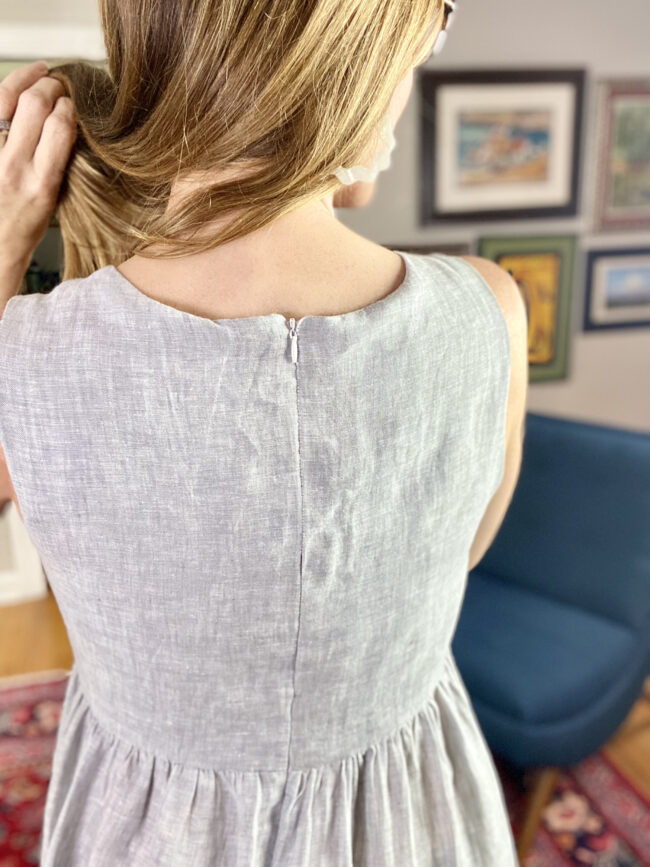
Suuuuuuper happy with how the invisible zip turned out!! No matter how many times I install one, I always (sincerely) take my time and really go slowly, paying attention to where the needle lands, in order to get a finish where the zipper tape really can’t be seen. I did the left side in one go, but hit some teeth on the right side and did it over. WORTH IT. The bodice lining is sewn through the zipper tape on the interior, so all you see is teeth.
Making a muslin is a funny thing. I kinda dread it, every time. It seems like SUCH A WASTE, honestly, like it’s going to delay me getting the garment I want. But in this case, I’m so very pleased with the results that I don’t think I’ll bother with the rayon, I don’t think I need another version of this dress? It’s pretty similar in shape and weight to my Ogden Cami hack, and a similar color to boot–and when I consider that I want to avoid redundancy in my wardrobe, I feel confident I can find another shape that suits the fabric better.
In this case, the grey handkerchief linen and the McCall’s 7774 are a perfect match!
davope
September 30, 2021 at 6:14 amYou are looking so good in this dress i will try for myself, thanks for sharing
Deborah Moebes
March 29, 2022 at 1:49 pmThank you! I hope you do, and share the link so we can see!! 😊