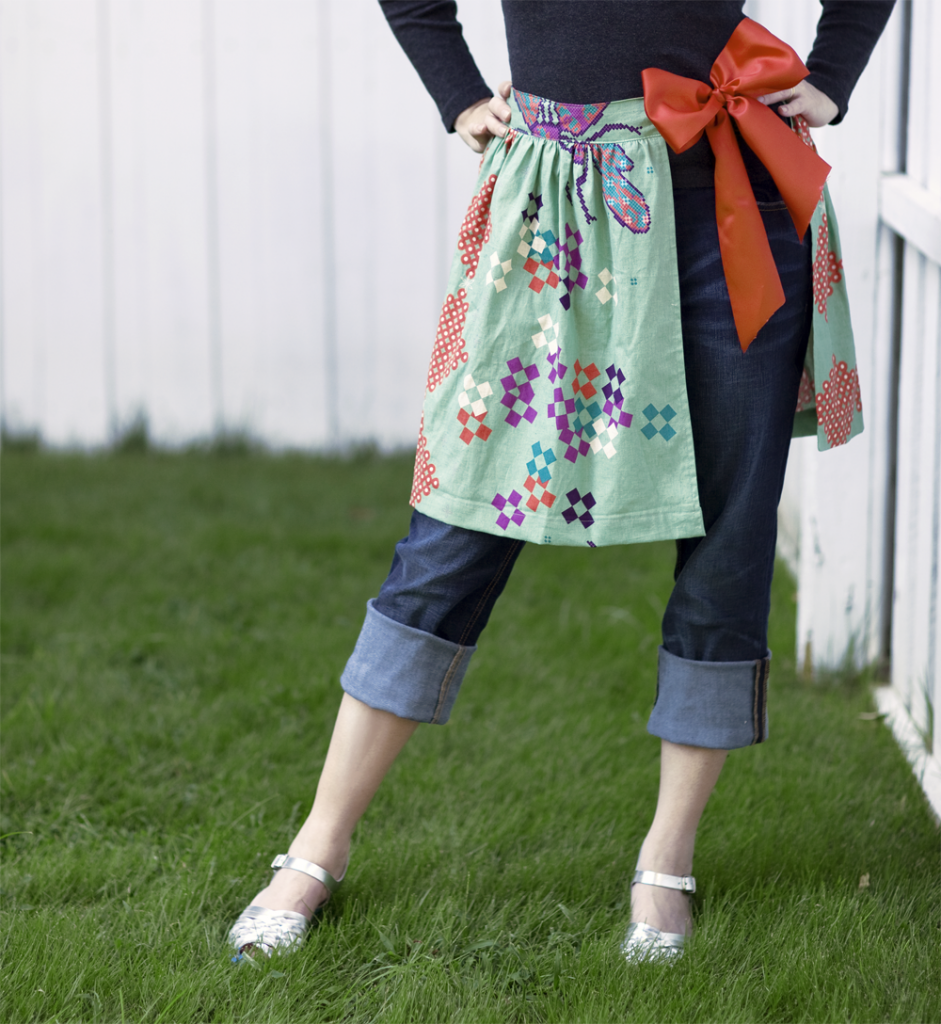
Did you love the Ruby Star Spring A-line Skirt? Because I love it. And when I originally envisioned it, I saw it in my mind as two layers, one a simple, clean skirt that can be worn all spring, summer and fall, and another an apron overlay that can sass it up or be worn over pants all fall and winter long. Isn’t it darling?? So, today, a simple tutorial for an apron-styled overskirt to wear with your Bee Skirt, or to pair with skinny jeans through the rest of the school year!
Bee Apron-Style Over-Skirt
- 1/2 yd Ruby Star Spring cotton/linen blend (or another fabric of your choice)
- one piece 4″ x 28″ for the waistband
- interfacing 4″ x 28″
- coordinating thread
- ridiculously wide ribbon in a coordinating color
Apply fusible interfacing to the wrong side of the waistband piece, then press under one long edge 1/4″. Set aside.
Make the miters in the skirt corners and set in the hem. Do this by pressing under 1/4″ on the two short sides of the 1/2 yd panel and the lower long edge. Use steam–you’ll want them nice and crisp. Then, turn under another 1/4″ and steam some more. Give it the old elbow grease.
Open out all the folds at the corners, and with a ruler, mark the point of intersection of the fold lines. Draw across the lines on a diagonal right where they meet–this is where we’ll stitch to make a good, clean miter at the corner of the skirt hem.
Fold the fabric into a corner, right sides together, lining up the marks you’ve just made. The line will be folded in half, and you’ll be using it to guide you to make a clean 45-degree angle.
With the first pressed edge folded in, stitch across the line you’ve marked, securing those edges in place.
Trim the seam, and pop the corner to the inside. It will carry the second pressed edge along with it, and make a lovely, tidy little mitered corner. Repeat on the opposite lower corner and press in place. Stitch the hem from the upper raw edge, down one side, pivoting at the corner, then across the lower hem, pivoting again, and up the second short side.
So pretty! Now we gather the upper edge and prepare to attach it to the waistband. Run a row of gathering stitches at a 1/2″ seam allowance from the upper raw edge. Run a second row of gathering stitches–your longest straight stitch–at 1/4″ seam allowance. Leave nice, long tails.
Draw up on the gathering threads like moving a window curtain along a curtain rod.
Place the gathered skirt front against the waistband, right sides together, leaving a 1/2″ overhang at each end.
Pin in place along the waistband, and adjust the gathers so they’re evenly spaced across the waistband. Stitch in place, using a 1/2″ seam allowance and keeping your gathers nice and perky–don’t smoosh them flat, but rather run over them where they’ve been gathered.
Press the seam allowance toward the waistband. Now, we add in the ribbon ties. At each end, where you left the 1/2″ overhang, fold the waistband right sides together. Slip the ribbon between the two layers.
 Pin in place, then stitch top to bottom, right at the edge of where the side hem begins. You’ll be trapping the ribbon in the middle at the same time, so do take care that it’s placed right sides together with the skirt front–if your ribbon has a shiny side, for example, that should be face down here.
Trim the seam allowances and flip the ribbon to the right side. It will draw the waistband with it, nice and clean. Isn’t that cool? Press the waistband in half, then pin the lower, pressed edge in place so we can topstitch it down.
From the public side of the skirt, topstitch close to the lower edge of the waistband, backstitching at each ribbon end.
 Tie an exaggerated and delicious bow, and kick-start your dancing shoes! Magnificent!
 Wear it over your Bee Skirt or pair with dresses, pants or jeans every season of the year. Sassy!


jane Boutwell
September 2, 2011 at 2:34 pmplease tell me about those cute silver shoes!love them!
Debbie
September 2, 2011 at 5:54 pmLove, love, love this! So adorable!
Melany
September 2, 2011 at 7:47 pmI LOVE this too. If..or WHEN I have my own little shop up here – I could totally see this as my little uniform. 😉 Perfect!
Belinda
September 2, 2011 at 9:50 pmGreat tutorial!
Apron/over skirt idea is awesome!
Tutorial is worth it just for the mitered corner trick – so using this!
Tip – on the back, non public side, of the waist band, instead of pinning it in prep for stitching on the “public” side, try using Wonder Tape (wash away basting tape) to hold it in place – it’s great stuff! Adds no bulk, doesn’t gum up my needle.
Have a great weekend!
Tresa
September 6, 2011 at 11:32 amWhat a great tutorial. I’ll totally use that mitered corner trick. Fabulous!
Shannon Yeaton
September 8, 2011 at 9:03 amLove your blog and this tutorial. I watched some videos in old posts – hilarious! I was laughing out loud, thanks and I am glad I found you. Have a good one.