
I took advantage of some Black Friday sales to make purchases for fabric I know I’ll need in the New Year. Wanna see?
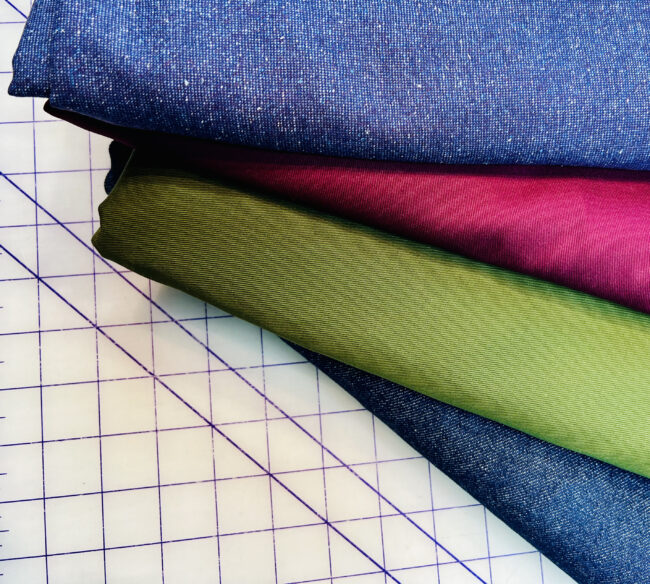
This amazing organic twill is from District Fabric on the Olympic Peninsula. This shop is a woman-owned small business in a GORGEOUS part of the US; my husband and I visited the Olympic Peninsula last summer and we are SMITTEN, so I was delighted to discover their online selection!
The plum twill is destined to be a Bianca Flight Suit. I’m thinking of lining it with Liberty lawn (yes, I am serious) and quilting the yardage before cutting out to make a jumpsuit for riding my Vespa in cool weather. I CAN HARDLY WAIT.
The olive of the same fabric is (maybe?) a wearable muslin of the Bianca, but maybe also a pair of pants–we have a whole pants sewalong coming up at The League as soon as we finish our current fitting & pattern adjustments series, so I’ve been going through my stash of bottomweight fabrics to see what I have, and OLIVE! Yes, please.
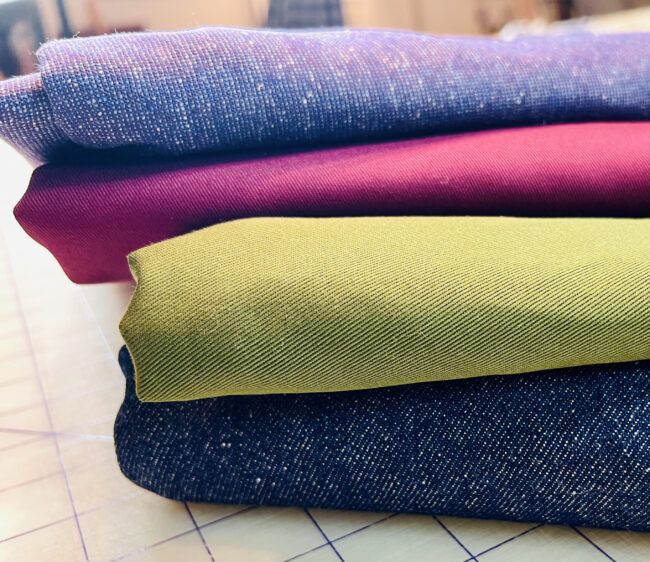
The wool on the top of the pile is drapey like water, and I think will be another pair of Mitchell Trousers, because that pattern blows my mind. We’re doing the Chi-Town Chinos for our League sewalong, and I’m using a crisp check twill for those, but if we didn’t do that pattern, the Mitchell Trousers would have been my very next choice.
Next year, we’re following up our pants sewalong with a JEANS sewalong, so I’ve also been sourcing denims, both selvege (non-stretch) and stretch. This Japanese denim is so delicious, and will be a great pair of classic straight-leg jeans.
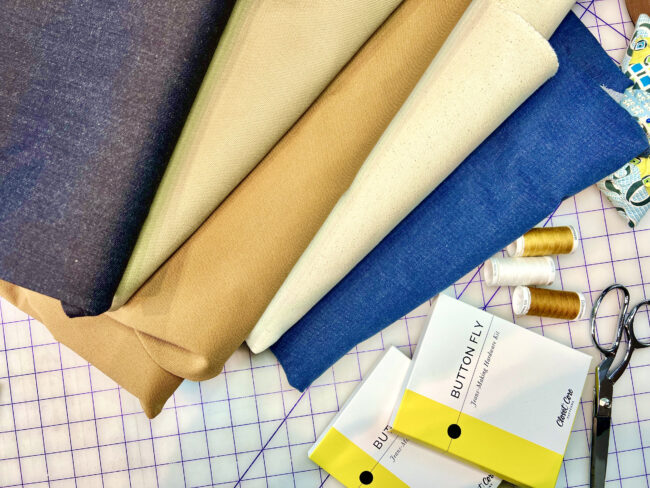
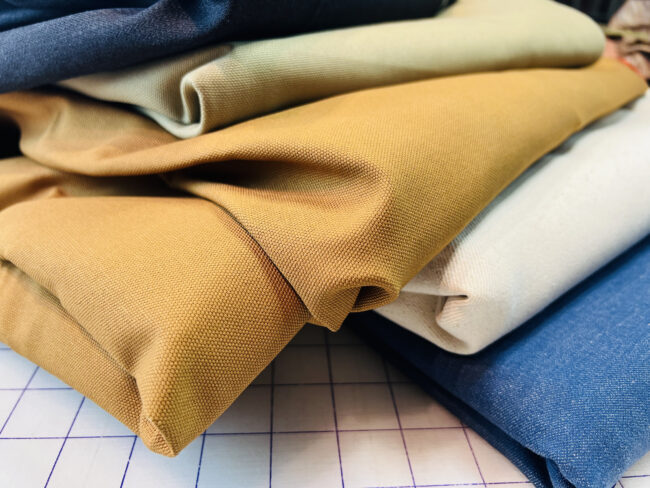
I also got this package from Core Fabrics, FULL of other denims for the sample jeans. The stack above includes two midweight canvas cottons, in camel and caramel; an incredible Italian stretch denim; another Japanese denim; and this jaw-dropping oatmeal-flecked ivory denim sourced from upcycled denims.
Obviously, these cuts of fabric represent a LOT OF SEWING. I won’t use every one of them this week–I’m working to make intentional purchases only for projects I already have planned, ideally when there are built-in deadlines that will hold me accountable for my planning. (The League is great for that, because we have quarterly sewalongs with guided video PLUS challenges PLUS a community where we can share our sewing and get ideas; it keeps me working on projects that might otherwise lag, and I get to enjoy the process of sharing my progress!)
Before I can sew with ANY of these fabrics, I need to PREWASH them. Prewashing, or pre-shrinking, is the process of preparing fabric ahead of time for sewing. I have a very specific system I use for my pre-washing, and I made a video to share it with you!
Pre-washing vs pre-shrinking
All fabric needs to be prepared before cutting for sewing. Any shrinkage that takes place should happen to the YARDAGE, and then the pattern pieces cut out; that way, your finished garment will remain the same size after washing and wearing as it is the moment you complete the sewing. This sounds like a super obvious point, but no one explicitly explained it to me when I was learning, and I’ve wept over laundry more than any woman should, as a result.
Fabrics should be pre-treated in the same manner as the final garment will be. If you plan to launder the garment in the washer and tumble dryer, do that. If you plan to launder the garment in the washer, but hang to dry (like, say, a specialty fabric or athletic wear or a bra), then do that with the yardage. You can even handwash, in the case of delicate fabrics! If you plan to dry clean the garment, you’ll do the same to the yardage–but see below for more details.
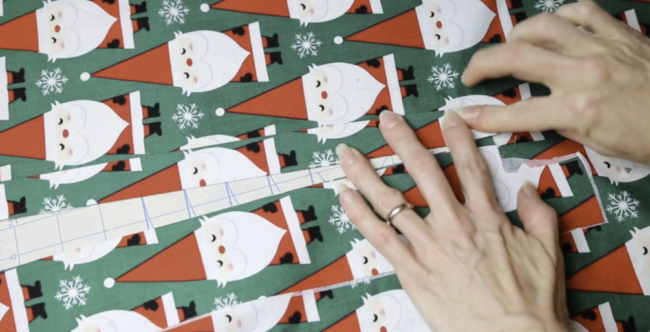
PRE-WASHING refers to machine-safe fabrics, where the final garment can be wet in the machine or in a sink. Generally, I think of anything “pre-washed” as a wash-and-tumble-dry situation, and I have a ritual for doing it, beginning with an overcast stitch across the cut ends of the yardage.
PRE-SHRINKING refers to fabrics that cannot be sent through the washing machine. Most of these are wools or wool blends, where the friction in the machine would cause the fibers to felt and ruin the texture. Instead, these fabrics are PRE-SHRUNK by steaming. Some folks lately like to send them through the dryer only, with a damp cloth, but I don;’t love that method; I’d much prefer to steam them on my ironing board with a press cloth, as in the video, or simply send the yardage straight to the dry cleaners.
What about quilting cottons?
I sew garments with some quilting cottons still, and can’t shake an affinity for novelty prints, especially as a button-up shirt, like this Archer Shirt:
But I do NOT pre-wash my quilting cottons for quilting! Instead, I leave them unwashed and CRSIP with the sizing from the manufacturer. This keeps them nice and stable as I cut and piece my quilts. Any shrinking that happens takes place after the quilting step, when the quilt is laundered for the first time, and not only do the quilting stitches prevent over-shrinking, but I love the modern, crinkly effect it produces.
I ALWAYS pre-wash my cottons for garments to ensure a good fit, including quilting cottons.
If I don’t know whether I’ll quilt or sew a garment? I like to prewash my fabrics (or pretreat) as soon as I get them home, and then store them folded. When I see the overcast stitches on the ends of the yardage, I know the fabric is ready to sew as soon as inspiration strikes!
I go over all these details and more in the video. Hope it helps you prepare your fabric for better results and more confidence when you sew!
How To Preshrink Fabric For Sewing - Hobby Blog
January 5, 2023 at 2:22 am[…] Source link […]