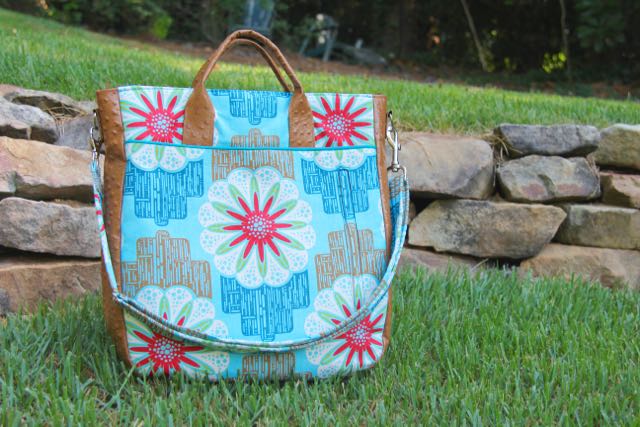
I have never made a bag I liked nearly as much as this bag. It is possible I have never OWNED a bag I like nearly as much as this bag–and I am deeply emotionally attached to my yellow full-grain pebbled leather Ralph Lauren satchel with brass hardware, so that’s saying something. This is the Supertote pattern from Anna of Noodlehead, which I originally bought thinking it would be a great shape for a ballet bag for my girls (spoiler: it will be), but then realized would also make a great backpack for me for our upcoming family travels. BOOM.
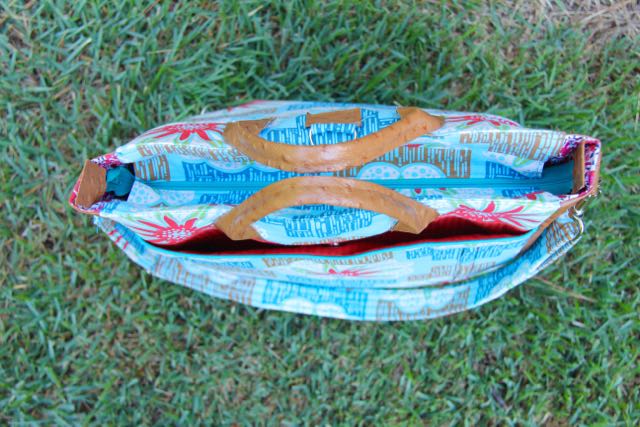
The pattern has a recessed zipper, which is technically optional, but why would you not use it? While the instructions have you cut it with the lining fabric, I wanted it to blend with the exterior, so I cut the recessed zipper and the upper part of the lining of the same fabric as the front and back of the bag–Anna’s genius design makes that super easy to do, simply by cutting the same pattern pieces of different prints. No adjustments or fiddling with adding seam allowances, just swap out your fabrics! SO GREAT.
I spent a ton of time thinking about this bag before sewing it. One of the things I keep yammering on about with my League of Adventurous Dressmakers is how revolutionary it is to make the leap from “I want to sew ALL THE THINGS!” to “I want all the things I sew to be SPECIAL!” That bleeds over into every area of your sewing, and you end up make a LOT fewer projects, but the ones you do make are really, really wonderful. And I suspect that over time, you get faster at doing a great job on great projects, just as you would doing a quick job on mediocre projects, you know?
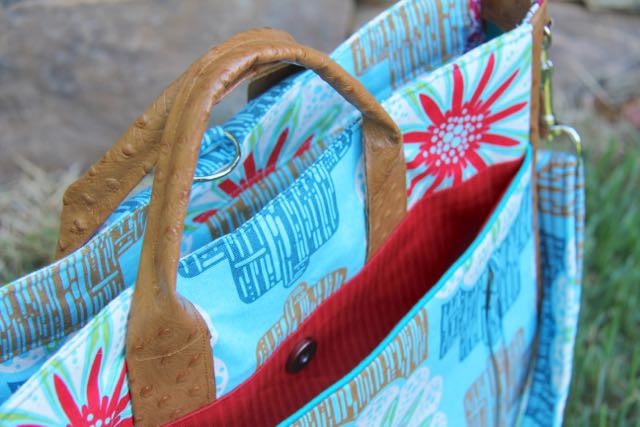
Anyway, so I spent a lot of time scrolling through the #supertote and #supertotepattern hastags, looking at how folks had combined their fabrics. And I read through the instructions (whaaaaat!) multiple times, to really understand where each piece when and what it would look like at the end. So when it came time to cut the front pocket and the bag front, I dumped my original fabric selection and chose this Field Study linen/cotton blend by Anna Maria Horner instead–but NOT for the bag front. Since the bag front pattern piece is technically BEHIND the outer pocket, I used a mid-weight herringbone twill in tomato for that, along with cutting a full lining for the front pocket. With the fabric I saved, I was able to fussy cut the upper bag front and the front pocket to make the print across that segment seamless–so it looks like the pocket front is one with the bag front, and you just get a peek of the tomato lining.
The front pocket is piped with purchased piping that I had on hand, and there’s a magnetic snap on the pocket upper edge–again, Anna makes that optional in the instructions, but mag snaps are EASY once you figure out how to install them, and they make everything look so professional.
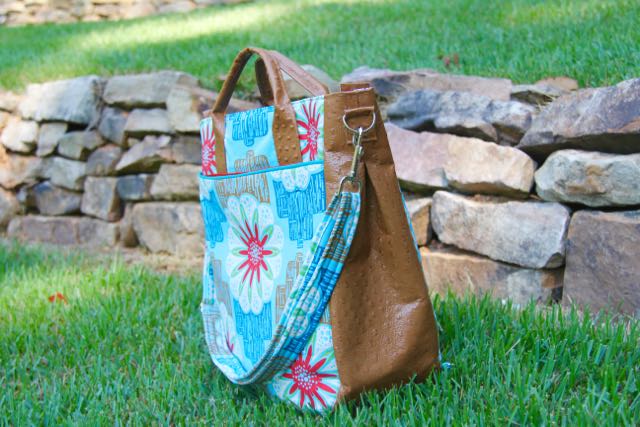
PROFESSIONAL is the big word here–I really wanted this bag to look like it was made professionally. Not run-of-the-mill store bought, but really well-made. I decided to cut into a hoarded piece of leather that I bought a few years ago from Leather Unlimited (which is near us in Georgia but ships all over). This isn’t an expensive or fancy piece of leather–it’s real cow hide, but it’s split grain, which means it was split through the center of the hide to make it thinner, and then embossed with an ostrich (??) pebbling. Bing thinner made it very easy to work with, and gives it a weight like a heavy canvas. I still interfaced it, though, and I don’t know if that’s legit–I used the same Shape Flex woven interfacing as I used for the remainder of the bag on the leather, which gives it nice shape and stiffness but still allows it to feel supple, like real hide.
I loooooove the leather. It raises the results of this bag to a whole ‘nother level, and makes me feel like a zillion dollars when I carry it. I chose NOT to use the leather for the strap, since I knew I’d be carrying this on our travels and wanted something super soft and padded, but did use it for as many accents as I could. So simple to work with–I used the same needle (I would have switched to a leather needle for full-grain, but this was thin enough that I didn’t need it) and changed to a matching thread every time I sewed the leather. I changed thread a LOT for this bag, and IT WAS SO WORTH IT. I can’t encourage you to take the extra 4 seconds to switch your thread strongly enough–it totally raises your game.
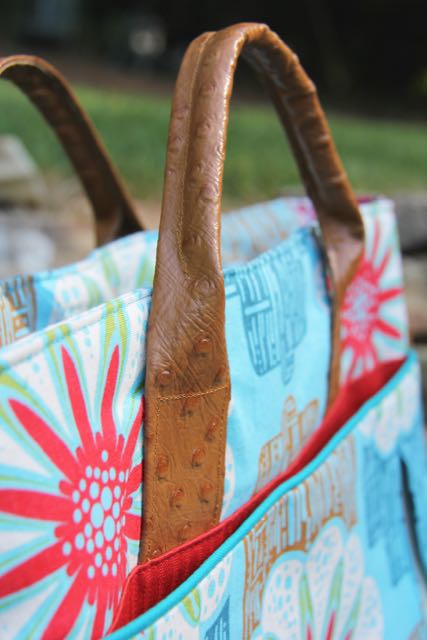
The rest of the bag is interfaced with ByAnnie’s Soft and Stable. It’s expensive, I admit, but the shaping and softness combined with ease of sewing really can’t be beat. This whole bag stands on its own with no trouble whatsoever, but is soft and pliable and was a snap to sew, even through all the layers. I really needed that support for the weight of the leather, and don’t regret the $15ish I spent on the product–of which I only used about $5 worth, because I have loads leftover for another bag.
The handles are leather, too, adding to the weight but taking the visual impact to WHOA. I shortened them significantly from the pattern, which calls for a 10″ drop–I like to hang my bag on my elbow, so I wanted a shorter drop for that, and I don’t want the handles to droop when I carry it as a crossbody or a backpack, so a shorter handle was in order. I cut these to 15″ length and spaced them 4″ apart instead of 4.5″ as in the pattern, which gives about a 6″ drop. It’s perfect. It won’t go over my shoulder, but fits fabulously on my elbow, and the handles don’t stab me in the back of the neck when I wear the bag as a backpack.
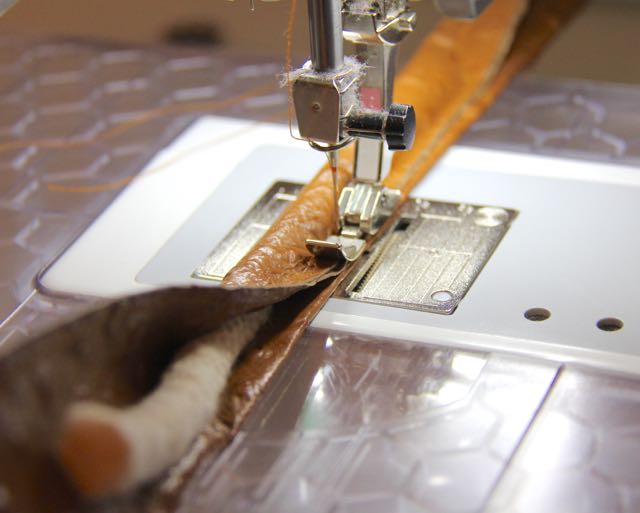
To make the handles, I stuffed in some 3/8″ piping along 7″ of the leather, centered, and then sewed along the edge. Because leather doesn’t fray, I didn’t need to turn under the edges, which makes it SO EASY to work with–but in this case, I did turn under 3/8″ along one side to avoid having the raw edges bite into my hands too much. I wanted it as comfortable as I could get it. I sewed along the edge to trap the piping, then angled the seam off a little at the raw piping edges to make sure it doesn’t slip or shift. The lower edge of the handle was left flat to insert into the front and back of the bag.
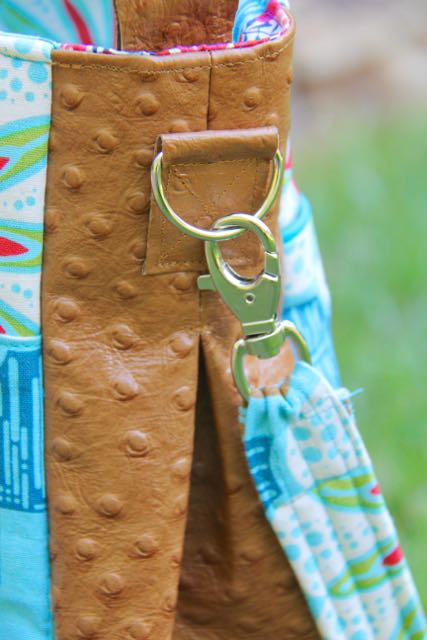
To add the strap and make this a convertible bag, I added D-rings at both gussets, right over the pleat. Just a small flat square of leather for these, with an X stitched through the center. The hooks are from Hancock, which is going out of business. I added the rings BEFORE the lining so I could work with fewer layers and get them really centered, then followed Anna’s suggestion to stitch a bar tack at the lower edge of the pleat THROUGH the lining to anchor it in place. Worked like a charm.
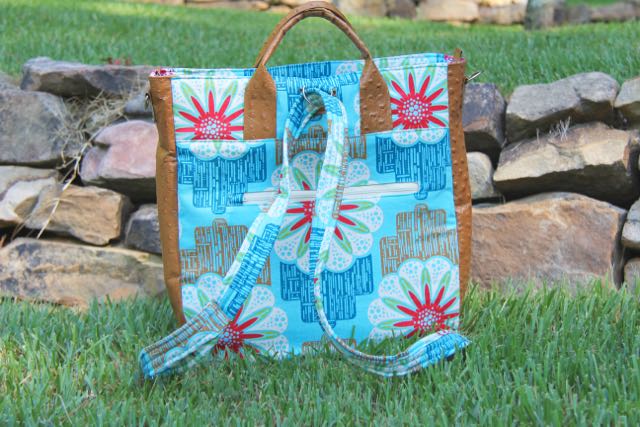
I also added a D-ring at center back and two more, one at each lower curved corner, so I can carry this as a backpack. I’ve seen a few different folks post this idea, and particularly eyed the placement used by Bumblebee Bliss Bags for the lower rings. Everyone I saw put their upper ring really low, which I was worried would make the bag sag too much, so mine’s a little higher. I will say that if I have a single disappointment, it’s that it STILL sags a bit, and if I did it over, I’d put the upper ring in the seam between the bag front and the lining, which would pull the front UP and support the weight of the backpack a little better.
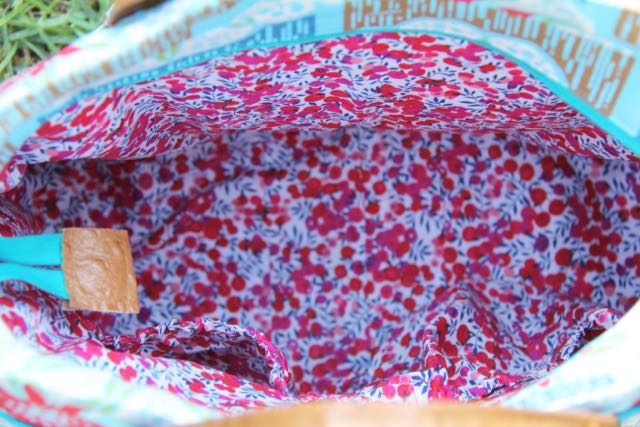
The lining itself is Liberty of London lawn. Yep. LIBERTY LINING. Because I am done hoarding my favorite fabrics. I want to use them and see them ALL THE TIME. So I busted out the very last of my favorite Liberty print for this project and I AM SO GLAD I DID. It’s amazing, and I get to see it every day for the rest of my life because I AM NEVER PUTTING THIS BAG DOWN.
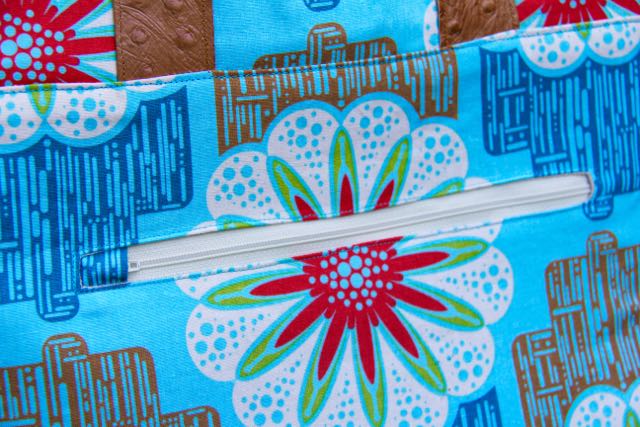
The only other major change I made to the pattern was to install a number of pockets before I started sewing. All of these went into the individual pieces after they’d been cut but BEFORE assembly began. This one is on the back of the bag, and is designed to be a hidden passport pocket, where we can keep important documents in a way that’s un-pickpocketable. Because it’s on the back, I didn’t want to get stabbed with the zipper pull, so I added a little cover at one end of the inset zipper opening to tuck the pull inside when the zipper is closed. It’s just a small square of folded fabric tucked behind the opening before the zipper is topstitched in place. I love how it takes the look up a level!
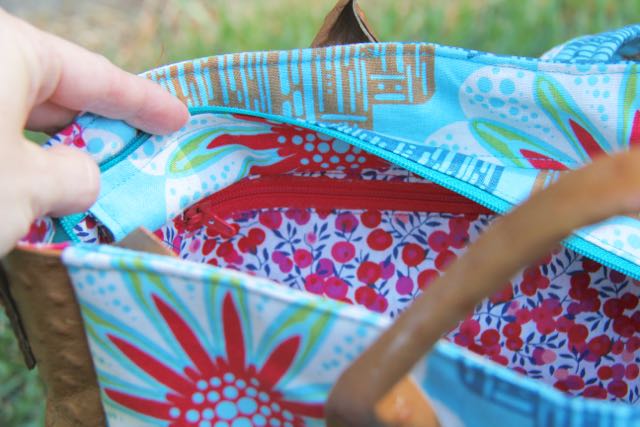
There’s another hidden zipper on the interior. This one didn’t need to be hidden necessarily, but it’s super high up and hides behind the recessed zipper fabric a bit. I did that deliberately because the Liberty is so lightweight and I didn’t want it to sag when things were in it–so I needed the upper edge to be caught in the seam above it. I could have cut a bigger pocket for behind the zipper, but instead I just made the pocket really high up. I like that I can put my coin purse in here and it would be tough to lose or have fall out or misplace.
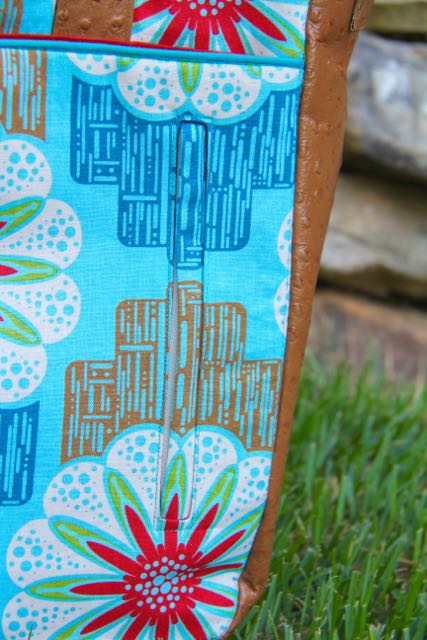
The final zipper seems to be everyone’s favorite–and it’s totally mine. It’s another inset zipper (made the same way I make them in my Pockets e-Book), but instead of just covering the zipper pull, I covered the whole thing. And I cut the fabric that covers it carefully to match the pattern exactly, so this one’s nearly invisible. I got the idea because I didn’t want to break up the pattern on the fabric of the front pocket, but I really wanted a zippered pocket here. So I thought I could do a VERTICAL pocket with a zipper, and put it off to the side. The hidden part came after I covered the other zipper pull, and is SO FUN.
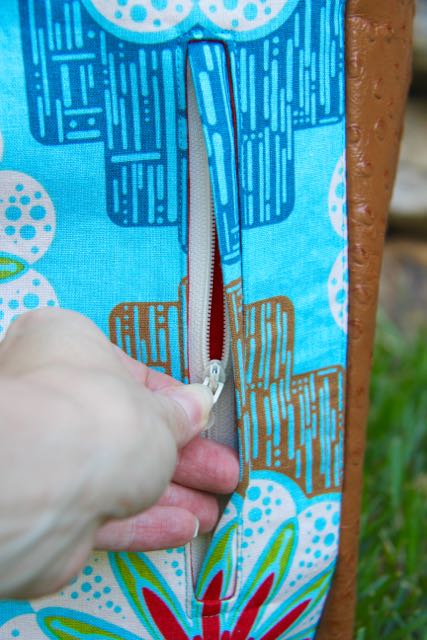
The lining on this pocket is also the same as the front pocket, this great tomato herringbone twill. Yum! It’s easy to access and I like that it goes sideways. It’s just the right size for gum or keys.
I failed to follow all of Anna’s directions, but it actually worked out for the pockets. I fused all my Shape Flex to my pieces, but then didn’t see that I was supposed to baste my Soft and Stable–and then when I got ready to add the gusset, was all, “Um, when do I use my fancy interfacing?” I added it AFTER the pockets, but that worked out because it supports the pockets from behind without interfering with them. Boom!
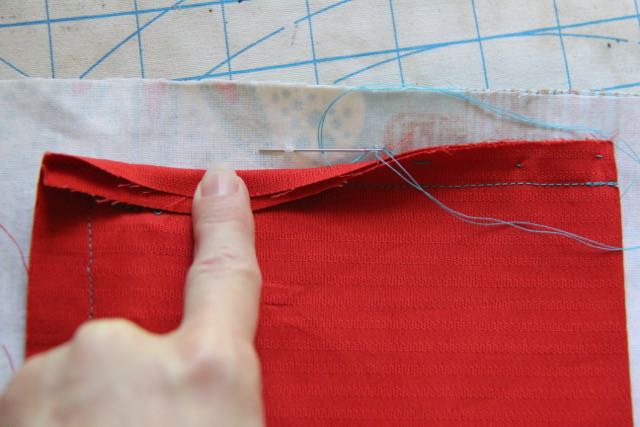
I also took the time to baste the upper edge of my vertical pocket to the front pocket piece, so it won’t sag inside, either. I really hate when the weight of what I put IN my bag makes my bag less pretty, and this step took so little time. Totally worth it.
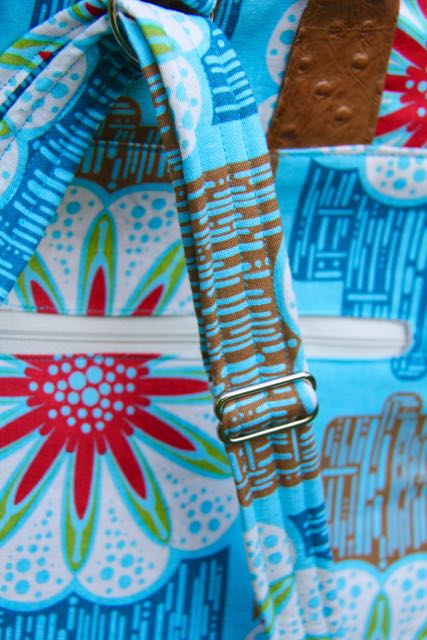
The strap was made of a 50″ piece of the fabric from the body of the bag, and has another piece of Soft and Stable inside to make it padded and a little stiffer. It still slides through the buckle just fine, but it’s really comfortable. I left the bottom 4-5″ on each end with NO interfacing, so they were easier to sew around the hooks.

Watch my IG for notes on how this bag performs on the road!! I’m already carrying it everywhere and have used it in every configuration except backpack. I can’t wait to take it all over on our walking tours and be totally comfortable. Thank you, Anna, for an awesome pattern–one of the few I can honestly say I see myself making multiple times again!

Samina
June 29, 2016 at 1:35 pmThat’s gorgeous, Deborah! I love how the leather really ups the couture-ness (it’s a word now!) of the bag. I really like Anna’s designs. I’ve got a copy of her book & think it’s fantastic. I’ve got to work up the time & courage to tackle one of the bags in her tote.
Samina
June 29, 2016 at 4:40 pmIn her *book*, not tote. Fingers & brains got disconnected there!
Melissa
June 30, 2016 at 9:29 amI love your version of the Super Tote! All of your pocket additions make me want to do the same!
Ruth
June 30, 2016 at 2:00 pmLove it! This is such a cute bag, and I love what you did with the pockets.
PsychicSewerKathleen
July 10, 2016 at 11:41 amI love this super tote too! Beautiful fabric inside and out and that leather! WOW. I don’t often stop to read blog postings on bags but yours caught my eye and I just had to know more about it.
Sarah
August 1, 2016 at 9:58 amWhat a beautiful bag! I love how you made the lining on the front the contrast rather than the pocket outer.
Have you ever worked with waxed canvas? I’m thinking of making a home-to-work bag out of this pattern (have made diaper bag previously – great pattern!), and the waxed canvas seems to be a great option. I’m wondering if it needs interfacing or not. Any feel on this?