I am guilty of collecting all the fun sewing toys. In my defense, I DO use them, and (for the most part) only buy them when I have a specific project I’m dreaming up. But as a result, I am very, very aware of exactly how saturated the sewing market is with gadgets, notions, accessories, and goodies to add to your collection–and store, and shame ourselves if we don’t use them.
So I’m here with my boiled-down list of absolute ESSENTIAL sewing tools, the ones I keep near my right hand at all times and can always find, even in the messiest mess possible, because I use them constantly. These tools could be a complete collection for someone who is just starting out sewing, and last a very, very long time with few additions, even when your skills advance well into the realm of “completely handmade wardrobe.”
All of these tools are mentioned in both Stitch By Stitch (my best-selling learn to sew book, available at your local library) AND as part of the How To Sew video series, where I’ve turned every part of Stitch By Stitch into step-by-step videos to guide you to sew the best clothes of your life in our friendly community. Learn more about The League here:
Want to hear more?
This blog post is also available as a podcast episode! Listen with the player below:
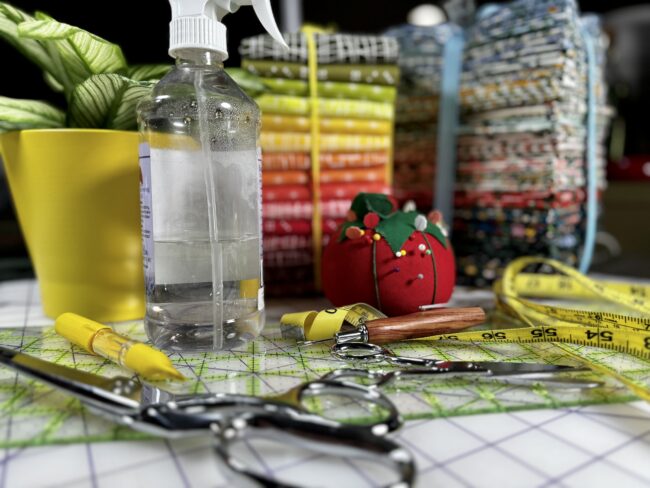
Your Essential Sewing Tool Kit
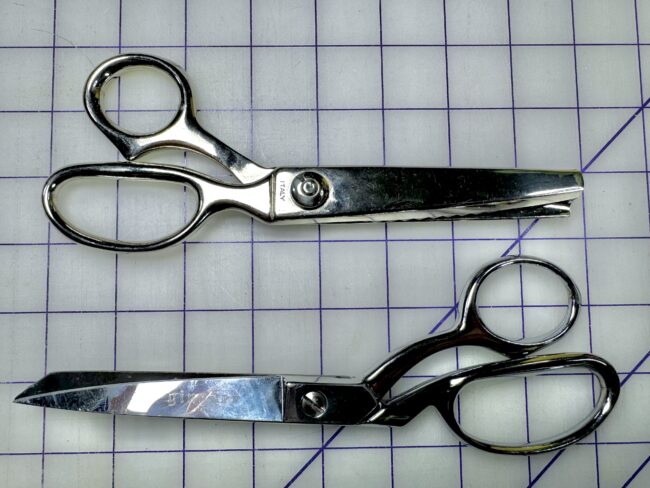
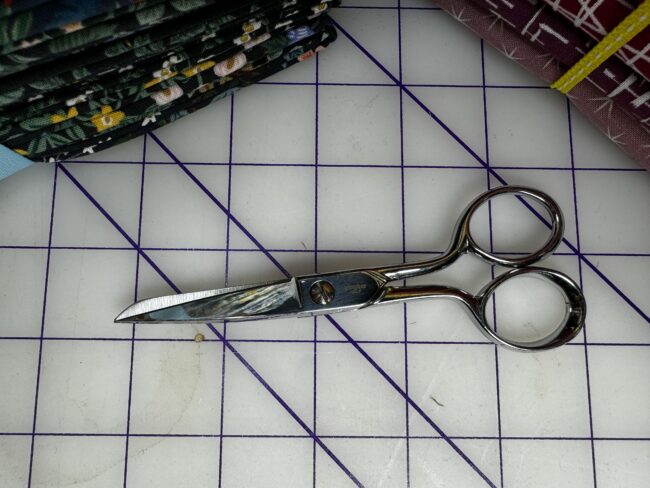
Number 1: Bent-handled metal sewing shears
This is my absolute MUST for every sewing kit: an excellent pair of bent-handled sewing shears. I said, way back in 2010 in Stitch By Stitch (and I’ve been quoted ever since), that sewing is 90% cutting and 50% pressing, which makes it -40% stitching. The good news is that means the SEWING part of sewing can be your very weakest skill and you can still get GREAT results if you cut well and press often.
I’m going to double down on that statement: even if your iron is the cheapest option on the shelf, if your cutting is clean and accurate, you’re going to get good results.
I recommend BENT-HANDLED shears. This means that the blade of the scissor moves away from the handle at an angle that allows it to lie flat on the cutting surface. This way, you can stabilize the shears as you cut for more control and cleaner cut edges.
I also recommend that you purchase an all-metal pair of shears. These are heavier, yes, but that allows the weight of the blade itself to do some of the work, so while they weigh more than an aluminum-and-plastic pair, they reduce the amount of effort and hand fatigue–which, if you have a hereditary tendency toward arthritic joints, can offer genuine relief. Metal shears also come with a screw assembly that can be taken apart to allow the blade (only the upper, since the lower doesn’t actually do the cutting) to be sharpened–you can do that yourself with a whetstone or send them out to be sharpened at a local chef supply (I hear rumors you can do this at Williams-Sonoma) or a mail-away service.
I adore my Gingher shears, which are made in Germany. I am confident my children and grandchildren will continue to use them, so while the price point can seem high, they’re worth every penny. If I were investing in sewing tools with nothing to start, I would buy these shears and spend $25 on a thrift store sewing machine, hands down.
You should know that shears come in both right-handed and left-handed versions, which is awesome for you lefties! You may also consider investing in a pair of pinking shears if you are just starting out and don’t want to purchase an overlocker/serger (although you don’t need them, at all, and can easily overcast your edges to prevent them from unraveling).
See more about my very favorite shears in this older video from the Video Sewing Glossary series on my YouTube channel:
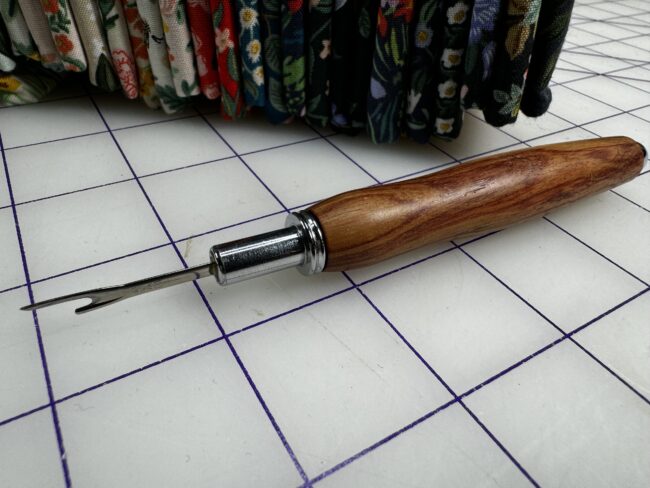
Number 2: Quality seam ripper
We will ALL at some point have to remove the stitches we put in. There are ways to do this that don’t involve a seam ripper, but there’s also a reason this gadget was invented: it’s the right tool for the job.
The classic blue-handled seam ripper that comes in most “learn to sew” kits is perfectly fine. I have three or four floating around. What you ought to know, however, is that the U-shaped blade in the heart of the seam ripper–the only part of the tool that’s actually sharp and designed to cut threads–can become dull over time, and cannot be sharpened. For that reason, the blue-handled version is a disposable tool which will need to be replaced periodically, on the same schedule as an air filter.
You can also, if you have a gift opportunity in your future, ask a loved one to present you with a really lovely, quality seam ripper. I have a beautiful one, hand-turned by a local artisan with a polished wood handle, that my husband put in my stocking one year at Christmas. The blade is removable, which means it can be reversed for storage to protect the point, as well as replaced when the blade gets dull. It feels weighty and luxurious in my palm, and reminds me as I take out those stitches that I am loved for more than what I make.
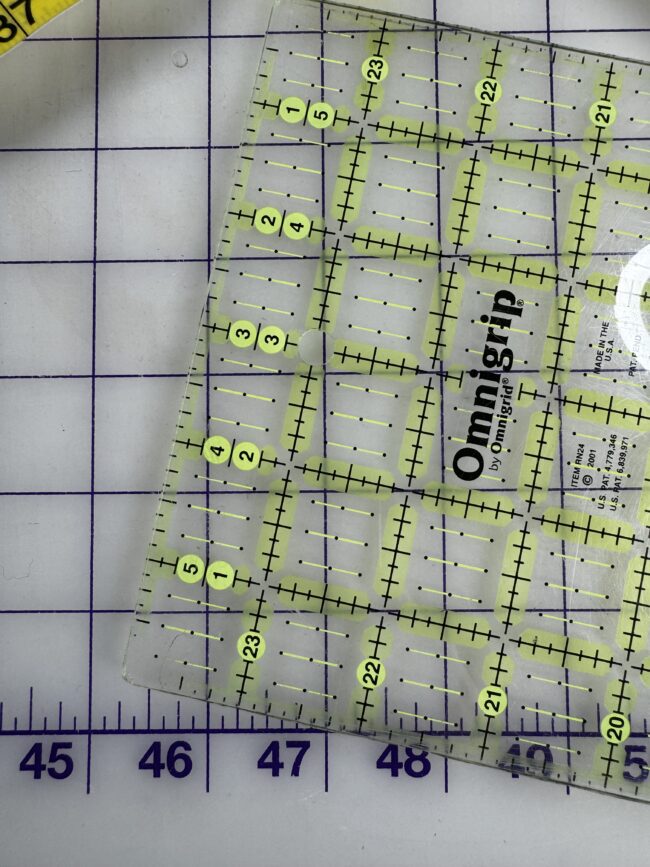
I discovered the clear acrylic ruler when I first began quilting, and I cannot thank quilters enough for this invention. It allows me to see through what I’m cutting to ensure accuracy, but it’s also versatile enough to be my one-and-only-ruler, if necessary.
My favorite is the 6″ x 24″ Omnigrip ruler. This has the dimensions that make it the most helpful to me for rotary cutting (both for quilting and for sewing knit fabrics, which can be cut suuuuuper accurately with a rotary cutter), and is lightweight enough to move around my work table without getting in the way but NOT so small that I lose it under a pattern page or a cut of fabric. Alternately, I also like the 6″ x 6″ ruler a lot, for the same reasons, although I tend to “misplace” it more often.
If you’re really serious about garment sewing but NOT as interested in quilting, I love the Pattern Master Ruler, which not only has a curve for armholes and necklines but also has markings for 45-degree bias to make sewing bias tape easier PLUS the curved edge has measurements that allow me to “walk” the neckline edge of a knit tee to calculate the length of binding (for example). A nearly-as-good but less expensive option is the Styling Design Ruler.
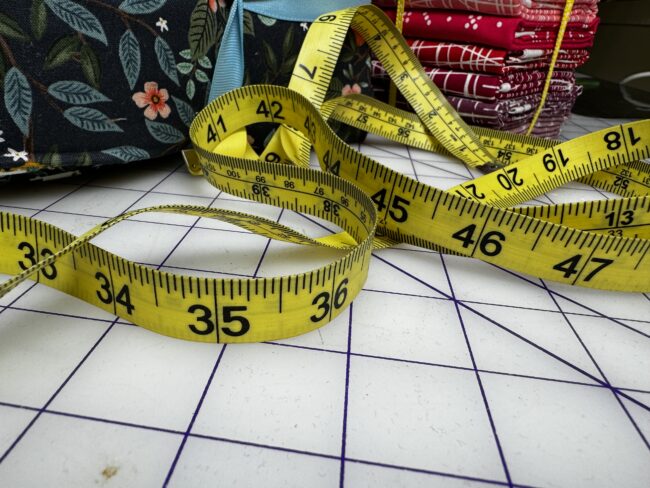
Number 4: Flexible measuring tape
A straight ruler, though, is the absolute wrong choice for measuring our soft bodies. For that, we need a soft ruler which will mold to our shape for the most accuracy. I love a classic fiberglass flexible measuring tape for this, although they also make canvas ones (be sure to verify the measurements on any vintage measuring tape to be sure the canvas hasn’t stretched out).
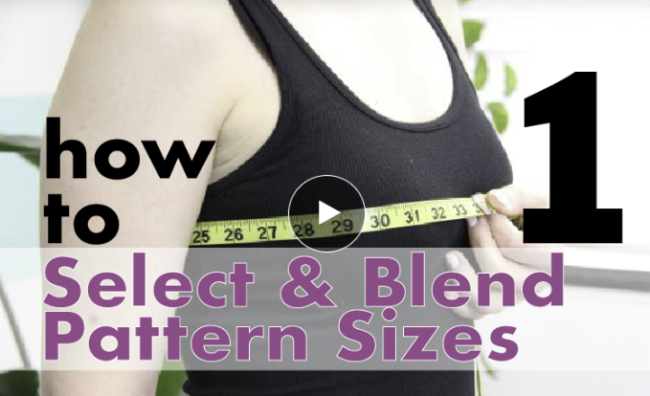
You may also like a measuring tape that anchors to itself, so you’re not forced to hold the end and then guess whether you’re within 1/4″ or not. I like this one, which locks into place so you can have a free hand to jot down your results. If you’re struggling with getting good results from taking your measurements, or you’re unsure how to do that properly, there’s a video series at The League to walk you through it called How To Select & Blend Pattern Sizes, complete with an episode about taking your measurements!
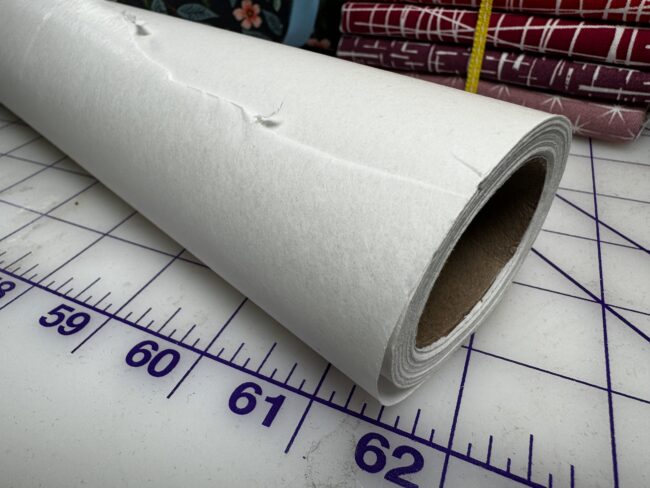
Number 5: Tracing paper
For years, I didn’t trace my sewing patterns, just cut the pattern tissue from inside the McCall’s envelope and called it a day. As I began using more and more indie patterns, though, which were printed on stiffer paper (either at home and assembled as tiled designs or sent off to a printer like PDF Plotting.com), I began to trace my patterns so I could use thinner paper and preserve the accuracy of my cuts. Over time, I also began tracing the initial pattern pieces so I could more easily make modifications and variations without needed to re-print the original pattern (like when I made three variations of each of the How To Sew Clothes designs for the video series at The League).
My one and only go-to tool for this purpose is medical exam table tracing paper. I tried Swedish tracing paper and other specialty products but went through them so quickly that I didn’t feel the effort of tracing was saving me much investment. With medical exam table paper, I buy a case of twelve rolls once every three years and that’s it. I never have guilt if I make a mistake or change my mind (I can recycle all the pattern pieces when I finish); it folds up to next to nothing so I can store patterns in file folders without needed a lot of space; and it’s simple to slice through as well as SEE through, which helps make my pattern cutting more accurate.
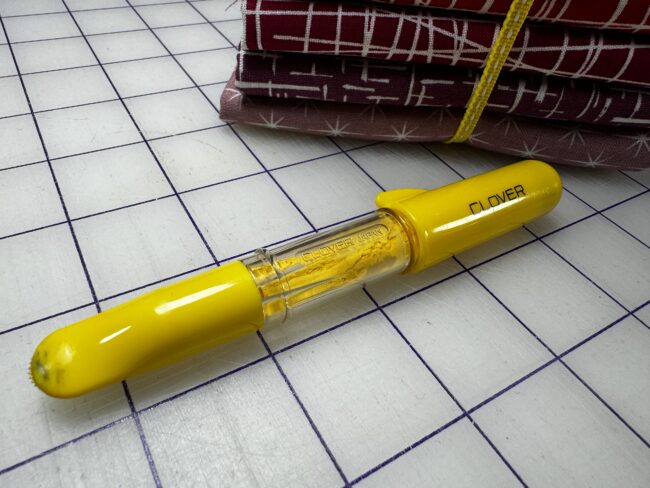
Number 6: Chalk wheel
I used to call this generic “marking tool,” because there are SO many, and on occasion one really will be the right tool for A job but not EVERY job. Now, I just suggest my all-time favorite: the chalk wheel marking tool from Clover. My grandmother used a lead pencil, I have boxes of proper tailor’s chalk, and I still on occasion will reach for a water-soluble ink pen, but on the whole there are very, very few sewing tasks where the chalk wheel marking tool isn’t the right choice.
It’s a tube of powdered chalk (which is replaceable) attached to a toothed wheel that, when rolled along the surface of fabric, deposits a very thin line of chalk. It’s small enough that it can handle tight curves and corners, it comes in various colors so you can get good contrast, and it brushes away easily but not TOO easily so it lasts as long as you want while you sew.
See other marking tools and learn best practices from this video on my YouTube channel:
Number 7: Small snips
In addition to a great pair of shears, the tool I reach for endlessly is a great pair of small snips. These are more delicate scissors that are very sharp with a fine point, for trimming thread ends and snipping seam allowances and trimming corners at hemlines. I love my Gingher 5″ snips, which have replaced my gold stork snips (which I still take with me for knitting projects).
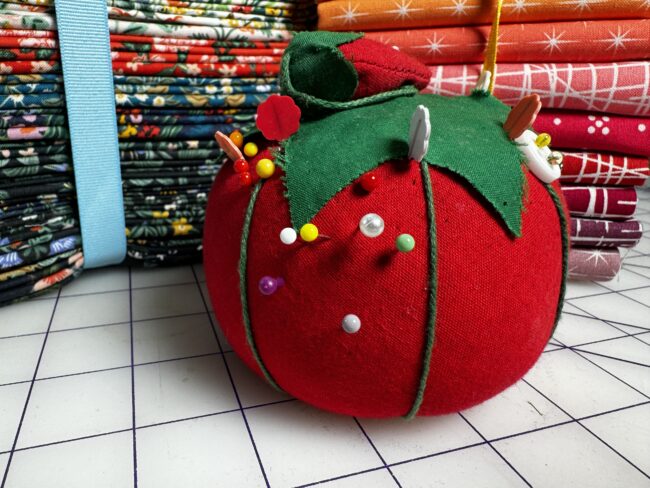
Number 8: Good pins & a place to put them
There are A LOT of pins on the market. Any of them will do. Seriously. I like glass head pins, because I can iron over them without melting, but you pick what you like. There was a trend for a while about using NO pins to sew, and I’m here to tell you: pins are not about rules, pins are about confidence, and you should use exactly as many pins as you need to feel confident in your sewing. Need 10,000 pins for that? Use 10,000. Need zero? Use zero.
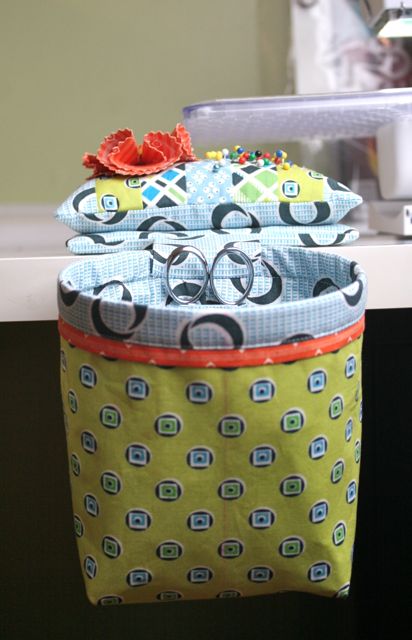
You’ll also need a place to store your pins. My very favorite pin cushion is the Curry Bungalow Thread Catcher, one I made from a kit I bought online that also includes a scrap bucket for thread trimmings, small bits of fabric, and empty thread spools. It’s truly invaluable. I also love my magnetic pin cushion, which makes it simple to clear the floor of dropped pins. Any pin cushion with sentimental value ranks very high, as does the classic tomato pin cushion (complete with emery strawberry, which can be used to sharpen and clean pins between uses).
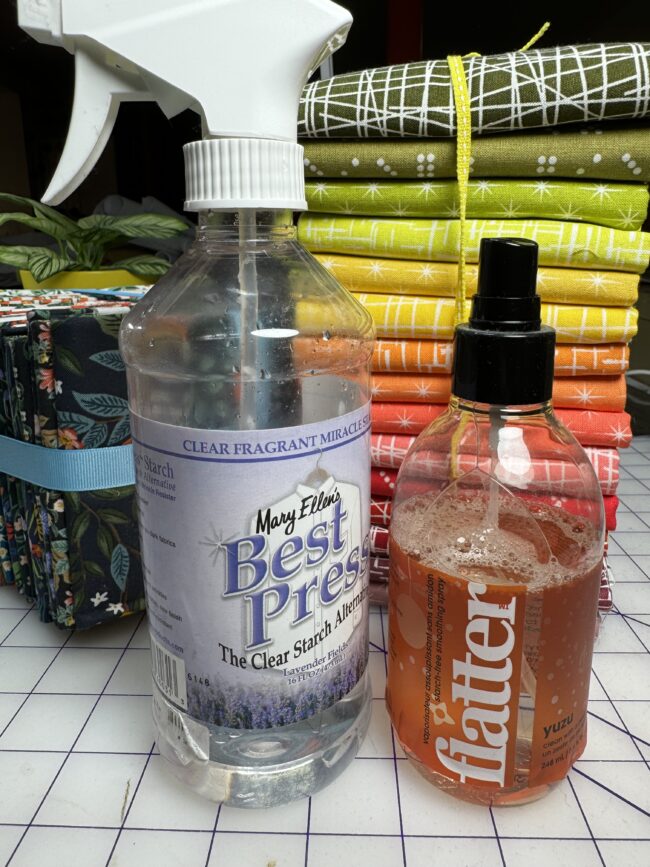
Number 9: Stabilizing spray
This is another tool I’ve discovered with thanks to quilting. Starch, back in the day, was something people who ironed their clothes used to make them stiffer–none of those words sound like much fun to me, so starch wasn’t something I cared to use. Stabilizer spray, however, is NOT starch. It’s a liquid that gives more body to fabric so it has a stiffer hand and is easier to manage at the machine.
In particular, I like Best Press brand. They make an unscented that’s available in large refill bottles, so I use the same sprayer over and over with less plastic consumption. It’s a very lightweight spray with zero residue that prevents all kinds of fabrics, ranging from rayons to knits to lace to loosely-woven cottons, from getting off-grain while cutting, from moving around at the sewing machine, and from distorting while stitching. Fabrics that in the past I might have avoided I am much more likely to sew with, simply because they’re better behaved after a spritz of this spray–and since soft fabrics with lots of drape are my favorites to wear, this has become indispensable to my sewing.
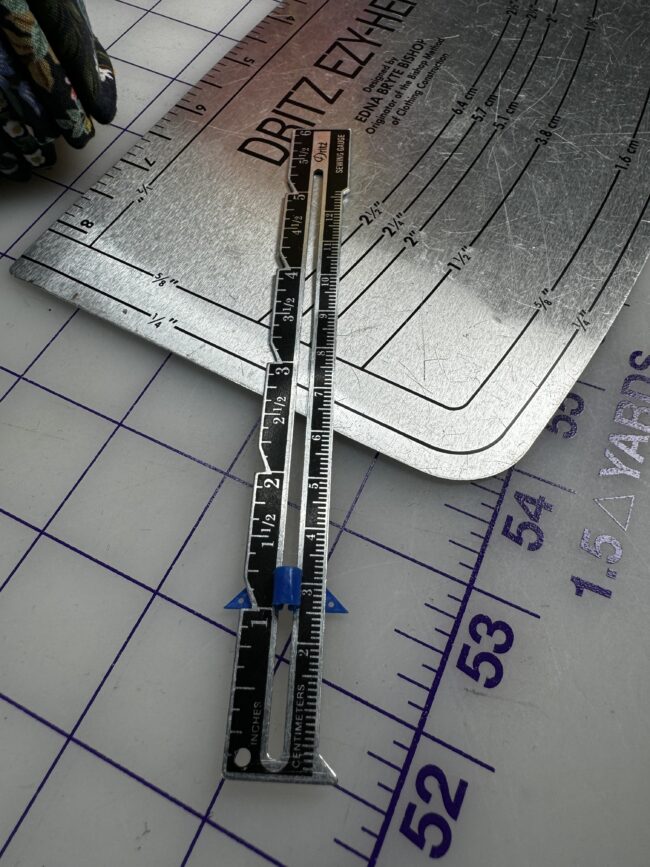
BONUS Number 10: Seam gauge & hem gauge
Here’s a little bonus, too: the seam gauge. This tool came in nearly every “learn to sew” starter kit I ever saw, and many new-to-sewing folks disregarded it, because how much use could a 6″ ruler with notches on it be? But it’s actually super great to have around for creating consistency across sewing projects. Measuring a hem right at the ironing board and making sure it’s even all the way around? This is the tool. Making sure you press the raw edge of your bias tape over equally? This guy can get it done. Marking a seam allowance on a pattern piece? Here’s your buddy.
Along the same lines, the Ezy-Hem is a thin, aluminum measuring tool that allows you to press directly on top of it, reflecting the heat back up through the fabric in a way that makes a very crisp fold. It’s inexpensive, has one straight edge and one curved edge, and at 9″ x 5″ is a great size if you want to invest in only ONE measuring tool, but think the clear acrylic ruler might be too unwieldy to store in your current work space.
Buying On A Budget
I’ve linked to all of these items so you can find them new, and I encourage you to also seek out your local quilt shop or sewing supply store–buying from small shops near you not only makes sure they stay around, but it introduces you to the community of folks who sew near you, and gives you that resource for when you have questions.
Additionally, consider browsing second-hand shops, thrift stores, flea markets, estate sales, and even eBay for sewing supplies! You’ll be SHOCKED at how many great items you can find that were released back into the wild and are looking for a new home.
What a fantastic guide on Your 9 Most Important Everyday Sewing Tools! This list covers all the essentials for both beginners and seasoned sewists. I especially love the emphasis on tools that enhance both efficiency and creativity. Having the right tools makes such a difference in the sewing experience, much like how quality materials impact industries such as yarn export! Can’t wait to see what others find most useful from this list! Great job putting this together! https://srtradelink.in/


1 Comment
Ashish Agrawal
October 8, 2024 at 5:28 amWhat a fantastic guide on Your 9 Most Important Everyday Sewing Tools! This list covers all the essentials for both beginners and seasoned sewists. I especially love the emphasis on tools that enhance both efficiency and creativity. Having the right tools makes such a difference in the sewing experience, much like how quality materials impact industries such as yarn export! Can’t wait to see what others find most useful from this list! Great job putting this together!
https://srtradelink.in/