
This is my fourth version of the Sew Together Bag.
Previously this year, I made THREE of these puppies as pencil pouches for my children for school. Act of motherly loving self-sacrifice, it was.

I don’t think this fourth version will be my last, but I’m not sure yet–the Sew Together Bag is a super versatile shape and great for storage, so I’d like to consider a second for travel. Then I could have one for skin care and one for makeup, or maybe another for hair accessories. (As a side note, it’s a great organizer for hand sewing or small purse items, so it makes a really charming companion for the Côte d’Azur Tote–you could make a matching set!)
While I’d love to keep making more and more of these, there are a billion different bag designs out there to try, and I am curious if another shape might be better for my purposes (like the Stash and Dash from ByAnnie’s)? It’s less that I need a lot of room than that I want to adequately and efficiently organize my things, and choosing the right bag or combination of bags seems pretty key.
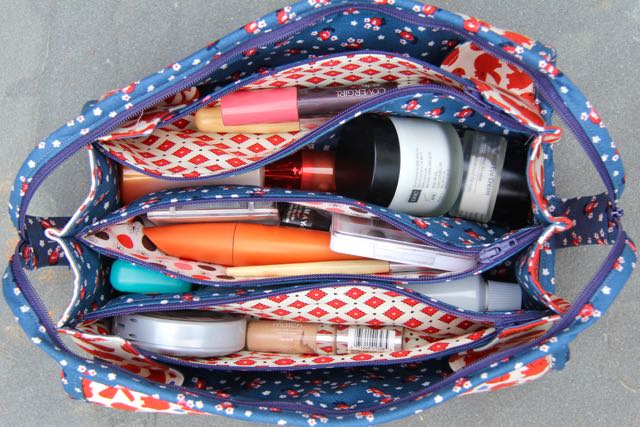
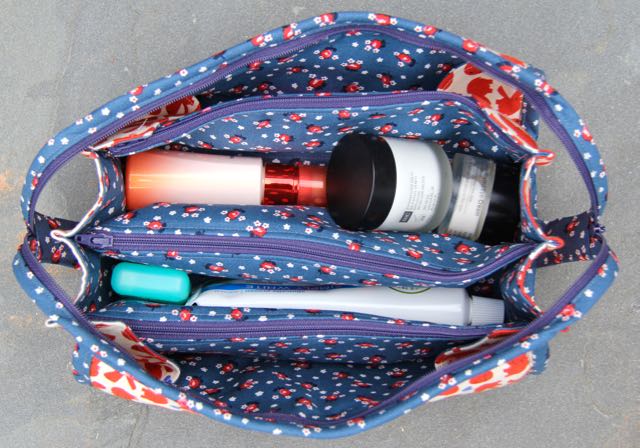
Despite having quite a lot of storage space, the Sew Together Bag doesn’t seem to do especially well with ROUND containers, and when I load in all my (zillions and zillions of) moisturizers–because even in a humid climate, I still have to fight against dry skin like a valiant warrior–I didn’t have a ton of space for toothbrush and toothpaste and cosmetics. They would all go IN, but the bag didn’t want to zip UP. So I want to have at least one other bag. I don’t find it redundant to have two cosmetics bags, one for skin care and one for makeup, since I frequently go without makeup altogether; it’s just as simple, too, to leave the skin care bag in the bathroom at a hotel while someone else is showering, and have a separate (smaller) bag for cosmetics at the hotel desk & mirror combo to free up sink space. Says the woman who often shares her hotel room with at least four other people.
So odds are pretty good that I’ll make another bag, but I’m still on the fence about whether the Sew Together Bag will be it. In particular, I want to select the right one for the fabrics I’ve chosen–the Sew Together isn’t great for directional fabrics (despite the fact that three of the four I’ve made use a directional as the main print–see the school bags above), and is especially poor as a choice for a large-scale print, since you just won’t see that much of it. So I’m undecided about whether the next piece of my travel set will be a second of these or not.
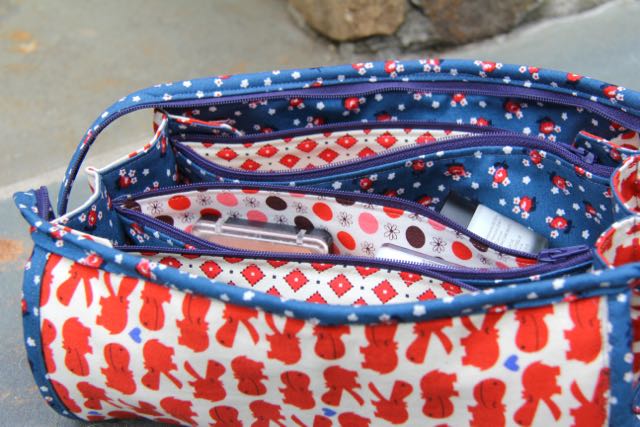
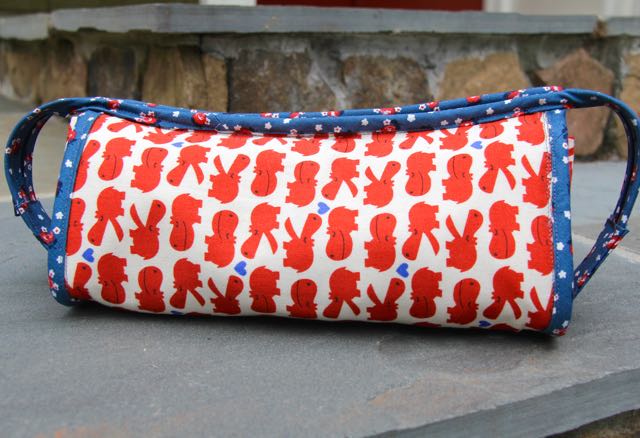
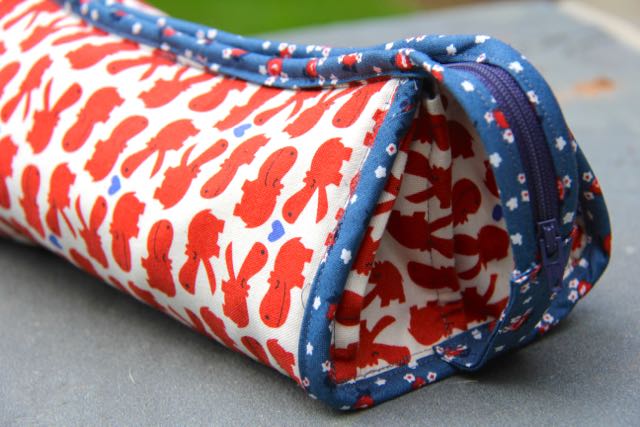
I never in a billion years would have guessed that these Denyse Schmidt prints would work so well with this Japanese cotton/linen hippo canvas, but they do. And while I have seen lots and lots (and LOTS) of examples of folks making their Sew Together from a wide range of prints–sometimes every piece is a different fabric, including a patchwork outer shell–I really like keeping the palette quite limited and making a slightly more streamlined look. So the inner pockets have different prints, but the larger compartments and all the lining are all the same navy floral, and the outer fabric and the two end pieces are all the hippos. Even the bias tape is the same as the lining fabric. Clean and classic.
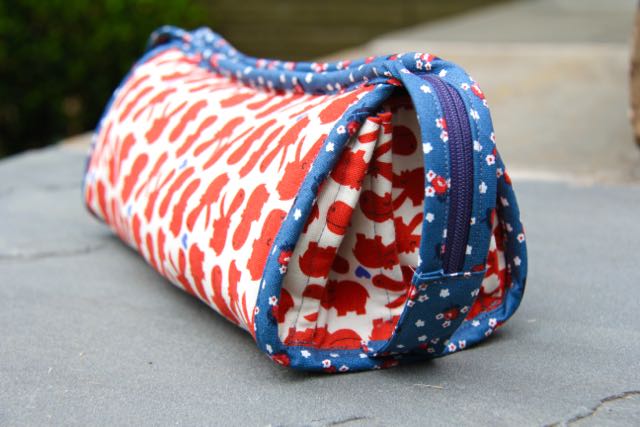
My dear friend Karen mentioned on IG that this bag is sometimes called the “Sew Forever” bag, and that made me laugh. So: some notes on the pattern. There are some places in the pattern instructions where I would have added more information–for example, the outer panel must be quilted BEFORE it’s cut, but that’s not super clear from the cutting list, which instructs you to “add embellishments before cutting.” Since I don’t think of quilting as an embellishment, I did not interpret that to mean I should quilt first (even though I ought to have known better), and for someone who isn’t an experienced quilter or bag maker, that could lead to mistakes. I cut all four of these at the same time, and had to re-cut ALL of them in order to quilt three. In fact, you’ll notice this one isn’t quilted at ALL, because I couldn’t find the rest of the fabric and didn’t want to bother to look. Note: it looks great not quilted, and since I still included the batting, is plenty sturdy.
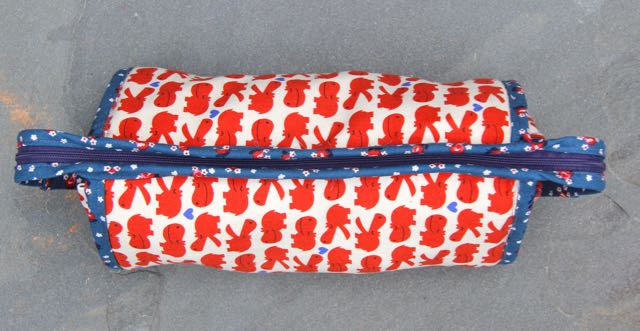
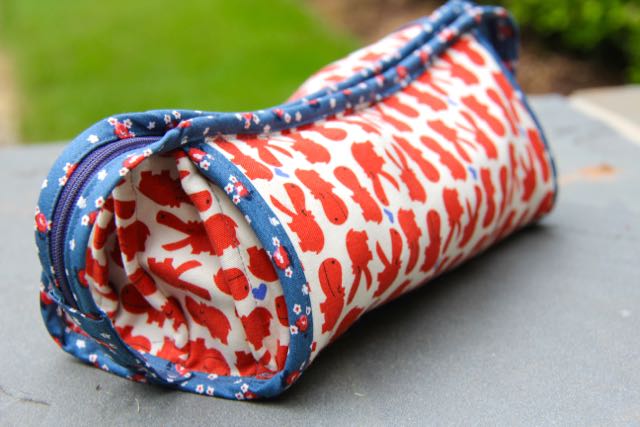
I adore the way the top zipper wraps around and becomes handles on the ends (some folks omit this step, but WHY??? it’s darling!), but the instructions for sewing the bias tape seem like they would be virtually impossible for anyone who hasn’t bound a quilt previously. In fact, the technical writing of the instructions is so difficult to interpret, even for experienced seamstresses, that the pattern has become something of a legend–it is, in many ways, the ultimate swap gift, because the design itself is so ingenious, but folks are intimidated by the instructions and avoid sewing it up themselves. Thank goodness for the genius ladies of the Quilt Barn, whose tutorial guided me through the tricky spots, some of which had me snarling in frustration (the illustrations for inserting the zippers do not make clear which panel attaches to which zipper at which point or how the two pocket panels relate to the lining panel; and the binding step with the zipper really needs an image to go along with it, for example).
Using their tutorial really cleared up the confusion, and once you’ve made one, these bags go together very quickly and easily–honest, they seriously do. And with all the zippers and pockets, they make a great presentation as a gift. The question of whether it’s a “good” pattern, when the design is awesome but the technical writing is awkward, is a conversation I’m willing to have at another time–I think there are some ideas to unpack there. But there is no arguing that this finished product is good-looking and impressive, and that it’s a satisfying project to complete. Addictive, even.
My only final quibble is the visible basting stitches here, but that’s largely my fault: when attaching the lining to the outer panel, I basted rather than zigzagged the edges, which the instructions clearly say to do, and now I can see my basting past my bias tape. It would irritate me on a gift, but works just fine for a cosmetics pouch that I expect will get a lot of abuse.
On the whole, I love the bags I’ve made and have found them to be roomy, great to look at, and fun to sew. Is there another great, small bag that I should consider for carrying small items when traveling? And what are your thoughts on patterns that make a great finished product but have difficult instructions and technical writing?
Melissa Irvin
September 3, 2015 at 11:14 amI’m so glad I read your review. I’m fairly new to sewing and have thought about trying this pattern. I think I will hold off for now. I need easy to read and understand instructions.
Deborah
September 4, 2015 at 10:45 amTake a peek at the link to the sew-along–it really is incredibly detailed, and I think an invaluable aid to sewing this bag (there are others, too, but the one I linked here is the most widely viewed and the one I personally used). With guidance, this is a completely sew-able bag, no question, if you’re willing to work in stages and do a section at a time. It can be a fun challenge!
Joanne
September 22, 2015 at 4:09 pmHi Melissa,
I am a fan of Deborahs. I have her books and have followed her website. Her instructions are great. I encourage you to try one of her books for easy instructions and tutorials she created for beginner sewists.
Deborah
September 22, 2015 at 5:02 pmOh, thanks so much for saying that, Joanne! I appreciate your kind words about my books, too–I really did work hard to make them accessible for even folks who’ve never touched a sewing machine before. I want folks to LOVE to sew! 🙂
Samina
September 3, 2015 at 12:12 pmThe pattern’s not for me, either, if the instructions are so confusing. It’s a nice looking bag & it’s a bit disappointing that the directions would be so convoluted. I’ll check out the sew along’s instructions, though. They might be worth holding on to.
Deborah
September 4, 2015 at 10:45 amTotally bookmark that link–with the sew-along, I think it’s an interesting and visually impressive piece of sewing. Once you do the first one, each successive one goes more quickly, and they make excellent gifts!
Diane
September 4, 2015 at 10:08 amOctober 15. That’s all I’m saying.
Deborah
September 4, 2015 at 10:42 amHaha!! Noted.
iHanna
September 14, 2015 at 10:42 amMy mom made me the sew together bag and I adore it, I need to blog mine and all of her examples they are so awesome with all the different fabrics. I use mine for pens on the go!
Yours are beautiful, thanks for sharing!
Deborah
September 14, 2015 at 12:09 pmI just made another for my mom’s birthday and didn’t take photos! They’re pretty addictive, right? Would love to see yours!
Co-Ordinating Sew Together Bag with Corduroy Bias Tape | Whipstitch
October 26, 2015 at 11:50 am[…] days digging around in the bottom of a cavernous purse searching for something. Enter: a matching Sew Together Bag with the same wide-wale corduroy as the bias […]