
Well, we’re only one day into this thing, but so far, so good! Some before-and-afters for y’all:
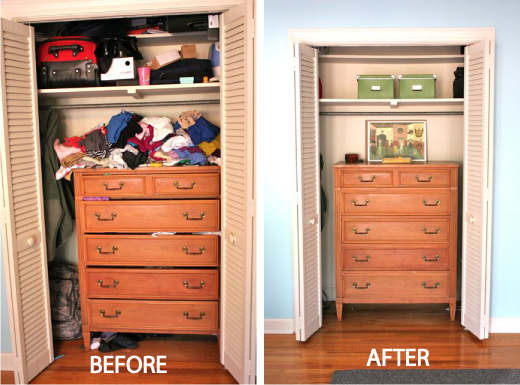
The small closet in the master, which houses my dresser along with less-frequently-used items like dressy clothes and my husband’s uniforms.
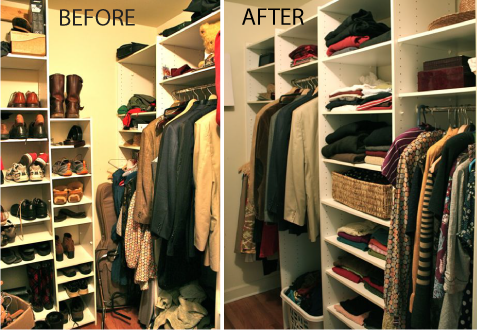 The larger master closet, which needed a great deal more work and planning than the small one. The angle isn’t perfect in these before-and-after shots, but you get the general idea.
I mentioned that I’d broken down the process of gutting and organizing these closets into five steps:
- evaluate and assess
- purge and empty
- re-design
- organize and store
- maintain
I’m sure there are any number of how-to books on the market that say largely the same thing–this isn’t rocket surgery, after all. It’s cleaning out the closet. But to me, having a kind of road map helped me be more deliberate and conscious of what I was doing, helped me to avoid working solely on instinct so that I can be consistent as I work through each room and project, and gives me some guidelines to follow if I find myself waffling on a decision. So let’s break down these TWO closets–I pulled a double!–using the steps that I made up myself, which means it’s not exactly a statistically significant analysis, but hey! It’s fun to look at someone who’s in way worse shape than you, right? Which explains the tacky talk show craze of the early 90s.
Smaller Master Closet
Step 1: Evaluate and assess
We certainly feel grateful to have this smaller, “extra” closet in our room. This house was built in 1968, well before the his-and-hers closet movement, so we’re not entirely sure why we have it, but we sure as shootin’ are gonna use it. Cleaning this one out didn’t take a whole mess of work–it wasn’t necessary to make many changes, just to focus on tidying. The space is adequate for our needs, so we aren’t looking for additional hanging bar space or anything like that. I suppose if I wanted to really get in and move things around I’d eliminate the hang rod and place two smaller rods perpendicular to the closet opening, one left and one right, so that we wouldn’t have a bar going across the opening. But I don’t mind the bar enough to get in and do something significant here when the existing space is working for us. My evaluation was that we just needed to CLEAN it out, rather than actually re-arrange it.
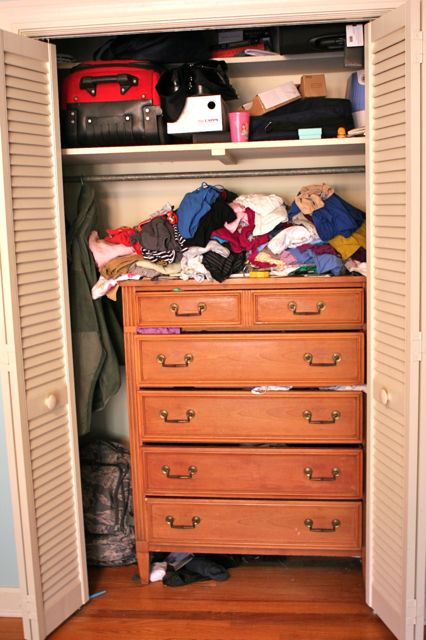 Step 2: Purge and empty
First, every single item from the top of the dresser came out and went on the bed. There was a ton of stuff UNDER all these “folded” clothes–vintage children’s books that are too fragile for the children to play with, a matryshoka doll that we got at the estate sale for this house, tons of coins from other countries brought back from our travels, shark teeth, baby teeth, a vinyl copy of Cinderella. Yeah. ALL of it came out and we started with a clean top. Next, the drawers were emptied, right on top of the giant pile of clothes on the bed. That way, I could sort through each of the “categories” and re-fold before putting things away. I’m efficient, y’all. I have a plan.
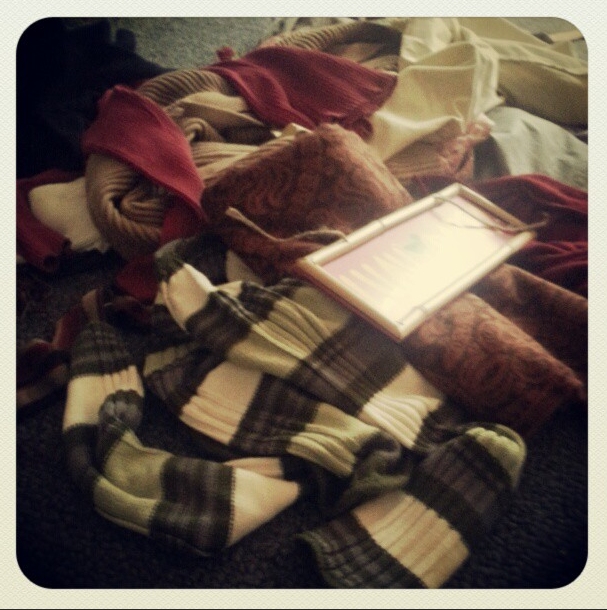
image via Instagram
As I folded, I sorted out the things I didn’t want to keep/that weren’t nice any longer/that didn’t fit/that I knew for a stone cold fact I hadn’t worn in the past year. I also edited out anything that was no longer age-appropriate (just because one can wear short-shorts doesn’t mean one should wear short-shorts–particularly if you bought them when you got your first real job out of college 15 years ago). All those things went into garbage bags to be donated (after being catalogued*). At this point, all the drawers and the dresser top were empty; I left the shelves for later.
Step 3: Re-design
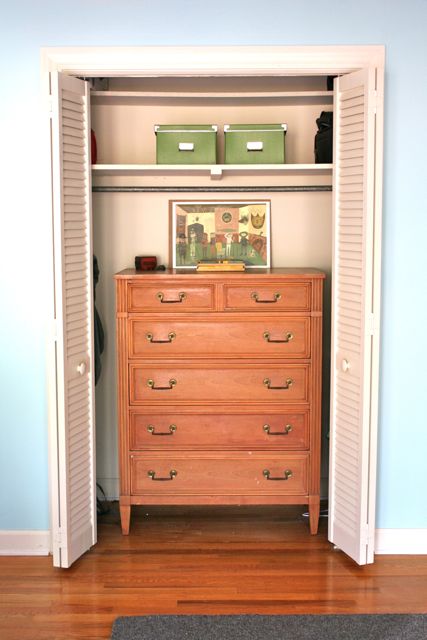
I opted not to re-design the space entirely, although I did scooch the dresser over and re-center it between the doors. I also determined NOT to use the dresser top for storage of any kind, but rather to reserve it for display.
Step 4: Organize and store
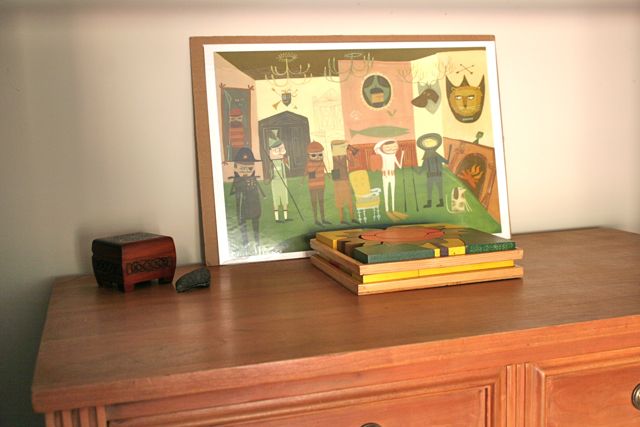
The dresser top got back the small wooden container full of baby teeth and foreign coins, along with the half of a Megalodon tooth I personally unearthed a few years ago on one of the Georgia barrier islands (it’s a funny story–I’ll tell you sometime, remind me). I also put the wooden puzzles I was given as a child when I lived in Germany–one or two small pieces are in a box in the boy’s room, so those will turn up as we work through all the other closets.
At this point, the shelves were purged, too. They actually didn’t have as much on them as it looked–mostly suitcases and my Bernina embroidery module, and lots of empty, wasted space at the far left and right, above the hanging clothes. I pushed the suitcases off to the far sides, and removed all the books and hanging clothes bags and random bits of curtain hardware–all of those have other homes now.
I stood back and realized there was a LOT of empty space above the dresser, which I didn’t like. Not only was it not terribly appealing, it was just begging to have CRAP plopped on it in the very near future. I really would love to find a gorgeous art glass bowl of alarming proportions to put on the shelf between the suitcases and directly above the dresser, but I have been working to spend as close to nothing on this project as possible, so I opted to rescue some Ikea boxes from the basement and add those, instead. Bonus: they double as concealed storage for any little bits and pieces that don’t have homes.
The wall space directly above the dresser was barren, too, but I was reading a comment from Karen who pointed out that she has piles of art floating around and no wall to place it on–me, too! This print, by Matte Stephens, was down in the basement, crying for a home. It’s not matted or framed, just propped up on a piece of cardboard for now, but I love-love-love how the colors work with this room and how it pulls the “closet” away from being just a closet and makes it a space I actually want to spend time in and maintain.
Which brings us to:
Step 5: Maintain
Should be pretty straight-forward for this closet. I’ve tried to supply myself with some analysis of the things I discarded so that I can avoid falling into the same habits. Like, Don’t buy knit tees at Target, they only wear out and get donated. Or, You have more long-sleeved tee shirts than you think, and clearly that 3/4 sleeve thing has run its course, since you tossed all those tops out. Also, I need more stretchy exercise pants, and they’d better go all the way to my shoes with a break, because the short ones did NOT make the cut. This closet seems to be less about changing my storage habits than about updating my shopping habits–which was an unexpected insight from this project.
This is now officially, BTW, the longest how-I-cleaned-my-closet post EVER. So I think I’ll break off and save the larger closet for tomorrow. Plus, I’m pooped! This took long enough that I’m not sure I can tackle another today, so making this two posts is just as well. Vital stats:
- total time invested (2 closets): 6 hours
- total donated bags: 4.5
- total donated garments: 78
- total donated shoes: 7 pair
- total cost (2 closets): $11
*Under current tax guidelines, donations up to $500 do not need to be itemized; donations of $500 and over MUST be itemized, giving both a detailed description and a dollar value for EACH item in the donation. We use the cheat sheet from ItsDeductible (a TurboTax product) to make the whole thing easier–their dollar values are also usually higher than the ones I would assign, but do note that tax law no longer allows you to donate ANY item that can’t be described as being in “good” condition–“fair” condition items are no longer deductible.
Rachel at Stitched in Color
December 27, 2012 at 5:08 pmWhat a great start!
Deborah
December 28, 2012 at 11:51 amThe satisfaction of getting in there and getting this whole ball rolling is WAY more satisfying than I expected. Whee!
Kim
December 29, 2012 at 9:18 amYou are inspiring all of us to do better in our closets. We just moved, and even though we purged MASSIVELY as we packed, there is shockingly more to be purged and organized.
carole
January 2, 2013 at 10:31 pmI have a question about the everyday underarm handbag in your new book, which I am making. Can you email me or can i ask here?
THANKS