
Full disclaimer: this was not a DIY project. But we did gut this bathroom down to the studs and make it our own. Which, in its own way, is pretty exciting.
This is the Jack-and-Jill bath that the children share. The two younger girls are in one room, our boy in the other, with the bath in between. It is the world’s smallest ever Jack-and-Jill, measuring just 6 feet by 8 feet. SMALL. And when we first bought this house, it felt a whole lot smaller.

You know how when you fantasize about doing a home renovation, you have that one project that sticks out and you say, “Until XYZ is done, I will not be able to draw breath or function in this house”? No? Just me and my mom, then. After we closed on the house–possibly even the very next day–my mother drove over to stay for a week and help me do some projects to make the house ready for us to move in. Primarily, that involved painting every surface in sight, but there was one other task necessary before we could be at peace in this house: removing the sliding doors from the shower in the Jack-and-Jill bathroom. That’s right, people: a bath measuring just 8 feet by 6 feet had SLIDING GLASS SHOWER DOORS in addition to a FULL-SIZE vanity and a door from one bedroom that was designed to swing IN. Which meant that if you entered through the door in the picture above, you would stand by the vanity, close that door, rotate in place to move past the toilet, be less than an arm’s length from the shower doors, and have to maneuver past a WHOLE OTHER DOOR to pass through the bathroom. It felt like a coffin. A pretty, pretty white-and-blue bow-covered coffin.
It was so bad that these are literally the only photos I have of the bathroom before the sliding shower doors were removed:
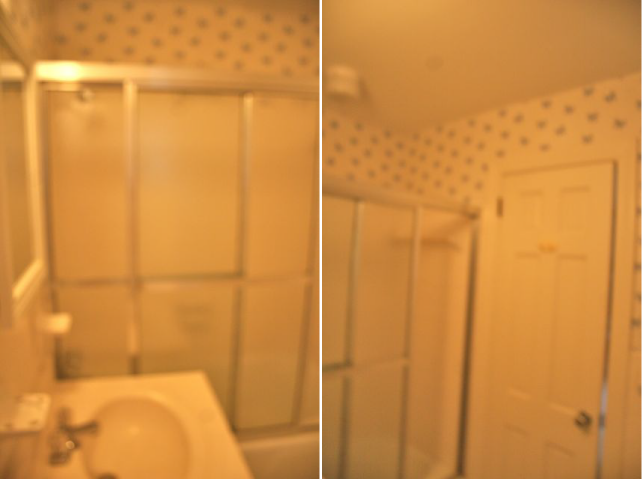
You know why they’re so blurry? Because the DOORS MADE ME CRY. They had to go, and they had to go first.
No, wait, OK, I have one other with the doors in it:
See how the door from our boy’s room opens INTO the bath? And the vanity is, like, RIGHT THERE when it does? And what you can’t see in this is that the toilet is juuuust out of frame in that lower right corner. You had less than 3 square feet of space to function in this bathroom, and it felt like the walls were closing in. Fortunately, removing shower doors is pretty quick and easy.
So Mom and I got on that already, back in Dec 2011 before we even moved in:
Pop! Doors like these are literally glued to the tile in nearly every home. There are some screws, usually along the sides, and possibly into the tub wall, but only a few. We got them out with a standard screwdriver–not even a drill–and then used the same screwdriver to pry the doors away from the glue and pop them off the wall. Now, they’re glass, so they weigh a ton, but the metal frame doesn’t, and each door can be slid out of the frame and carried away.
The glue took a little more work to get off, but some elbow grease and it was done! No biggie. Look how messy, though:
The tub is the original from when the house was built in 1968, and is a cast iron enameled model, so I wanted to keep it. We used a scratch-resistant scrubby product to get all the glue off, and the whole thing cleaned right up.
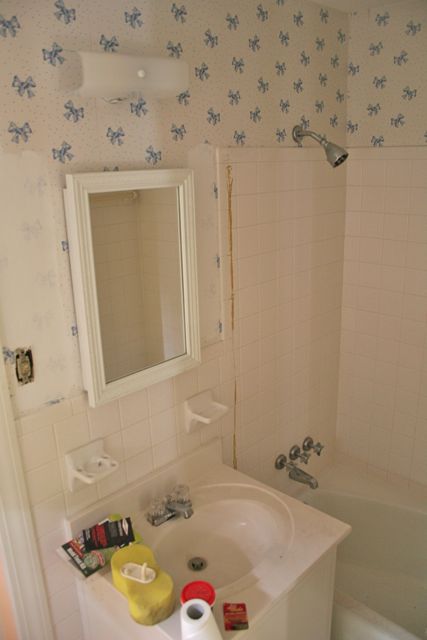
From there, I did a little bit of priming over the wallpaper, but honestly we painted every single room in this entire house, and this one wasn’t a big priority, so I bailed part way through and this bathroom looked pretty half-done for…well, about a year. Seriously.
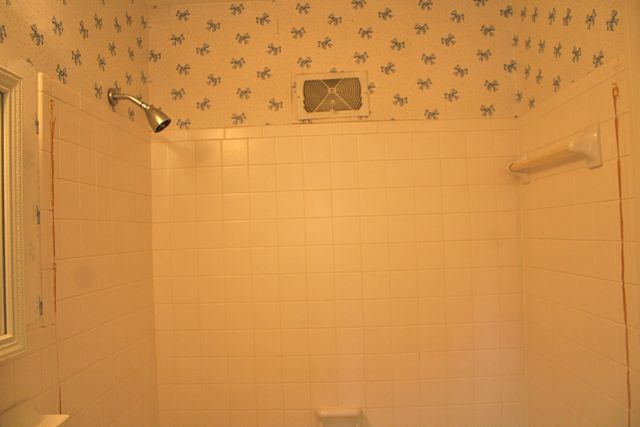
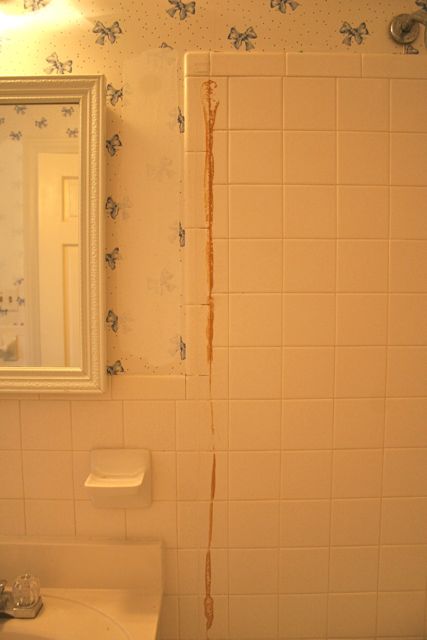
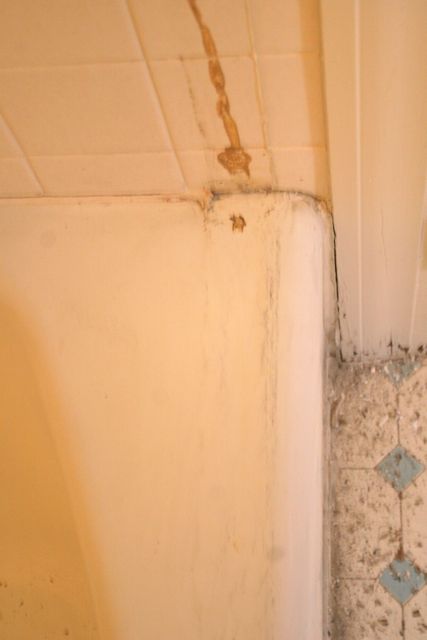
The kids used it, but over time, we began to suspect there was some moisture trapped in the walls. We had seen some old water damage when we pulled out the carpet in the bedroom that shares a wall with the shower, where the floorboards of the hardwoods had gotten a bit black. And my husband has a mold sensitivity that seemed to get worse gradually after we moved in. We knew there had been water at some point behind the wall, and worried that we’d need to tear out all the drywall to figure out what the issue was.
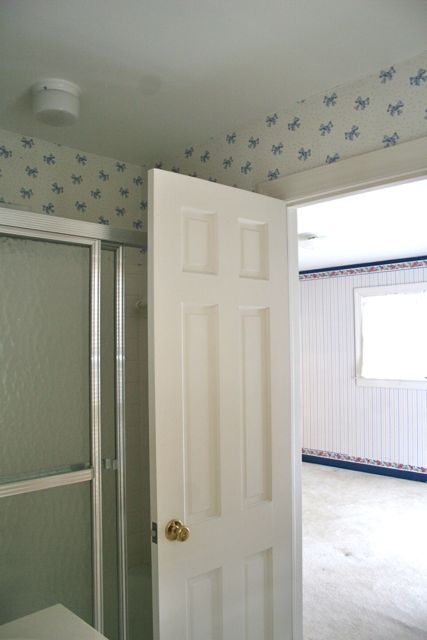
We also hated that door. This one:
Good grief, WHY is it opening INTO the bathroom? We decided to make it a pocket door so that we could recover the swing space, and since the pocket door would slide into the wall where we suspected some moisture issues, and since we wanted to replace the tile anyway, suddenly we found ourselves in the midst of an entire to-the-studs gut of this bathroom.
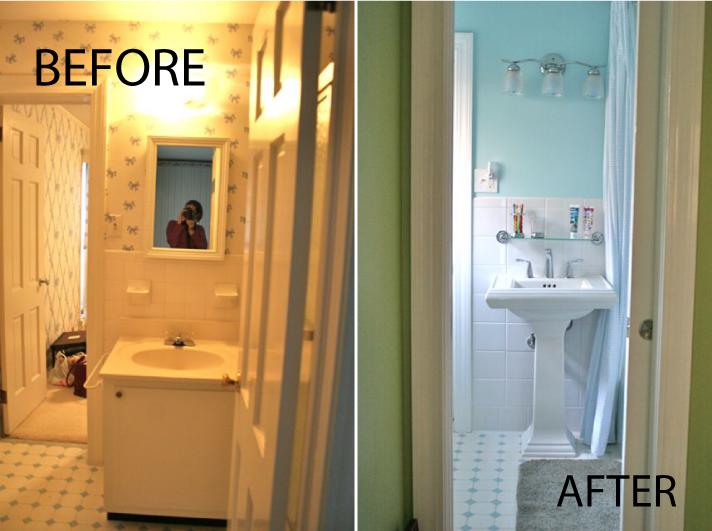
I loved the tub, so that stayed, and the toilet is pretty standard-issue, so keeping those fixtures saved some cash. We also love the floors, which are the original tile from when the house was built. But all the wall tile, the sink and vanity, and the fixtures got changed and renewed. Plus, we ripped out that wallpaper–eeek! twelve-year-old-girl-circa-1984!–and painted, instead.
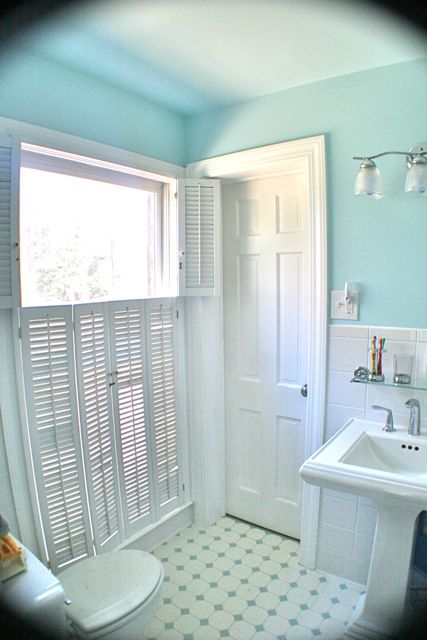
Now, we have this to enjoy:
We chose a paint color as close to the accent tile in the floor as we could get, and had them paint the walls and the ceiling the same shade to make the room seem as tall as possible. All the trim was painted bright white, rather than the buttermilk color it was previously–that alone made a giant difference. The vanity came out and was replaced with a pedestal sink to gain some floor space. All the tile came out and was replaced with a jumbo-sized white glossy tile to enlarge the bath visually–it’s a little bit of a trick, but it does make the whole place seem larger to have larger tile on the walls.
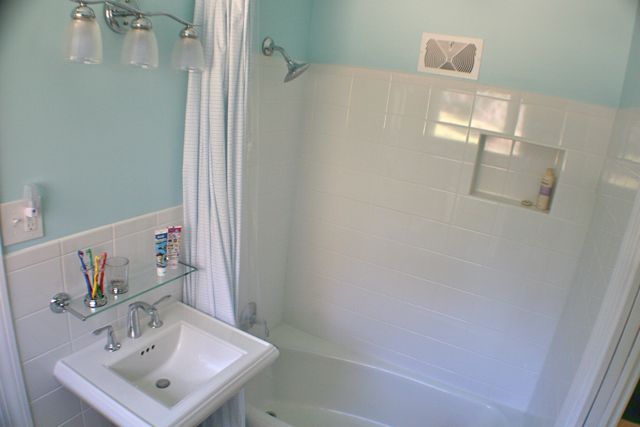
Rather than the shower doors, I sewed up a shower curtain in a white-and-blue print, to keep the visual clutter to an absolute minimum in here. There just isn’t enough space to break it up by adding another color, and keeping the palette light and tight has helped make everyone feel a lot less claustrophobic.
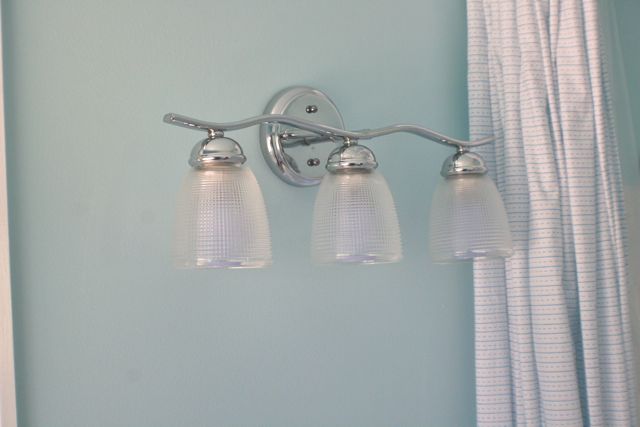
Most of the fixtures are off the rack at Lowe’s or Home Depot, including this light fixture. We still haven’t found the right mirror, but I expect we’ll go for something rectangular and framed in black, for a little wall pop under the light.
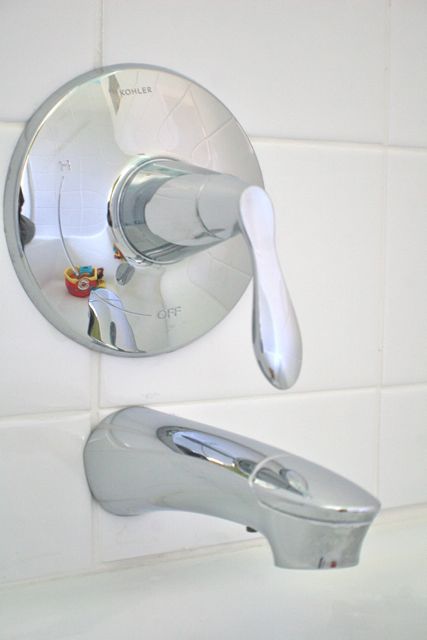
My husband picked out all the fixtures his very own self while I was out of town. I love the clean, modern lines that are still classic–I like to avoid “trying too hard” syndrome, which can be so easy to fall into.
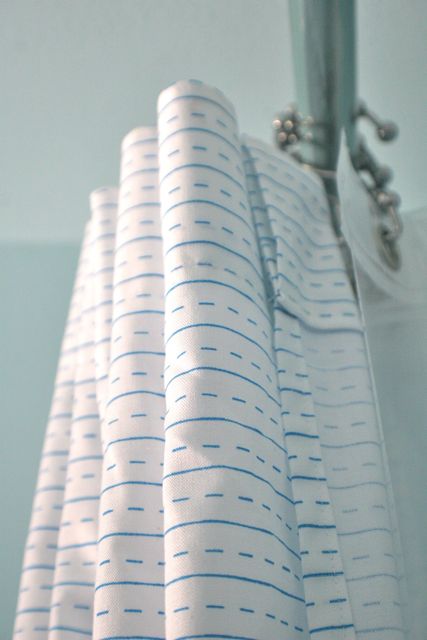
We always hang our shower curtain waaaaaaay up close next to the ceiling–you can see here that it’s a scant 5″ or so below the paint. I love how much taller that makes the whole room look, and that I get to see a ton more of the fabric than I would otherwise. This print is based on children’s writing tablets, and is both subtle and nostalgic–easy pick (that only took three months of deciding).
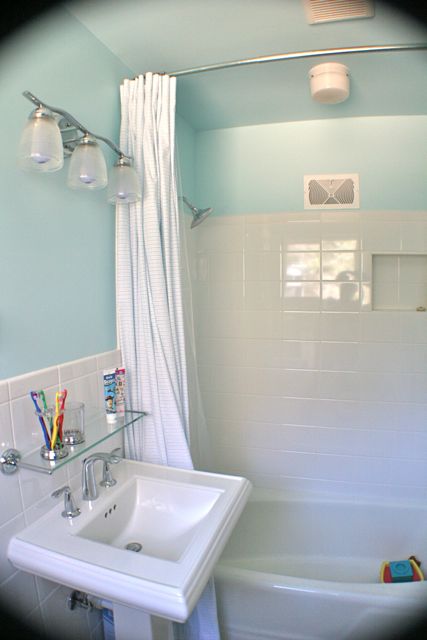
As for towel racks, in the old bathroom you would walk into one on the side of the vanity on the way through the door, and that sucked. I thought we’d put a double on the back of the swing door, but it turns out it’s too wide. Right now, looks like we’ll hang it inside the shower itself, but I’m waiting for my contractor to come back with his tile drill so we don’t destroy what we just put in.
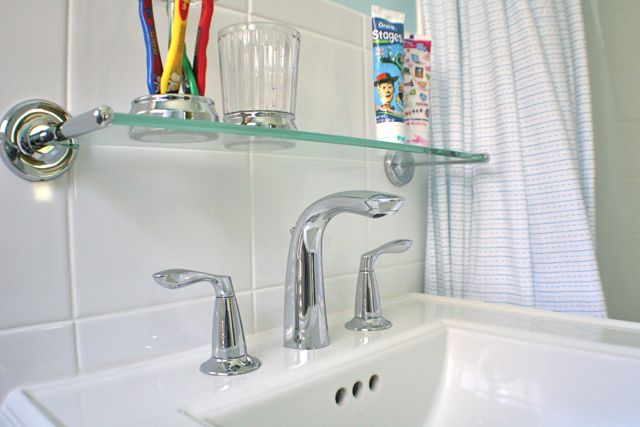
We already had him add one towel bar over the toilet and this glass shelf over the sink–again, I’m working to avoid as much visual clutter as humanly possible, and now I really like that the kids’ bath toys and toothbrushes have all the color in the room.
The room still isn’t complete–we’ll need a cabinet over the toilet for the various little things that get stored–and that grow as children grow. But the difference between before and now is pretty much night and day:
Next project: curtains and drapes for every room in the house! Lots of sewing left to do. Woot!


Dree
March 7, 2013 at 6:56 pmIt looks wonderful! I am still beating myself up for not adding a pocket door between the hall/kids bedrooms and entryway/living room. We took out the floor heater that was there, but the contractor and my husband talked me out adding the door. Why did I listen?!
Was the moisture problem not severe? Our remodel involved taking a 1948 bathroom to the studs–because 1) it was ugly, 2) there were cracked tiles everywhere, 3) no fan, and 4) the previous owners father had “solved” the shower plumbing problems by redoing the bottom of the shower–and he did not install a shower pan!!!!!
Excellent call on the tall faucet on the sink. I wish I had that 🙂
Brooke
March 8, 2013 at 9:20 pmWow huge difference! Reminds me of the horrible master bath in my house that has been in process of renovation for oh, 6 months… And no end in sight yet. Boo!
Nancy Esmade
March 23, 2013 at 9:18 amGreat job!
Penny
May 28, 2013 at 1:25 pmLove the bathroom redo! We have 3 bathrooms we need to update in our home…late 80’s. I’m always looking for ideas. Could you please share the paint color and manufacturer you used in the bathroom? I’ve tried to find a color like this and it always looks too green instead of blue to me. Thanks!
Bathroom Supplies
December 2, 2013 at 4:44 amIt looks good, great work!