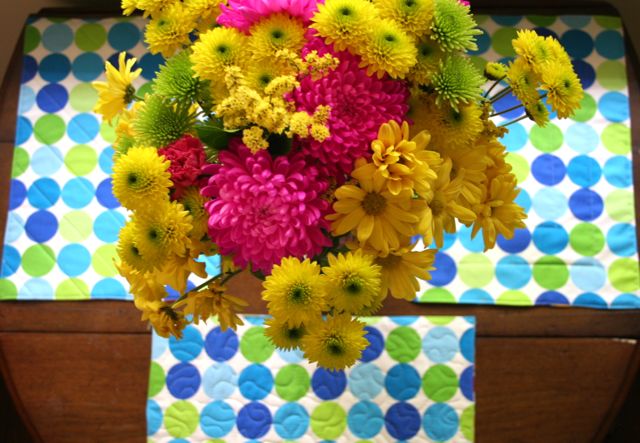
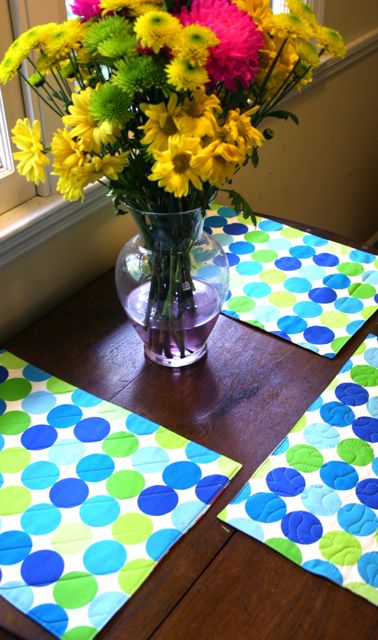
 Today was the first full day of school for the three oldest children. Yippee!! Getting ready for the first day, especially for preschoolers, involves packing spare clothing, nap time bedding, and in our case, placemats and napkins for lunchtime. So the other night, I stayed up late making some cute little boy placemats for our almost-three-year-old who is at full-day school for the first time this year. They were crazy cute and easy, so I made a set for the family! Woot!
 These are simple to make, batted and quilted, and reversible. If you’ve known me for any length of time, you might have noticed that my motto tends to be, “Why bother making it at all if it isn’t going to be reversible?” So.
To make your own Reversible Quilted Placemats:
Cut two pieces of cotton fabric 18″ x 13″ in coordinating prints
Cut one piece of quilt batting or fusible fleece 17.5″ x 12.5″
To make SIX placemats, you’ll need one yard each of two fabrics; to make THREE, you’ll need a half yard.
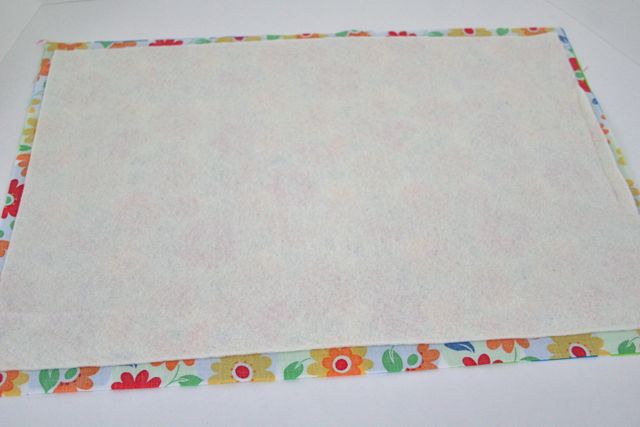
 Begin by placing your two printed cotton fabrics right sides together, then layering the fusible fleece or quilt batting on the wrong side of one. I like fusible fleece because it stays put super well, but quilt batting works fine if that’s what you have on hand (like I did today).
Sew a seam around all four sides, leaving an opening to turn, and using a 1/4″ seam allowance. Consider using Nancy Zieman’s cool intersecting seams trick to make super sharp points at the corners!
 Once you’ve stitched all four sides, clip corners (if you’ve pivoted rather than doing Nancy’s trick). Be sure you’ve backtacked at the beginning and end of the opening you left in one side to turn!
 Flip right side out and press, press, press all the way around. When you get to the opening, tuck the seam allowances in, wrapping them around the batting as you do. Work to keep the seam allowances even with the stitched sides of the placemat.
 Topstitch super close to the edge of the placemat, catching the opening closed as you do. Woot!
 I like quilting these on the diagonal, just because it’s unexpected and a little fun. Whether you’re using a walking foot or not (more on that below), mark a 45-degree diagonal through the center of the placemat to determine your first line of quilting.
 See how I’ve lined the 45-degree angle line on the ruler with the edge of the placemat? That ensures a nice angle across the work as you quilt. Cool, huh?
 Once you’ve set your line, mark it with chalk or disappearing ink. I like the skinny, skinny point of the disappearing ink pens, myself.
 Use your walking foot to stitch along the first line. Because this piece is already seamed on all four sides, we can’t mask our stops and starts at the edges, so be sure to secure the stitching at the beginning and end of each quilting line–do this by reducing the stitch length to ZERO and taking 3-4 stitches in place, then returning your stitch length to normal and running a row. The walking foot will help prevent “drag” lines on the back of the work, but if you don’t have one, no sweat; just use your regular foot and check frequently to ensure you’re not catching the fabric ickily (it’s a word) as you sew.
 Once the first line of quilting is done, use the guide bar on your walking foot to evenly space all the other lines across the placemat. I’ve set mine pretty arbitrarily–I think it’s around 2″ or 2.25″, something like that, but choose a measurement that looks pretty to you and let the presser foot do the rest. (If you don’t have a walking foot, simply use your ruler to mark each line you’ll be quilting with your pen or chalk, then stitch directly on top of each line, just as you did the first one.)
 I mixed mine up a bit and did one in concentric rectangles, following the edge of the placemat for the first, then using my walking foot guide bar to make progressively smaller loops as I got closer to the center. I even played around with free-motion quilting some. We have six in our family, so I whipped up two placemats in each style of quilting, just for kicks. All it took was two yards of stash fabric, and some batting I had on hand!


Belinda
August 17, 2011 at 6:52 pmI often use blue painter’s tape to mark my first quilting line (or lines if it’s something I don’t want to mark).
Love the place mats!
Deborah
August 17, 2011 at 11:09 pmI’ve used painter’s tape on the arm of my machine, but I’m not sure I have used it on the sewing itself–I like that idea, especially for something as small as this. You always have the best suggestions, BG!
lisa
August 17, 2011 at 7:58 pmSo that’s what those lines on the ruler are for! Is setting your stitch length to 0 kind of like sewing back and then forward again, but looks nicer?
Deborah
August 17, 2011 at 11:08 pmHa! YES, that’s totally why those lines are there! I used to ignore them until I learned how to use them, and now I don’t see how I got anything done well without them. Setting the stitch length to zero just allows you to stitch in place without the “trail” that backtacking leaves–some machines have a “knotting” function that does the same thing. It’s a little less visible, so I like it in places like this where it might show.
Jennifer
August 18, 2011 at 1:59 amI’m new to your blog, but love your tips and observations so far – I completely agree about the simplicity of this corner technique. IAlso, I’ve never paid much attention to the spacing arm for stitching – what a timesaver! I’ve used painter’s tape with hand quilting, but find that when using with machine stitching it tends to get the needle sticky if you happen to accidentally sew into the tape (which I usually do). Thanks for the great info!
Rachel at Stitched in Color
August 18, 2011 at 10:45 amI’m always afraid that my stitching in place at 0 won’t really hold the threads. I wish my sewing machine had a “knot” function so I could just trust it!
Deborah
August 18, 2011 at 10:52 amI used to feel the same way–convinced that it wouldn’t work. You can always reduce the stitch length to the lowest non-zero setting–I’ve done that, and it works well. Put it to the .5 or whatever is the itty-bittiest, and you’ll have some forward movement, but not a ton. Then you can actually see the stitches and know it’s working–and as you and I both know, those stitches aren’t going ANYWHERE, because any time you’ve had to take them out it was a total impossibility, am I right??
Jeanne
August 20, 2011 at 10:02 amI really enjoyed reading about Nancy and snagged up those two tips like they were going to disappear in front of my own eyes. The thread dealie is awesome and will be greatly helpful. I am thinking I read something like that about serger thread (don’t quote me on that.)
Pat V.
August 21, 2011 at 1:09 amOh, I would so love to win a copy of this book! I was terrible at “home ec” in grade school, never wanted to sew again after taking that class (the teacher publicly ridiculed those of us with no sewing knowledge, really made us want to know more, right.) In later years I taught myself to sew passably, but I’d love to learn some actual tried-and-true techniques!
Jodi Guerrero
August 21, 2011 at 11:19 pmI have not tried the double needle sewing yet but when I do I’m so glad I will have this tip. I know this book is full of knowledge, things I will learn to do better and things I didn’t even know , that I didn’t know. lol Thanks for the great review.
Marsha McGinnis
August 14, 2012 at 4:31 pmThis tutorial was just what I needed today. I decided to stitch up some cute chicken fabric as place mats for my sister’s birthday. Thank you for this ~ you’ve managed to “destress” this last minute project :*)
101 Sewing Tutorials for Winter
August 26, 2012 at 8:15 pm[…] HooligansTravel Sewing Kit – Rosey Corner CreationsLong Mittens Tutorial – A Lemon Squeezy HomeSimple Reversible Placemats – WhipstitchCoffee Cozy – Stitch Craft CreateLined Curtain Panels – House of HepworthsLinen […]
Corinne
October 14, 2012 at 12:17 pmWhen topstiching….do you topstich around the perimeter of the entire placemat or just to close up the opening?
Deborah
October 16, 2012 at 12:22 pmWell, the goal is to close the opening, but I do the entire perimeter so that I can keep a nice, consistent look across the body of the placemat–plus, it disguises that there ever *was* an opening, which is nicer. Hope that helps!
Cynthia Pulsifer
December 8, 2012 at 11:14 pmSoooo I spent literally hours tonight, going through this awesome site, drooling, getting all worked up, and LETS GO! Then. whamo. 🙁 my machine won’t free motion quilt, heck it barely let me quilt at all (and I’m working on a full size quilt. I realize its over 40 years old! (and its a workhorse when I make my dog/cat collars!) but I’m heartbroken. I desperately wanted to make these for a friend, or Christmas, (with pandas.) now? I just want to curl up in a corner, and cry.. 🙁 even my dog is giving me la-look! I know I can never afford a new machine, (I’m on disability), and well, I really like your blog, so even tho it HURTS and I am just sitting here wanting to GOGO (to the sewing dungeon), I know its won’t ever happen. 🙁 Thank you tho, for sharing the tips. I tried the square thing. mine came out a bit rounded, (lack of corner shoving? habit of sewing -no, that was not possible) they still looked amazing, until of course, I tried to quilt the top. then all heck broke loose and well, meh. :/ Sorry, I’m bumming out. maybe one day, I’ll get a machine that will allow me to free motion quilt or just quilt. maybe (doubtful). mine had a loaned attachment which didn’t work, and it was just (laughing at me, I SWEAR I heard it!) 😉 I have to semi-laugh, otherwise, I’ll bawl! Thank you for the posts, and the lessons! SO creative, so awesome… so… inspiring. Back to my paintbrushes then, to paint. 🙂
kate
January 30, 2013 at 8:50 pmThese are spectacular! However, I am a complete novice and have a stupid question. When you say to sew all four sides together (with an opening) is the batting sewn as well or do we keep that in place with our hand when we flip it inside out? The batting doesn’t seem to be sewn at all, is that right? Thank you for this, I’m excited for this project!
Sarah W
July 6, 2013 at 10:59 pmI have the same question as Kate about the batting…?