
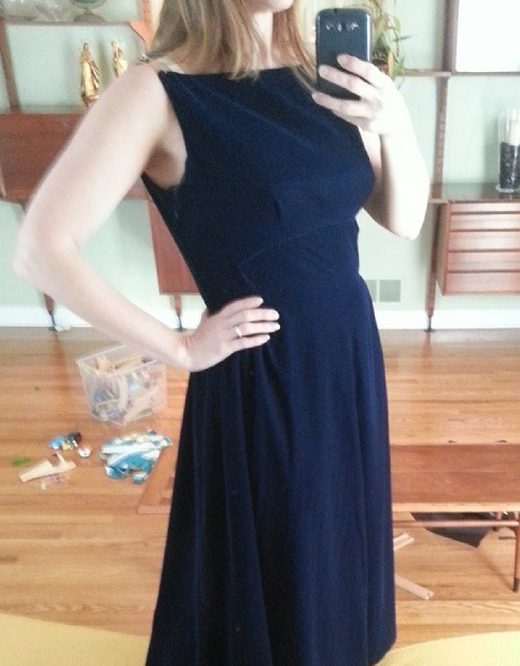
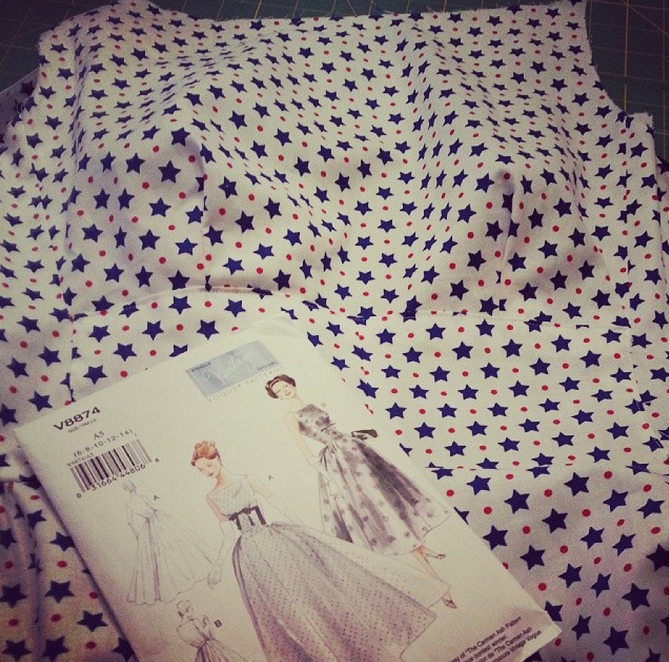
When I got the (possibly hare-brained) idea to sew my blue velvet cocktail dress, I had pretty minimal experience sewing with velvet. This was absolutely my first time making something from velvet on this scale–anything larger than a sleeve cuff would have been bigger, honestly. So I’m totally no expert on velvet or on fancy fabrics. I did learn a ton in making this dress, though, and some of what I learned had nothing at all to do with sewing velvet.
For example: I like learning that no matter how much you know–or THINK you know–there’s always more to learn. That’s a great lesson to be reminded of, because grown-ups have a tendency to forget that they don’t know everything, and one of the things I love most about sewing is that you can always try SOMETHING you’ve never tried before, and odds are pretty good it’ll be awesomely fun. I like seeing that up close now and then. Both humbling and motivating.
This whole velvet thing was like that: it seemed a little intimidating, and golly but how! did the internet have scary things to say about velvet. On the whole, I found the internet’s general dislike and fear of this fancy fabric to be largely unfounded. I didn’t think it was horrible to sew with, but being the girl I am, I totally did my research first. I’m all for jumping in feet first, but I like to do a lap before committing to the jump, so to speak.
I found both Emma One Sock and Threads super helpful, with extensive and thorough guides to sewing with velvet available from each.
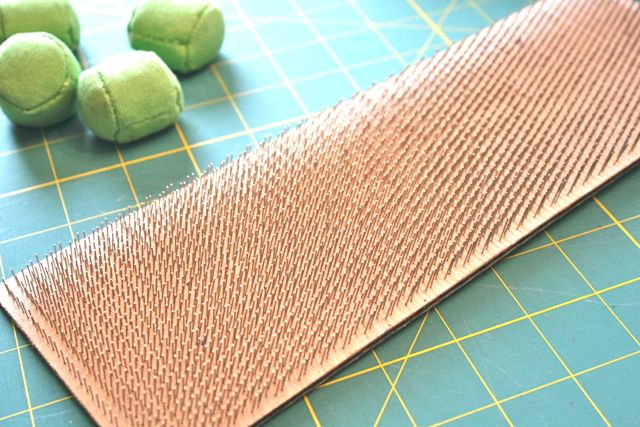
Top tip: use a velvet pressing board, also called a needle board. Now, I have also read that this could be a plush towel or another scrap of the same velvet, but (1) this dark midnight blue color I was using would show fluff from a towel like a crazy person, (2) I was pretty tight on yardage and didn’t have a scrap to spare, plus (3) those felt just the tiniest bit bootleg.
They felt a lot less bootleg when I saw the price on this velvet press board at JoAnn. Sheesh! Good thing I snapped one up with a 50% off coupon. Boo-yah! That’s what I’m talking about. This little gadget is a rubber backing embedded with dull-tipped needles. The needles serve to press into the pile of the fabric so that you can steam out the seam allowances and any wrinkles without pressing the outline of the seams into the fabric where they’ll be visible from the public side of your sewing.
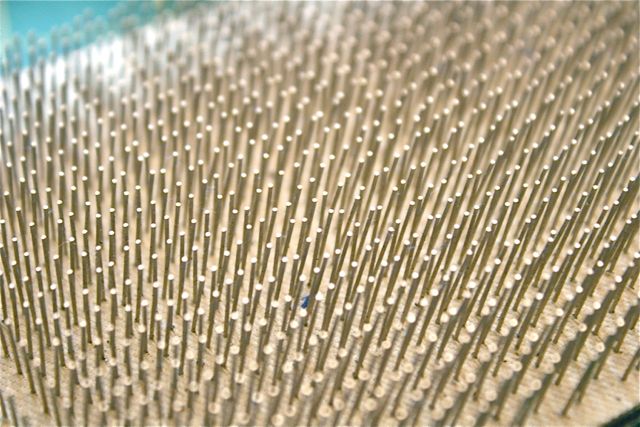
Now, the major tip I read repeatedly was that you don’t actually PRESS the fabric into the needles. You place the velvet pile side down, so that it nests in with the needles, then hover the iron above the wrong side of the fabric and steam the velvet into submission. The fabric will relax from the steam, but there won’t be any residual outlines on the pile side of the fabric, and the pile won’t be crushed. It’s magical.
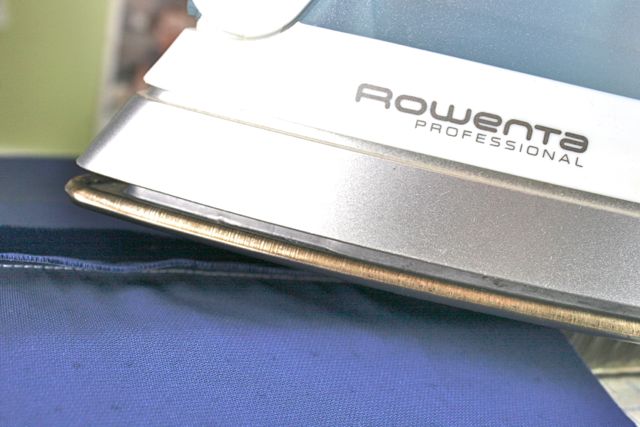
After steaming, allow the fabric to cool completely (which increases its “relaxation” and lets the steam evaporate so you’re not sewing on a sopping wet mass by the end) before moving on to the next section or step.
The next giant tip I picked up in my research, and which was borne out in practice, was that velvet has a tendency to “creep” when you’re sewing. Best way to combat the creep? Your walking foot, naturally.

If you’re not familiar with the walking foot--for example, if you don’t do much quilting, where the walking foot figures predominantly–you might not be friends with this fella. But he’s a lot of handy fun to have around.
I do use my walking foot for quilting, since it prevents the layers of quilt top/batting/backing fabric from scooching around as you put in the quilting stitches, but I also use it for knits on occasion, and for working with plaids–it has the amazing ability to keep the plaids all lined up just the way you pinned them, so that everything matches along your seam lines. Yum.
The walking foot installs on your machine very much like a standard presser foot, but it has a second set of feed dogs IN the foot, which are tied to the motion of the needle bar. As you stitch, the lower feed dogs draw the fabric forward from beneath, and the second set draw it forward from above, so both pieces are moving at the same rate.
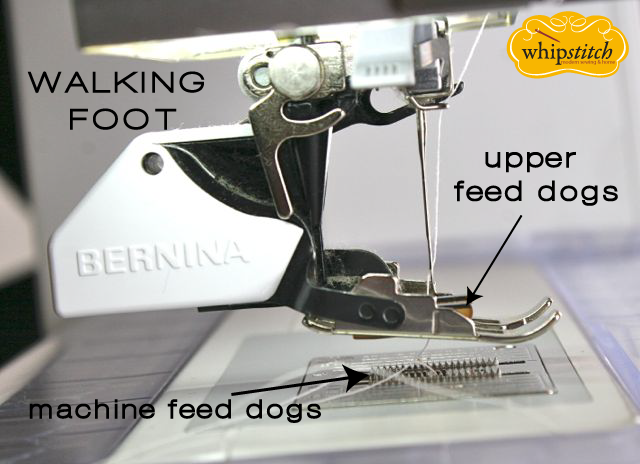
For a pile fabric like velvet, that can really make the difference, since the fibers tend to want to push against one another, creating weird bumps and bulges and distorting seam lines.
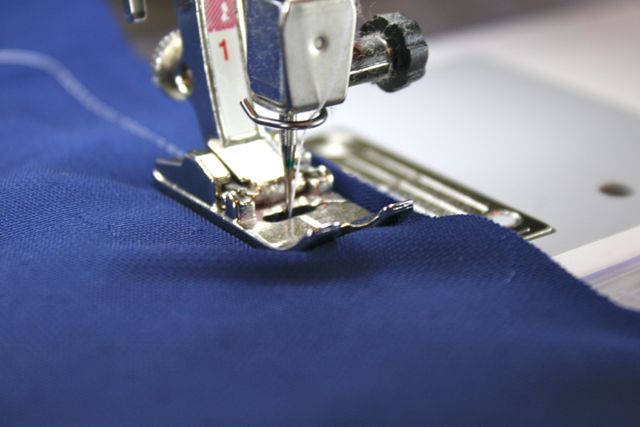
I tested the theory out first, using some of the shreds left over after all my pieces had been cut. It seemed as though I was able to easily sew without any movement, but the sewn pieces were horribly puckered along the seamline–totally unacceptable. So I added a ton more pins (another tip I read repeatedly) and switched to my walking foot.
Vastly better results!
Smaller tips that still played into the making of this dress:
- I cut everything in a single layer. Despite that care, I still made a cutting mistake–so be careful! Be sure to REVERSE your pattern pieces when cutting on a single layer so that you end up with a right and a left, and not two rights. Blergh.
- Also, match the pattern to the drape of the fabric. Velvet is heavy and swingy and has the most beautiful movement, so it’s not well suited to a design that requires a lot of stiffness or shaping. It gathers extraordinarily well, and the light just bounces off those gathers to create beautiful results–in any room.
- Make all your marks for tucks, gathers and darts on the WRONG side of the fabric, preferably in chalk, as they will migrate or disappear entirely on the pile of the right side (or not come out completely, which is another kind of disaster).
- And finally, hem carefully. This fabric is luxurious and looks expensive, no matter what you paid–take the time to hem by hand and create a really lasting garment. Even in my holiday time crunch, I hemmed this entire dress with a hand needle, and am so pleased I did. Took about an hour, but it was an hour well invested!
See, I also read over and over that I should take my time when sewing velvet, but let’s just say I didn’t have a whole lot of that to spare, and what I did have I threw at making a muslin, under the idea that I needed to get the fit right more than I needed to get the finesse right–it was going to be a dark party, and while I hoped for perfect results, I was more worried about (1) being finished and (2) looking thin. Let’s be real here: it’s all well and good to sew a dress for yourself, but if it doesn’t flatter your figure, will you really ever wear it? So while in general I like to pay attention to the details and do the best sewing I’m able, if I have to choose between perfect seam finishes and a flattering fit, I’ll pick fit every time. (Plus, I think we all know my track record when in a fancy dress time crunch.)
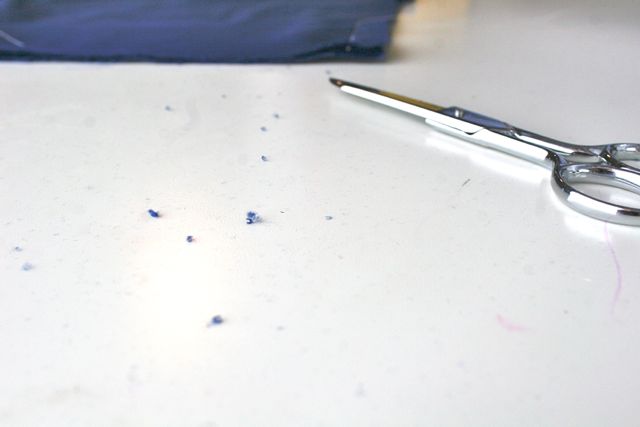
I stand by that decision. But I also recognize that had I been in possession of more time, I might have made some changes to how the dress was constructed. For example: all the research indicated that velvet sheds horrifically.
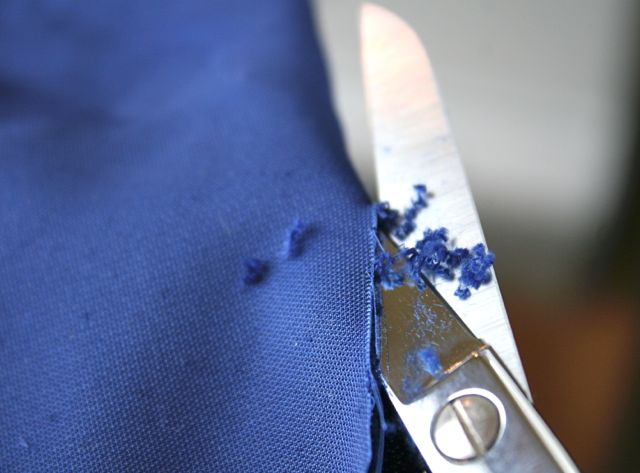
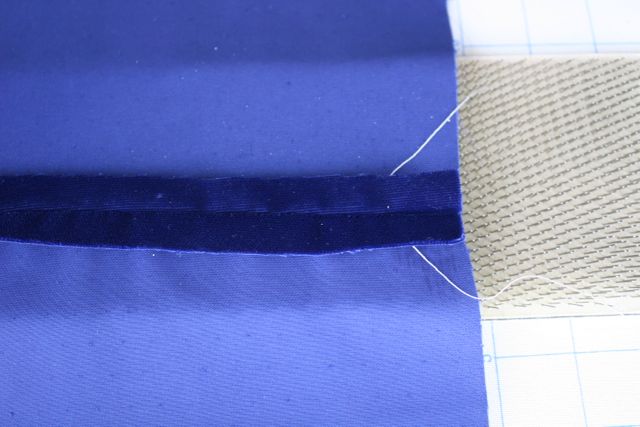
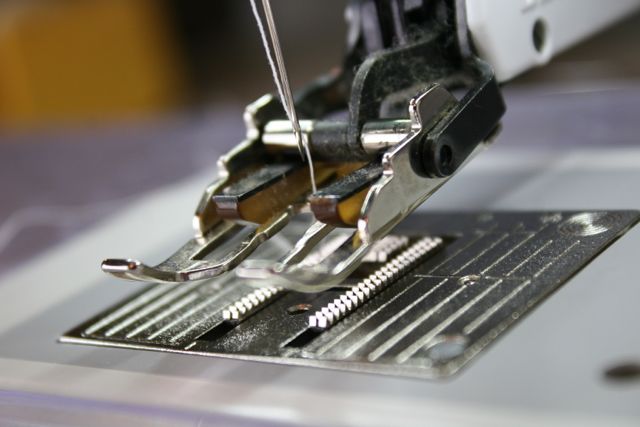
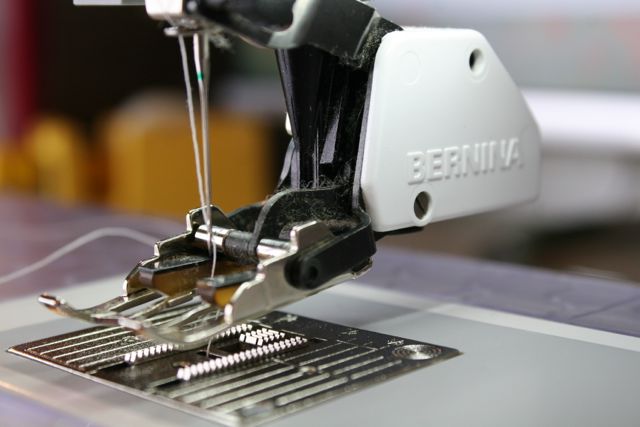
While “horrifically” might be an exaggeration, I totally had some fluff left under my throat plate by the time I waltzed out the door:
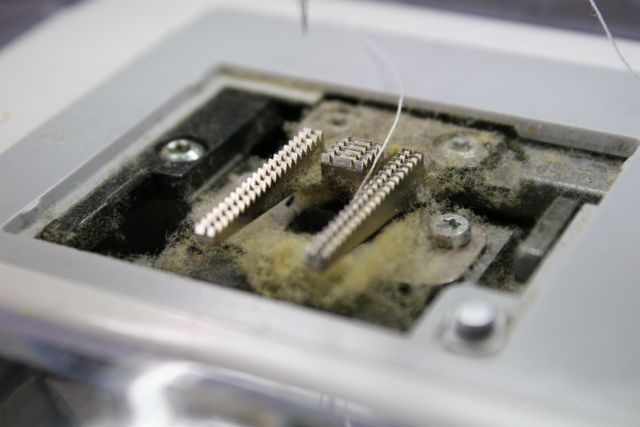
Granted, some of this was leftover from making the flannel Fanfare pajamas I sewed for the kids at Christmas, but the velvet left its mark, both under the needle and on the cutting table:
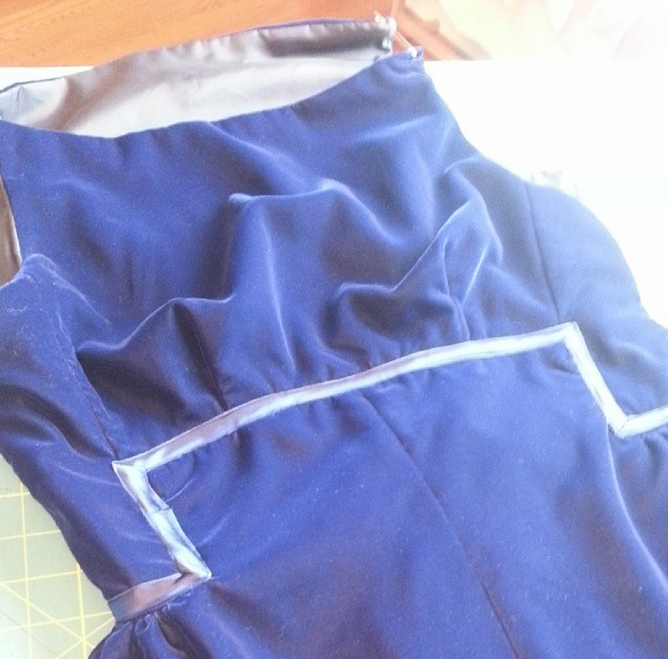
Always good to do a solid round of sewing machine maintenance after working with a fabric like this (and I strongly include minky in that designation). With all that shedding, I might have handled the waistline seam differently if I’d had more time: I was forced to skip a nicer seam finish, and simply treat the lining and bodice as one when joining the skirt to the bodice at the front. There’s an awkward shaped inset there, and I just couldn’t work out how to tuck it under and still cover the seams. I think I’ve figured out a better solution, but at the time–late in the evening and up against a deadline–I didn’t see it; if I’d had longer, I might have unpicked this seam and re-sewn it. No one knew but me, so no biggie, but fill disclosure and all that: this dress is gorgeous, and imperfect. Sewing can be both. Just like people.
On the whole, I didn’t dislike sewing with velvet at all. Mostly that was the joy of learning to do something new that I haven’t done before–it’s a little thrilling, right? To just jump in with two feet and see what might happen? But it was also the excitement of making something beautiful that I knew I’d be wearing someplace magical with the man I love. That part of it–the delight of sewing something that I knew I would wear and enjoy and be proud to show off–made any inconvenience seem so tiny in comparison.
Man, how many things can do that? Make you so excited to see the other side that you don’t mind any of the irritations along the way? True love, and the act of creation. Those are the ones that spring to mind. How inspiring that making something with our hands can provide the same powerful emotion that we experience when we share our hearts with someone! Sewing is as close as we get to magic, y’all. Velvety, lovely magic.

seamsoddlouise
January 11, 2014 at 9:19 amA fantastic post, thank you for all the tips. Though I could have done with this info a few weeks ago, I made a velvet dress for Christmas too. I struggled a lot with my velvet and the finished article isn’t that great but I’m so proud to have finished it. I completely agree about sewing being like magic. It can be such fun, I love it.
Great British Sewing Bee :: Series 2, Week 5…working with nylon, leather and velvet | Little Black Duck Blog
March 18, 2014 at 6:55 pm[…] It wasn’t used on the show but I believe that a needle or velvet pressing board is great for preserving the nap on velvet and reducing the risk of shine. Check out the blog post from Whip Stich, it has tips on how to work withe velvet and how to use a needle board […]
Great British Sewing Bee :: Series 2, Week 5…working with nylon, leather and velvet | Little Black Duck
May 2, 2014 at 11:31 am[…] It wasn’t used on the show but I believe that a needle or velvet pressing board is great for preserving the nap on velvet and reducing the risk of shine. Check out the blog post from Whip Stich, it has tips on how to work withe velvet and how to use a needle board […]