NOW AVAILABLE: A step-by-step video tutorial and printable project guide! See the post and get the PDF.
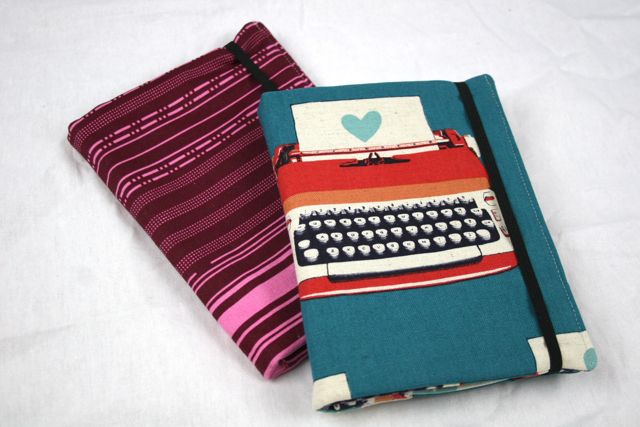
My sweet friend Mika liked my Kindle cover so much she asked for a tutorial. Since I’ve always been a bit of a slacker in the gift-giving department, I wanted to make her something pretty, so it was with sincere and genuine pleasure that I put this together, mostly for her but also for you! I have clutched my electronic reader in my hands and cried over it as I read, laughing and feeling with the characters, totally forgetting that this wasn’t print but was a screen with flashing LED behind it, all of which astonishes me, since I really love the book-ness of my books. I honestly think having a soft fabric cover made a difference in the experience to me–and certainly made me more willing to toss it in my bag and take it with me to read on the go.
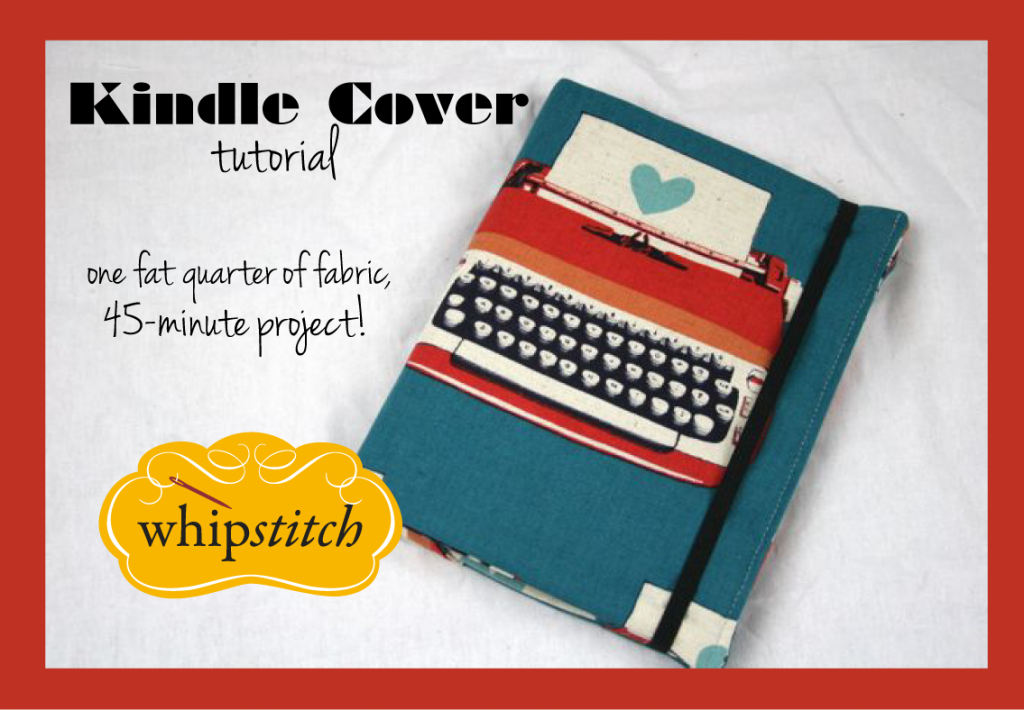 This was a fun project to think through and plan, and it really is super easy to construct. It took me right around an hour and fifteen minutes to sew this one while taking photos and planning the tutorial, so I feel pretty confident that you could make it in about 45 minutes in real life, which makes it a great option for gift-giving. (I’m already thinking about end-of-year teacher gifts, again because I am usually such a slacker that when someone puts out the hat I toss in a check even though what I’d really like is to make something personal and lovely. Wouldn’t it be nice this year to take up a collection for a Kindle for your child’s teacher, and then sew a sassy cover? Just an idea.)
 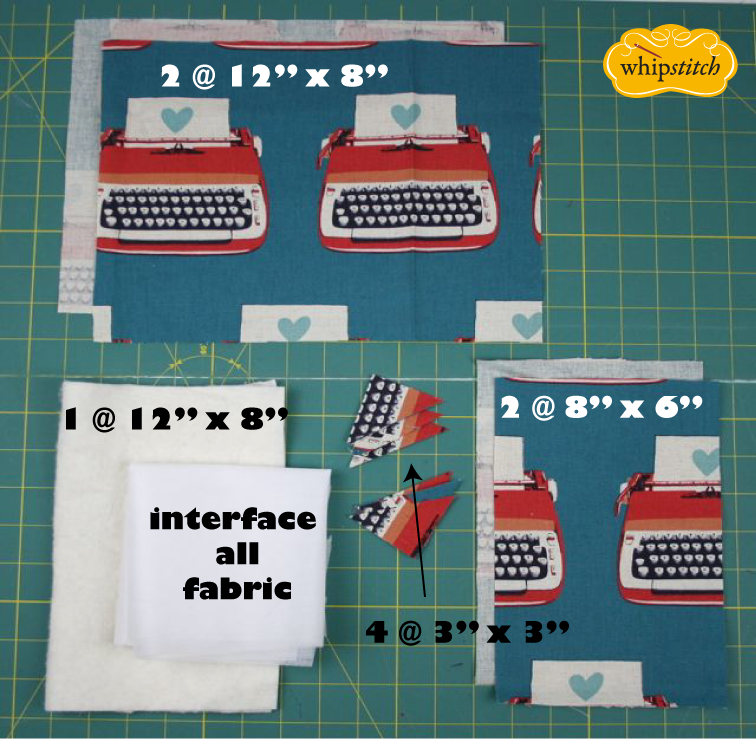 Measuring and Cutting
Begin by cutting your fabric pieces. I’ve used the life-changing typewriters from Melody Miller’s Ruby Star Shining line (there’s still some bits of this collection in the shop; Melody tells me many of these prints won’t be reprinted, and they’re going fast, just FYI!). This is a really nice canvas-weight linen/cotton blend, but I made my other version from a 100% cotton home dec print. You could also use a quilting cotton, but I’d probably use a slightly heavier interfacing than I would for a canvas. Whatever fabric you choose, you’ll need:
- fabric for the outer cover and inner cover: two pieces at 12″ x 8″
- fabric for the pocket, which is lined: two pieces at 8″ x 6″
- fabric for the little corners that hold the Kindle in: 4 pieces at 3″ x 3″
- batting to cushion the cover: one piece at 12″ x 8″
- interfacing for every piece of fabric you’re using
- one piece of elastic to hold the cover open or closed: 1/4″ elastic at 10″ long
There is nothing that says you can’t use one print on the outer cover and another for the inner cover, or one print for the main cover body and another for the pocket–get wild!
Note: all measurements are based on the standard Kindle, which is the model I own. I can’t testify whether or not the higher-end models share the same dimensions as the standard–does anyone know if these measurements are universal across the various Kindle models?
Assembling the Pocket
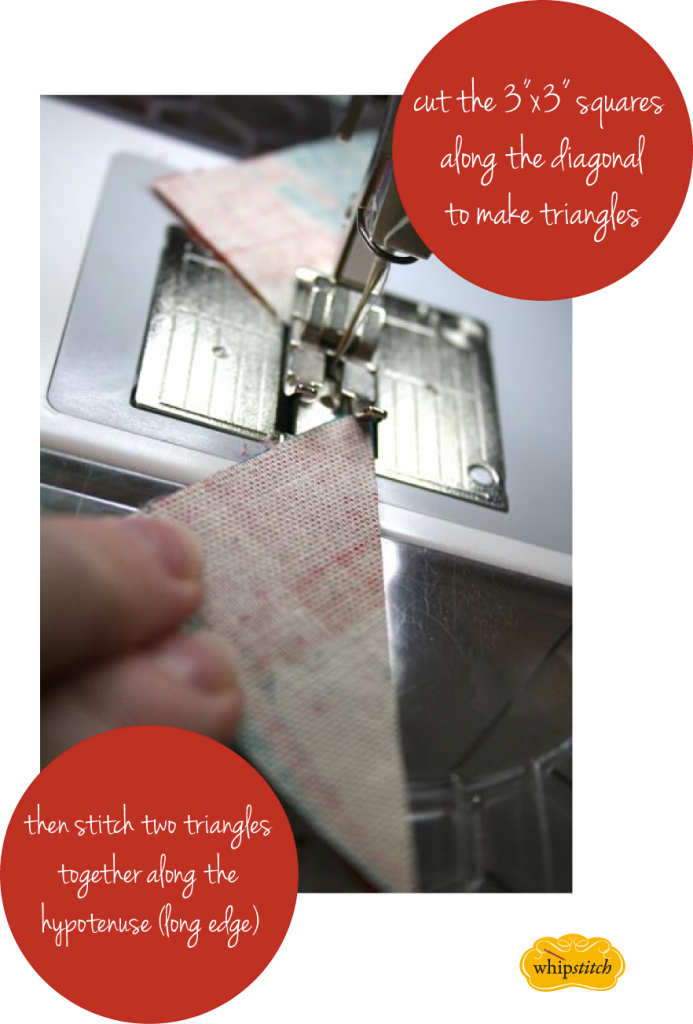
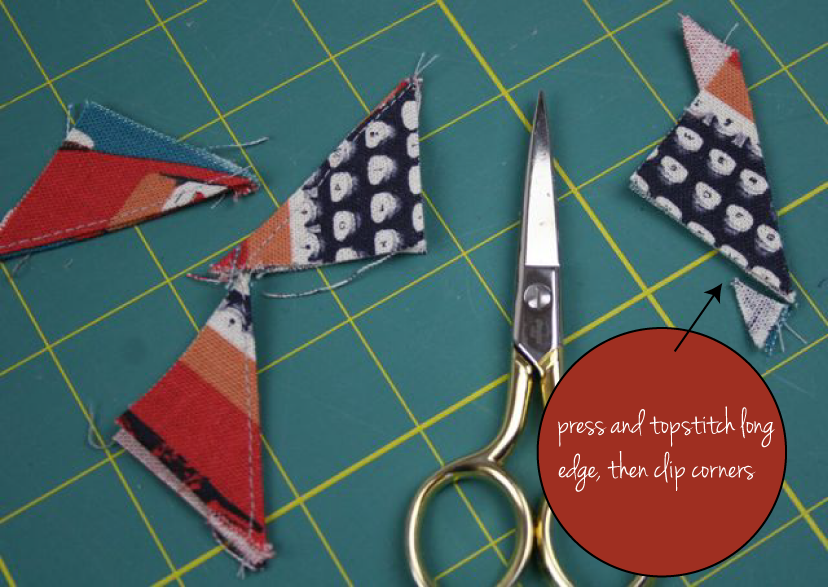
Begin by working with the 3″ x 3″ squares, after they’ve been interfaced. Cut all four in half along the diagonal to make triangles. Then, stitch two triangles together along the long edge using a 1/4″ seam allowance, to make the corners. Consider chain-stitching these to make the work go faster, like in the photo.
Turn each corner right side out, pressing firmly. Then topstitch the long edges. Finally, clip off the little “ears” that are leftover to make a clean edge.
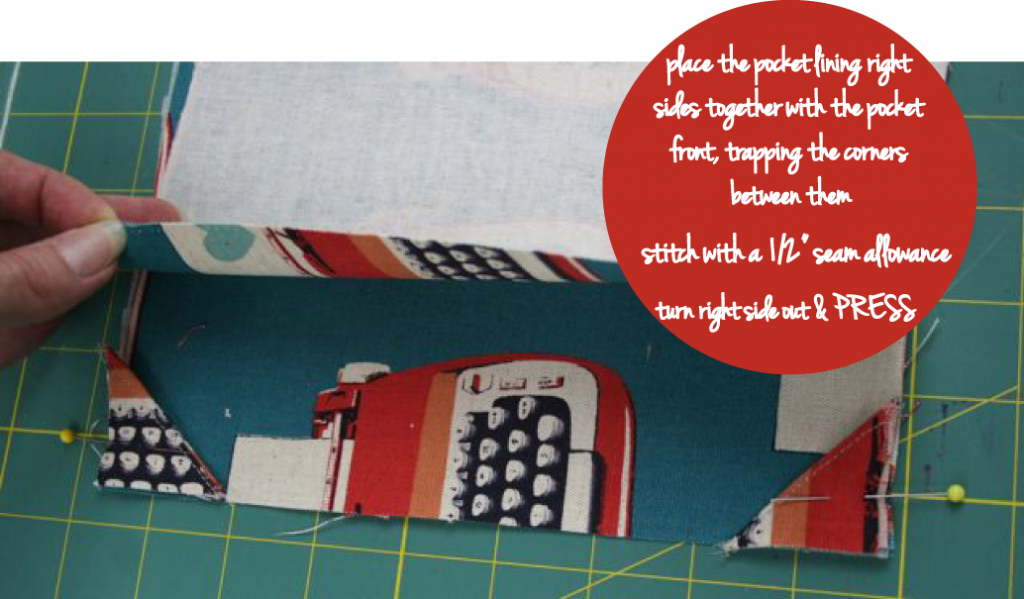
Now we really begin building this thing! Place the corners on the piece you want to have as the front of the pocket. Raw edges should line up. Pin in place. Then, place the inner side of the pocket–the lining–right sides together with the pocket front and corners. The pocket opening edges will line up, catching the corners between them. Pin and stitch, using a 1/2″ seam allowance. Then flip the lining back so that the whole thing is right side out and PRESS that seam nice and flat. You’ll have two corners, but their edges will still be raw; no worries–we’ll fix that in the next step.
Assembling the Body of the Cover
For the rest of the cover, we’ll use the pocket you just made, along with the outer and inner cover pieces, to make a padded cover that has a hidden large pocket for storage, plus four corners to hold the Kindle in while you’re reading.
Begin by laying the inner cover right side up. Place the pocket you just made on the right side of that fabric, lining up all the raw edges. You’ve got little corners to the left of the pocket, but none on the right of the pocket. Take your other two triangles and add those on the right of the pocket. Pin them in place through all the layers: the pocket and the inner cover. Finally, add the 1/4″ elastic across the whole thing. By putting the elastic here, you’re making sure you’ll be able to wrap it around to the front or to the back. I know it seems like a ton of layers, but you’ll only have to stitch through them once, and you’re totally going to be great at it.
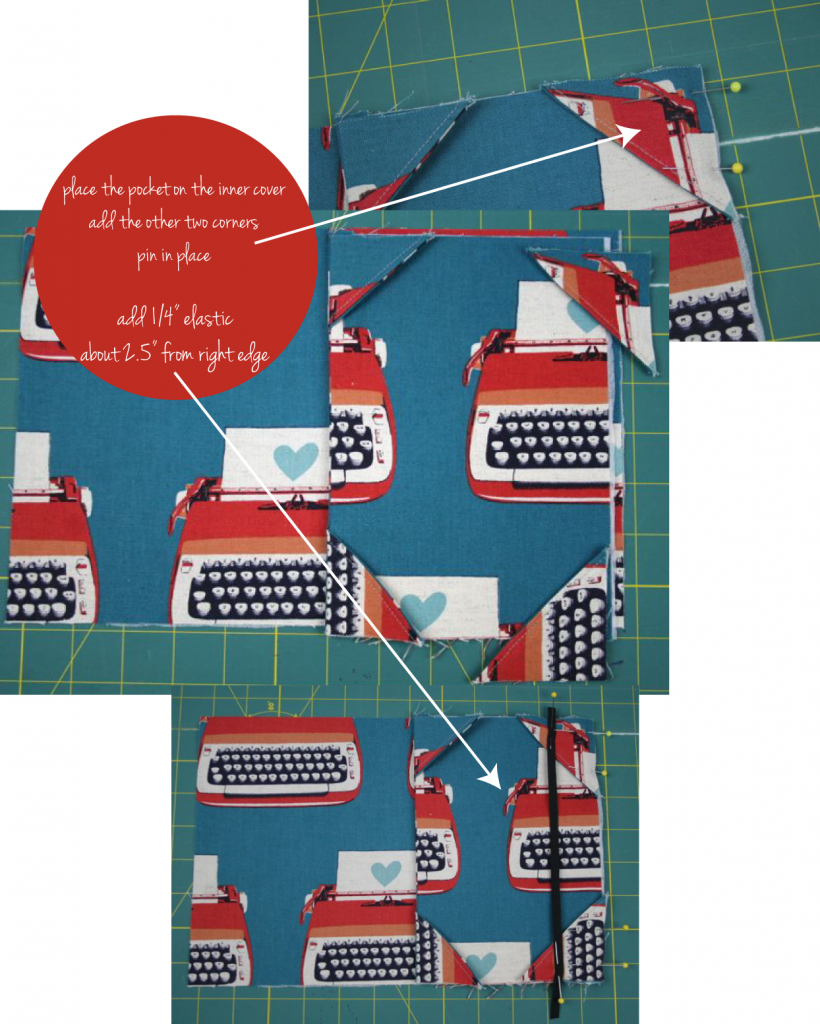 Now, lay the outer cover right sides together with this whole pile of stuff. You’ve got the inner cover, wrong side down, then the pocket, then the corners, then the elastic, and now the outer cover, which is right side down. Throw the batting on top of the wrong side of the outer cover, making a tower of fabric. You’ve got a giant pile now, but with some pins, you’re going to be OK.
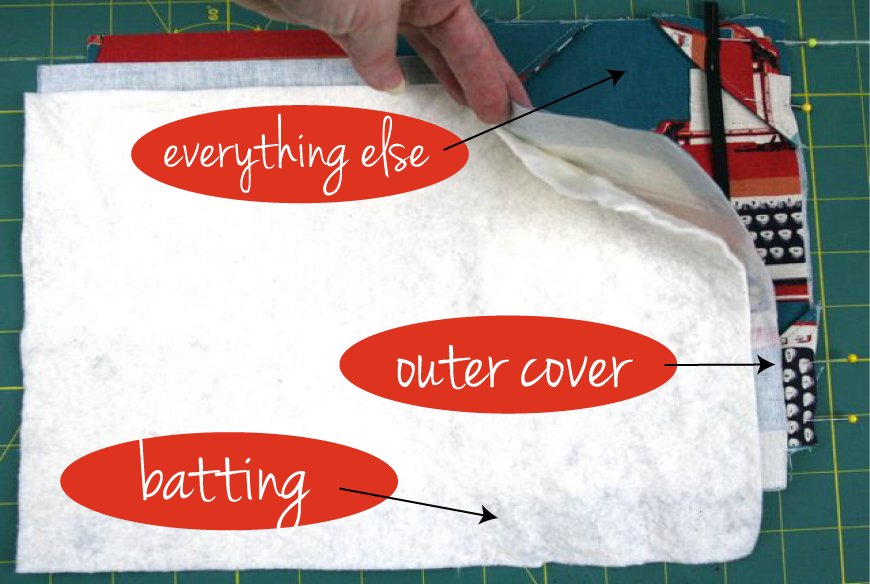 Make sure that all your raw edges are lined up nice and neat–you don’t want any overhang here. Take it all to the machine, and stitch around all four sides using a 3/8″ seam allowance, leaving an opening on the left side of the cover–the side that doesn’t have all the corners and the pocket and junk–so that you’ll be able to turn it later. Backstitch at either side of the opening, because we’re about to shove our hands in there to flip this right side out.
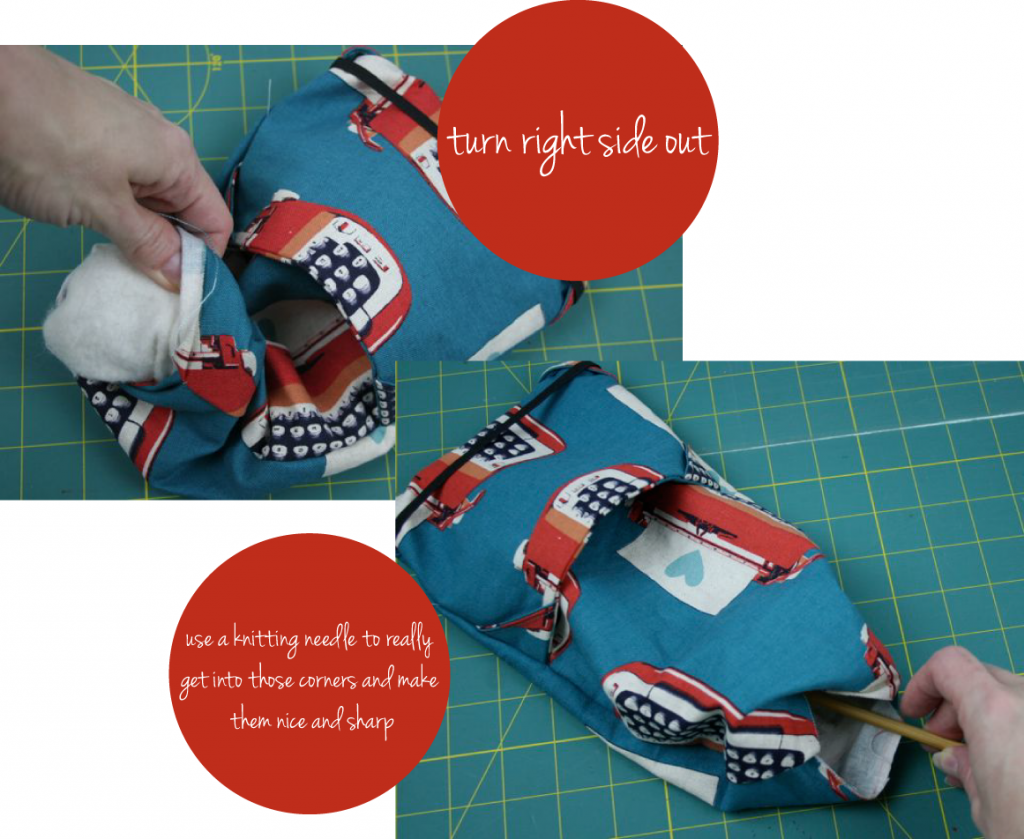
When you turn the whole thing right side out, be prepared to wrestle with it a bit–all that interfacing and all that batting can make for a lot of bulk. Be sure to clip the corners at an angle to remove most of the bulk, and if you’re still struggling to get a clean point on the corners, trim a bit of the seam allowance away, as well. I ended up trimming ALL my seam allowances down to about 1/4″, with the exception of the side with the opening, which I left at 3/8″ so I could be sure to catch the raw edges inside when I finish that edge.
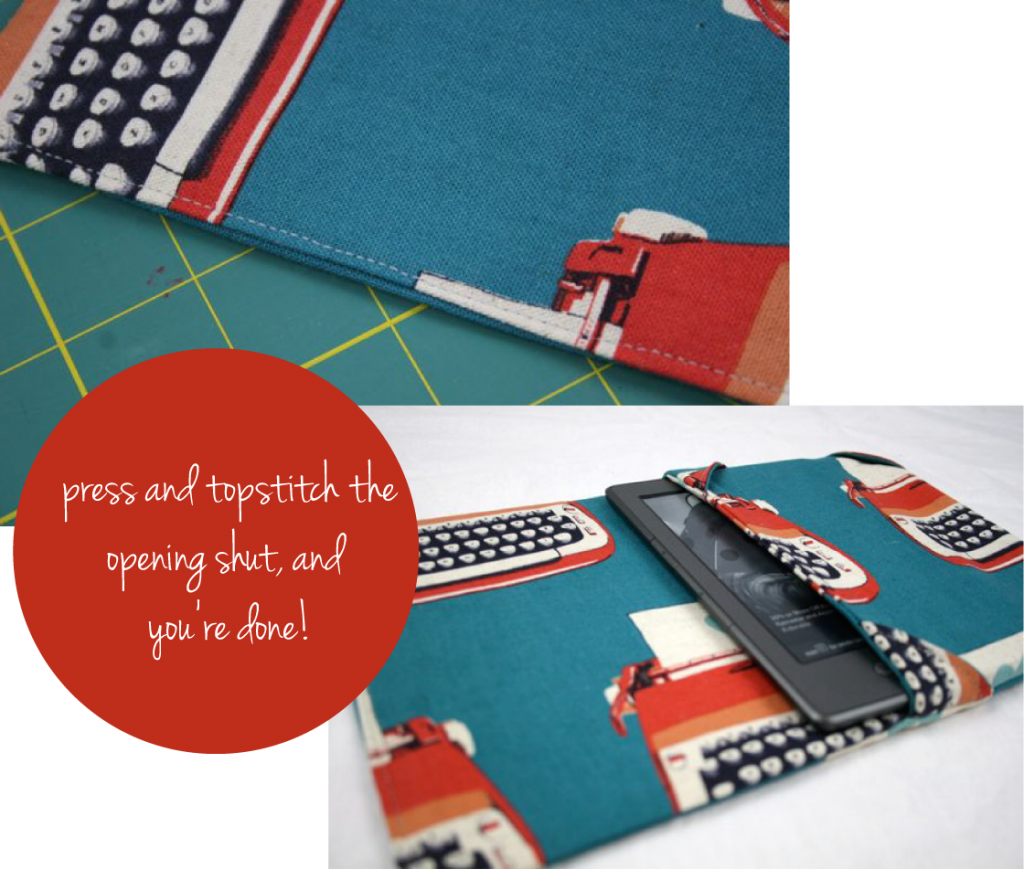
Press the entire thing like a crazy person. I mean, really steam it up. You’ll want to keep working those corners with the knitting needle until you get them as sharp and pointy as you can, then steam them into flat submission. You can do it. Once the edges and corners are all tamed, go back and topstitch along that left edge, the one that makes the flap opposite the pocket, and close up the opening you used to turn. Done!
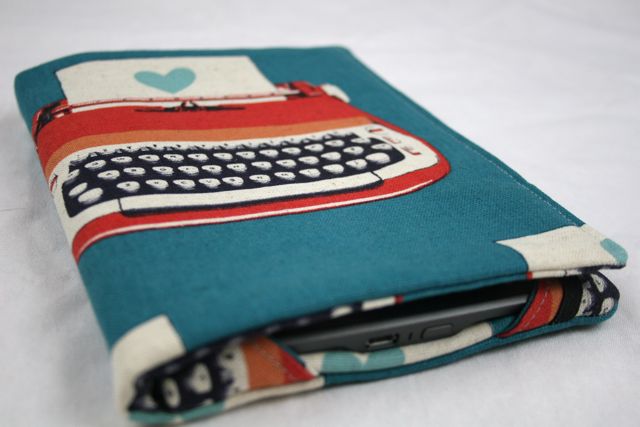 And there you have it! Padded and slightly stiffened, but still soft and easy on the hands. The elastic wraps around the front to hold the cover closed when you’re not reading, or around the back to hold the cover open when you are:
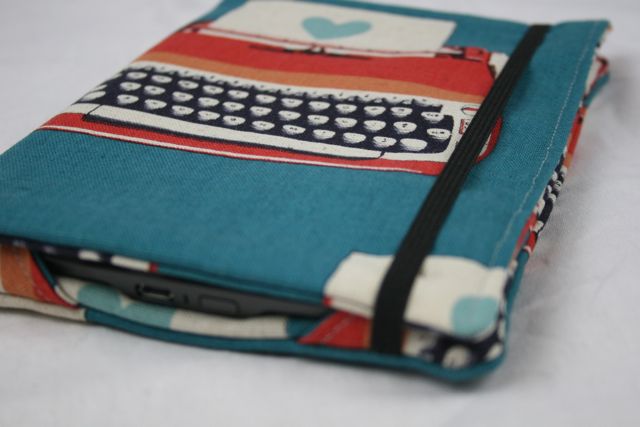 The Kindle can go in the little corners to be held when you’re using it, or inside the interior pocket to be secured and buffeted when you’re not:
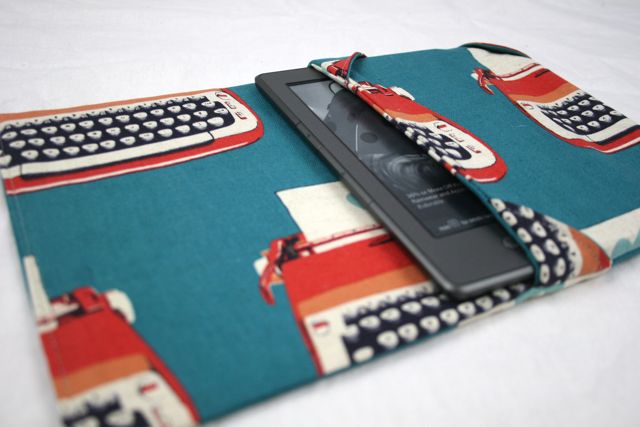 It works equally well for right- or left-handed users, which I’m realizing is more and more important as I get older. I also love that you can use it as a dust cover for when you’re charging, since you can still access the port when the cover is closed:
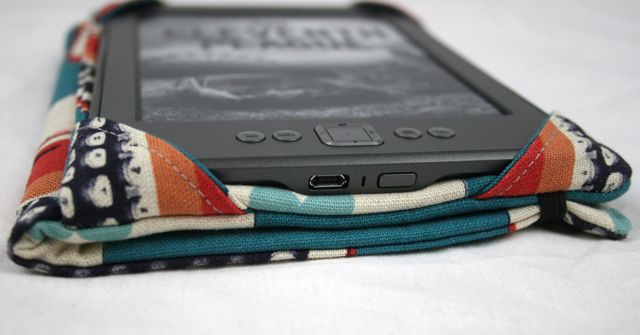 Just like the dust jackets of yore, except all 21st century and stuff.
And if you’re looking for recommendations for literature to download, well, here ya go!
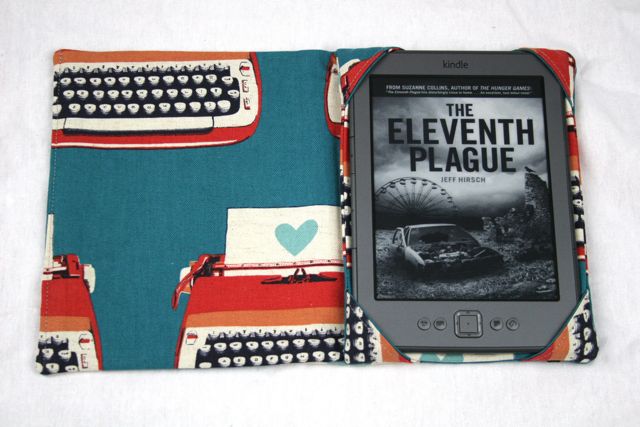 I just downloaded this one today for a rock-bottom, dirt-cheap price–if you’re a fan of Gertie’s at all, be a peach and grab a copy of her husband’s novel (I really do think it’s important to support other artists whenever you have the chance). And if this title floats your boat or are a fan of Young Adult dystopian literature (which is to say, if you’ve already read The Hunger Games trilogy three times each and are looking for something new), I got some great suggestions on Twitter today. Woot!
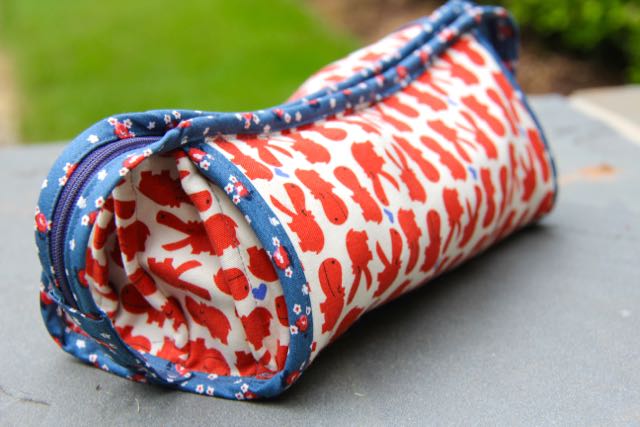
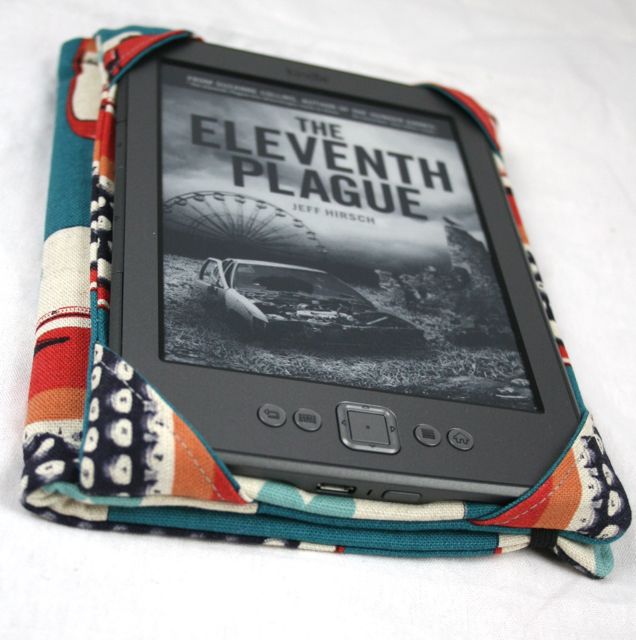 Of course, now I have two Kindle covers and only one Kindle, but I am sure I can find a use for them both. Like matching them to my tote bag. Or getting my oldest her OWN Kindle so she can stop asking to borrow mine. I love all my children beyond reason, but loaning out my Kindle won’t. be. happening.
Have fun stitching, y’all!

Valerie
April 12, 2012 at 11:25 amAnother blog directed me to this useful link for specs on the various Kindles available. I have the Kindle 3G and it differs ever so slightly from your model. Mine is 0.3″ taller, 0.2″ wider, and 0.06″ thicker —- miniscule differences thinks me. Could you tell me, please, does your Kindle fit super snug in the case? I’m almost thinking I can get away with using your dimenions —- thank you for putting this tutorial together!
http://www.amazon.com/gp/product/B004HZYA6E/ref=famstripe_kk3g
Deborah
April 12, 2012 at 11:27 amOoh, thanks so much for that info! The case is snug on my Kindle, but I stitched with a 1/2″ seam allowance–I think most folks like a bit more room, so the tutorial suggests a 3/8″ allowance. I think, given the dimensions you’re quoting here, that if you use the exact same measurements but sew with a 1/4″ seam, you’ll be just fine–that would give you 0.5″ more wiggle in each direction than my case has, which would be more than enough!
Valerie
April 24, 2012 at 11:32 amSweet! Thanks for the feedback —- I’ll adjust my seam allowance and give it a go… I’ve been holding onto some Echino for awhile now, waiting for just the right project. This is it —- and all for me, too! {grin}
Valerie
May 3, 2012 at 3:31 pmI made two covers last night —- great instructions! I didn’t adjust the measurements, but I think if I make a third I will. I made one using fusible fleece on ALL the pieces + echino linen/cotton blend. I think adding the fusible to everything was a little overkill, especially on the lining of the pocket and the little corner triangles. When I slipped my Kindle Touch (ever so slightly bigger than the Kindle in the tutorial) into the pocket, it turned on! Oops… {grin} Overall though I really liked that padding the fleece provided.
The second I made with quilting cotton and only applied the fleece to one exterior, one pocket, and half of each triangle. It’s not as sturdy or padded as the first, but the Kindle fits into the pocket. You win some, you lose some! {grin}
My third round I feel like adding 1/2″ to the height and fusible fleecing everything except the lining of the inside pocket. I’ll give it a go tonight!
Mika
April 12, 2012 at 11:28 amOMG!!! I am so honored. Thank you, Thank you. I’ll get right on this & send you pix once I’m done.
You are a Super Star, AS USUAL!!!
xoxoxo
Deborah
April 12, 2012 at 11:29 amHee!! It makes up for all those birthday gifts I am guaranteed to forget to send you in coming years… Glad you like it!! 🙂
Mika
April 12, 2012 at 11:34 amI have the Touch – so my dimensions are
6.8×4.7
vs yours
6.5×4.5
so I’ll do the quarter inch seam as well & it should work fine. Thats my standard seam allowance anyhow.
xo
Deborah
April 12, 2012 at 11:38 amThe funny part is: that’s usually my default seam allowance, too, but I used 1/2″ because I figured it would make more mathematical sense. But now it all works out! Because we have margin! Hooray!!
Lia
April 16, 2012 at 4:34 pmI would totally love to try this out for my friend…she does have a Kindle, but now I found out she has the Kindle Keyboard and that is the biggest there is…
The Standard one has the measurements of 166 mm x 114 mm x 8,7 mm and the Kindle Keyboard has 190 mm x 123 mm x 8,5 mm.
Am a bit lost now as to which measurements I need then to make a cover…Maybe someone has altered already and can help? Would be awesome as this would make such a fabulous gift 🙂
Beth Strand
April 18, 2012 at 12:22 pmI have the Fire which measure 7.25 by 4.75 so I’m going to play with your pattern on paper and when I get the measurements figured out, I’ll post them back here for you. This is a great tutorial, thanks!
Deborah
April 18, 2012 at 8:52 pmOooh, fantastic! All that thinking about metric was making me dizzy. I’d love to see how widely they vary–and also, should I upgrade in the future, I’d love to already have the math done. Thanks for sharing with us! 🙂
Kathleen
April 22, 2012 at 10:52 pmThanks for the tutorial!
FYI I made the original for my kindle 3G but it did not fit my kindle fire.
The fire is a little longer and thicker in size. If anyone wants to make it for the kindle fire all i did was use the same measurements EXCEPT every 8 inch measurement i changed to 8.75 inches. The corners hold it in and It fits perfectly in the pocket! I used 1/4 inch seam allowance.
I also changed the triangles to hold it into 3.5 inch squares, although they could probably work a bit smaller. Happy stitching!
Lia
April 23, 2012 at 11:37 amthank you, i believe the fire has almost the same measurements than the kindle keyboard that my friend has, i will try out what you suggested 🙂
Beth Strand
May 5, 2012 at 10:56 pmI just finished the cover for my Kindle Fire and posted pictures on my blog with the address for your site and tutorial. I used the 8.75 measurement and it’s just a shade snug but I also used a very stiff interfacing so that may bit it, too. Thanks again for the great tutorial, I really enjoyed making this.
Valerie
May 9, 2012 at 11:28 pmHi! Thanks for the great tutorial! I just made this for my mom for Mother’s Day. She has a Kindle Fire, so I increased the 8″ dimensions to 9″ & used a 1/4″ seam allowance on everything. It fits perfectly. When I make another, I will iron the interfacing to the fabric before cutting so I only have to cut once. (I’m new to sewing so everyone else probably knows to do that.) Also, I didn’t pull the elastic taut when I measured it, so my elastic was a little loose. Nothing major & I can adjust going forward. All in all a great tutorial! Thanks so much!!!
Rebecca
May 25, 2012 at 9:34 amI made this Kindle Cover this morning before work. I was shocked how quickly it came together. The only problem I had was the two outside corners being a smidge too small (I think 3/8″ seam allowance on that side was a little too much). In any event, it turned out great and I had a lot of fun using up 5 different scrap fabrics!
Deborah
May 25, 2012 at 9:40 amOh, I’m so glad! I think it comes together much more quickly than it looks like, and having given this cover away, I think it gets a much bigger reaction from the recipient than the amount of work I put in would usually demand. I’d love to see pictures of your scrappy version–fun!
Lauren
June 7, 2012 at 12:33 pmI just finished making this, and my Kindle fits perfectly. Thank you for such great instructions. I bought quilt batting before looking through all the pictures. I saw that your batting was a lot thinner, so I ended up using some felt I already had on hand. Worked great, and now I can return the unused batting. Sweet. Thanks again.
Rachael
June 23, 2012 at 5:39 pmLOVE this tutorial!!! I just made one and it turned out gorgeous!! I did have to make a few adjustments though since I have a different and larger Kindle. I have the pre 3G with the full keyboard and is white. It is 1.5 x .75 larger than yours so I had to do more than just adjust the seams. This is my cut list for any of those with the same model.
Outer & Inner Cover: 13.5″ x 9.5″
Pocket Pieces: 9.5″ x 6.75″
Corner Pieces: 3.5″ x 3.5″
It fits PERFECTLY!!!! Not to mention it looks amazing and was sooooo easy for this not so awesome sewer to put together!!
Thank you!!!!
Nana Whittington
July 15, 2012 at 9:08 amI’m so excited about making this. Can’t wait to get my kindle. I am going to have fun making this. Thanks! Amanda! Love, Aunt Nana
Amy
July 20, 2012 at 2:59 pmHello 🙂
This is a great tutorial and I have nearly finished my cover, it’s going to be a present for my mum, she’s just bought a kindle. I’m fairly new to projects like this and this one in particular. All I need to do is finish sewing up the opening on the left and wondered how you do this. How do you get it to look so presentable if you’re sewing raw edges together or do I tuck them in somehow? I’d really appreciate some help and advice on this bit as I’m so close to finishing. It’s just this last part that’s confused me.
Thanks 🙂
Deborah
July 20, 2012 at 3:01 pmI just took those little raw edges left after you turn everything right side out, tucked them in about 1/4″ or so, then pressed with some steam to get them to stay put. Then I ran an edgestitch right along that opening to get it shut! Hope that helps, and that your mom loves her gift!
Lia
July 22, 2012 at 3:30 pmSo, after waiting for more comments I have spent the last day making one of these Covers for my friend’s Kindle Keyboard.
I used the measurements that Valerie posted above, because the Kindle Fire has the same measurements, I also used 1/4″ seam allowance on EVERYTHING, bar the last part to sew all the layers of back and front and corners together, where I used 3/8″ as well.
I made a template that was exactly the size of the Kindle (since I don’t own one myself and it fits perfectly, almost a little too snug and I hope the buttons won’t turn out to be a problem. But the cover is entirely made of cotton fabric, so I suppose it’ll be widen a little with several uses.
Here’s some pictures:
https://fbcdn-sphotos-a.akamaihd.net/hphotos-ak-snc6/s720x720/603443_10151267393148943_67169263_n.jpg
https://fbcdn-sphotos-a.akamaihd.net/hphotos-ak-ash3/s720x720/599531_10151267393378943_1412433030_n.jpg
Thanks again for this awesome tutorial and all the help from the other readers!
xLia
Samira
July 24, 2012 at 2:19 amThanks for this great tutorial!
I love my new kindlecover 🙂
Lavinia
August 3, 2012 at 2:32 amHi! I love your kindle cover!!! thanks for the tutorial n___n
Laura
August 19, 2012 at 9:28 amThank you a lot for this tutorial ! I am planning to do my own cover but I was wondering if your cover would protect my kindle when I put it in my bag or if I let it fall (I am a bit clumsy). Maybe I could add some cardboard for some extra-protection ? Again, thank you a lot !
barbara
October 4, 2012 at 2:08 pmThank you so much for taking the time and having the talent to make such an awesome tutorial! I am buying a kindle for my sister as a Christmas gift, and I plan to use your instructions to make her a (hopefully) beautiful cover which will make the gift that much more special and personal. Thank you, thank you, thank you!
hblikethepencil
December 2, 2012 at 1:46 pmBrilliant pattern! Just made up three of these for Christmas presents. Thank you!
Rachel
December 28, 2012 at 1:25 pmHow would I adjust these measurements for an iPad Mini? Can somebody help? I’ve only been sewing a year, so all the adjustments still seem a bit difficult for me! The dimensions of the iPad mini are: 5.3 x 7.87. HELP??? Thank you!
Katie
January 4, 2013 at 3:20 pmI just made this for my Kindle Fire (the newest version). I did what people above suggested and changed all the 8″ measurements to 9″ ad kept the seam allowance at about 1/4″ or so. It worked perfectly!
I love it and will definitely be making more! It went super fast – it only took about 45 minutes total.
I made two modifications – First, I used a sheet of felt instead of batting, because it seemed like that would be easier to sew and I knew it would be enough protection (I made my old Kindle case and lined it with felt). I also made the corners out of the same elastic as the closure – it just seemed easier than the fabric corners and a bit sturdier too, since they are tighter.
Janet Bogan
January 19, 2013 at 12:07 pmI love this pattern and all the helpful feedback to adjust to different devices. My kids gave me a Nook Simple Touch for Christmas and I’ve had a hard time finding a protective case for it that 1) I like, and 2) isn’t outrageously expensive ($30 for a case? really?). Thanks so much!!
Deborah
January 19, 2013 at 1:45 pmI’m so glad you like it! I had the same struggle–they were either ugly or too expensive or both. I love mine, hope yours makes you just as happy. I hope you’ll post photos in the Flickr group–would love to see your results when yours is done!
A case for in case « Cookies and Crafts
January 21, 2013 at 4:16 am[…] protect it a bit while I was reading it. So, I found a picture of one online that I liked, along with a tutorial for it and tweaked it to fit my […]
Janet
January 25, 2013 at 1:38 pmSo I finished my Nook cover based on your directions and I LOVE it!! How do I post pictures?
Deborah
January 28, 2013 at 11:27 amI’d love to see them!! Click the Flickr group link in the sidebar and you’ll be able to join and upload to the Whipstitch Flickr group! 🙂
Janet
January 28, 2013 at 12:23 pmOkay – I’ve joined and uploaded my pics to the Flickr group 🙂
Frankie (FreakieB)
February 9, 2013 at 12:50 amHi, I made a cover for my Nook Color using felt. No interface, am working on 2nd cover now b/c I am getting a Kindle Fire HD. Will add the interface to next one. This was not hard but it was my “very first” sewing project ever. Pictures on the Whipstitch group URL. Thanks for everything ya’ll
FB
Patty
February 9, 2013 at 12:44 pmany way to get the tutorial in a pdf file?
Anna
February 14, 2013 at 3:20 amThank you so much for this tutorial – though there are millions elsewhere on the Internet this is my favourite by far! I’ve just started sewing and I had to substitute the batting for a piece of felt and a yellow (unused!) dusting cloth. It came out fine though! Thank you!
Word Up | cheletopia
May 2, 2013 at 7:36 pm[…] majority of this cover was patterned after the Whipstitch Fabrics’ KindleCover Tutorial that I found on Pinterest (of freakin’ course). I added the pockets on the left – a […]
sarah sky
June 12, 2013 at 5:11 pmThanks so much! this fit my kindle perfectly once i cut away the excess. Didn’t see all the comments about sewing at 1/4″ and did 1/2″ and it came out great anyway. Needed something smaller for travel.
I also added a little piece of thin cardboard inside right before i stitched up the last part. Just for a little extra protection because i didn’t use the batting, just really thick interfacing.
yay!
Sarah sky
Rose
July 14, 2013 at 3:13 pmLove this cover. I made one in the past but this one is nicer with the extra padding and the pocket for storage. I made mine 1/4″ large in the material to fit my sister’s Nook and it was perfect. Thanks for the simple instructions.
Naomi
July 18, 2013 at 9:09 pmMy Kobo Touch is the same size as your Kindle (4.5 x 6.5) so I will be using this tutorial to whip one up. Thank you so much!
Lisa
August 13, 2013 at 12:50 pmHI. I want to make this for my husband for a gift but he has the Kindle Paperwhite model. I am very new to sewing and don’t know how to make the adjustments to the measurements. I didn’t see anything in comments about others having this model. Thanks for any help.
Marilyn
August 28, 2013 at 10:24 pmThank you so much for this tutorial! I made a cover for my kindle. The pockets aren’t as neat as yours but I’m still learning about seam allowances – And it was good practice. Plus now my kindle has a cover! Thanks for this tutorial!
Ingrid
December 25, 2013 at 5:45 pmI got Kindle Paperwhite for Christmas this morning and by the afternoon I had whipped up this little cover. Thanks so much for this tutorial! I love it, and the fact that I can now spend more of my accompanying Amazon gift card on ebooks rather than a cover!
Gemma
July 28, 2014 at 8:20 pmHi, just wondering what measurements/seam allowances you used for the kindle paperwhite? Trying to adjust this tutorial for mine too 🙂
Karen Burney
July 28, 2014 at 8:36 pmGemma, I used the original measurements with a 1/4″ seam allowance. I did the corners as directed, though I still don’t know why you can’t cut the square smaller and just fold it. I guess the seam gives the bias edge more stability.
Gemma
July 28, 2014 at 9:06 pmOh really? I thought I would have had to make it a lot smaller! Thankyou, I will give it a try 🙂
Deborah
July 28, 2014 at 10:44 pmKaren, you’re exactly right: I have a seam running along that diagonal because I found that without it, if I folded the squares in half, that bias line had a tendency to stretch out, and after a while, the corners of the Kindle weren’t secure any longer. With the seam there, they retain their shape and my Kindle stays put! I’ve been using mine (without removing it from the cover) ever since I wrote the tutorial and they’re nice and firmly anchored. Hope that helps! 🙂
Monica
February 14, 2014 at 12:49 pmI finally got around to making my paperwhite a cover. This tutorial is awesome. Thank you so much. I am pretty terrible at sewing so mine didn’t fit my paperwhite. I tried to do 3/4 seams for the final seams around the outside but my kindle wouldn’t fit, so I ripped them out and tried with a 1/4 seam allowance and left gaping holes everywhere. Such a mess. And the fact that I can’t cut straight lines didn’t help either. So I’m going to try it again. I’m hoping to learn from my mistakes. This tutorial is so great and spells everything out simply! Just what I need.
Deborah
February 19, 2014 at 9:31 pmI’m so glad it was useful for you! I loooove my Kindle cover, and gave the “spare” to a good friend, who uses hers all the time. And I love that so many folks have updated the measurements for various models here in the comments–hope you’ll add some more notes for your Paperwhite when you get a chance! 🙂
Nancy S. Brandt
March 9, 2014 at 11:49 amI’m going to make this for my daughter and one for myself. We both have Nook Simple Touches, so I’ll check the measurements. I don’t understand something, however, and it doesn’t seem to be in the comments. Why cut the 3×3 squares in half on the diagonal, and then just sew them back together? Why not just fold the squares in half diagonally and top stitch? Seem like it would serve the same purpose and end up with essentially the same thing.
Thanks for this tutorial. It’s exactly what I’ve been looking for. I’m thinking of adding a second, smaller pocket on the left side bottom for things like a notepad, a pen, maybe business cards. I’m a fantasy author and often have my business cards with me.
Thanks!
Karen Burney
June 1, 2014 at 11:15 amI have the same question. Cutting the corners at 2.5″ and just folding them ends up the same size. Does the seam add anything to the sturdiness?
jeune femme
June 24, 2014 at 7:18 amQuel plaisir de parcourir ce site web
Jackie
August 16, 2014 at 7:15 pmMade one for my kindle paperwhite. A little snug in the pocket but still comes out fine. I expect over time it will loosen a little. Love the tutorial.