
 It is rapidly becoming curtains week around here–first a revised set for our boy’s room, then the temporary curtains for the front living room, and now some for the den. I guess it goes to show the power that imminent house guests can have!
 Our little late-mid-century ranch has a pretty standard floor plan: you enter the front door, which is more or less centered on the front of the house, and you’re in a foyer with a formal living room on the left and a dining room beyond that. In front of you is a hallway, and on the other side of the hall is a family room. We call it the den. Den just seems so warmly old school.
Our den has one wall almost entirely occupied by a double-wide sliding glass door that leads to a sunroom. These doors are original, and when the house was built, led to what we suspect was actually a screened-in porch that was later closed in with Florida windows to make the sunroom that we use as a playroom for the children. In practical concerns, that means we have a 16-foot-long floor-to-ceiling window on one side of the room that is open to view from the back of the house.
Originally, prior to our purchase, that window had drapes across it that looked like this:
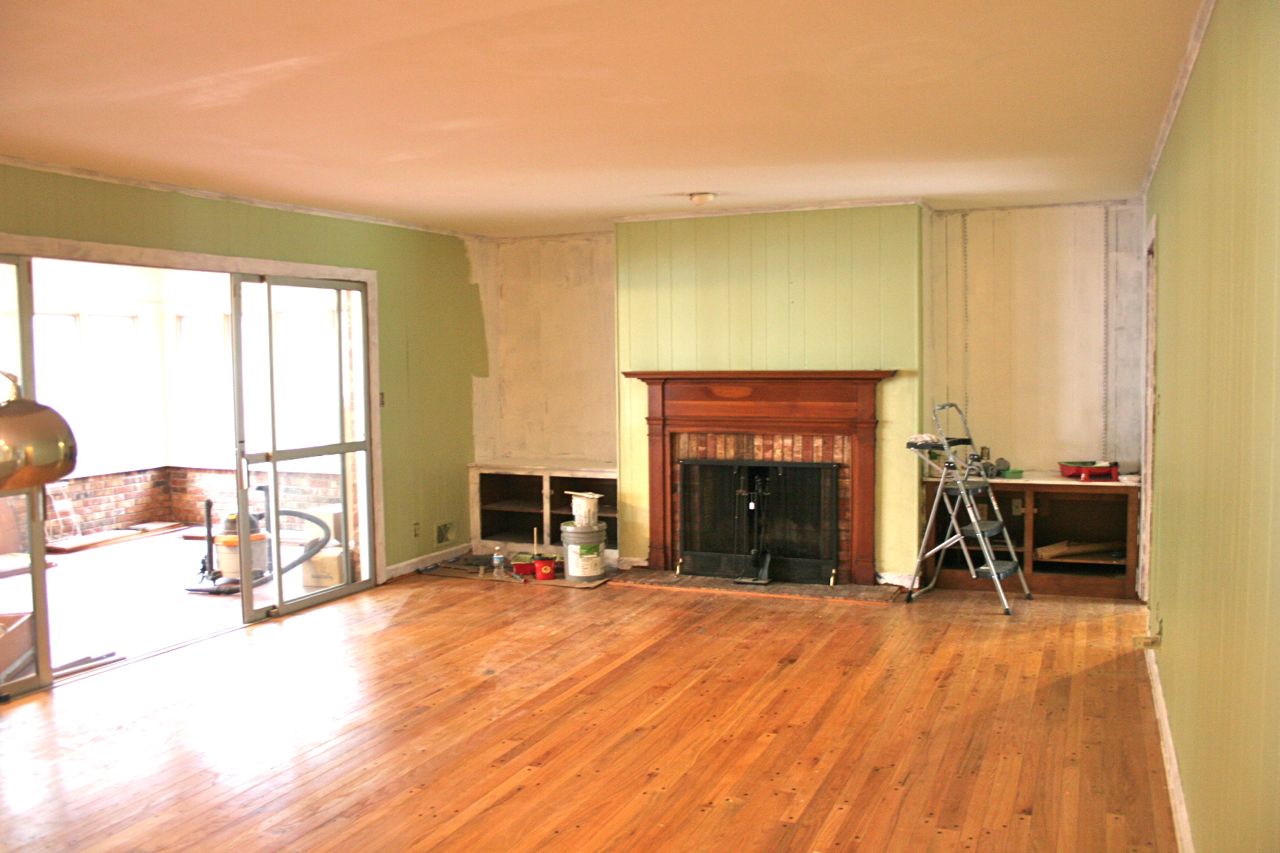
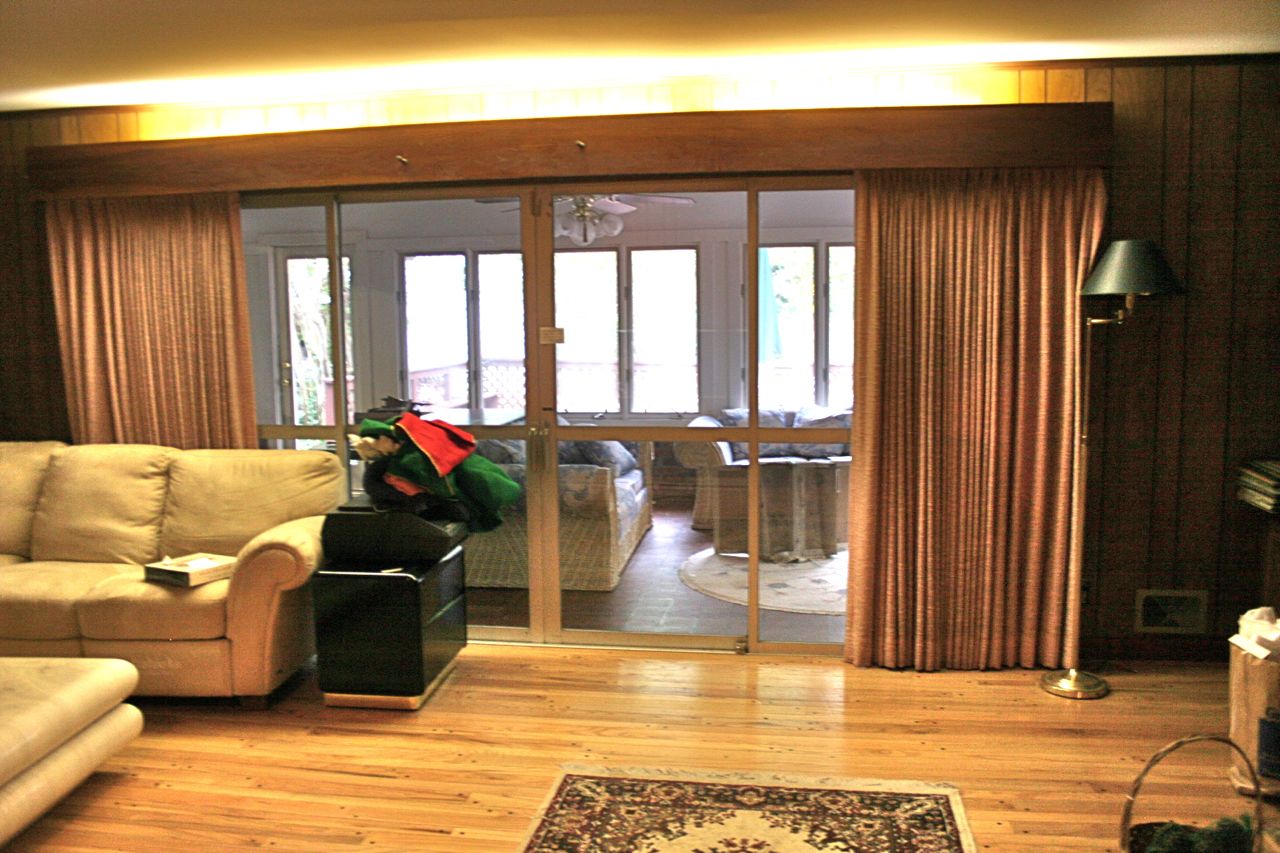 This is a photo I took during the walk-through we did about four months before we bought the house. I have thrown this bad boy in iPhoto and lifted shadows and brightened it up the absolute max that I possibly could–and it’s still this dark. The whole room was wood paneling and closed doors and heavy drapes. Dark, dark, dark. (This is the previous owner’s furniture, I should point out–don’t get me started on how the scale of the furniture and the layout of the room made you feel as if you were being eaten alive and chased away simultaneously.)
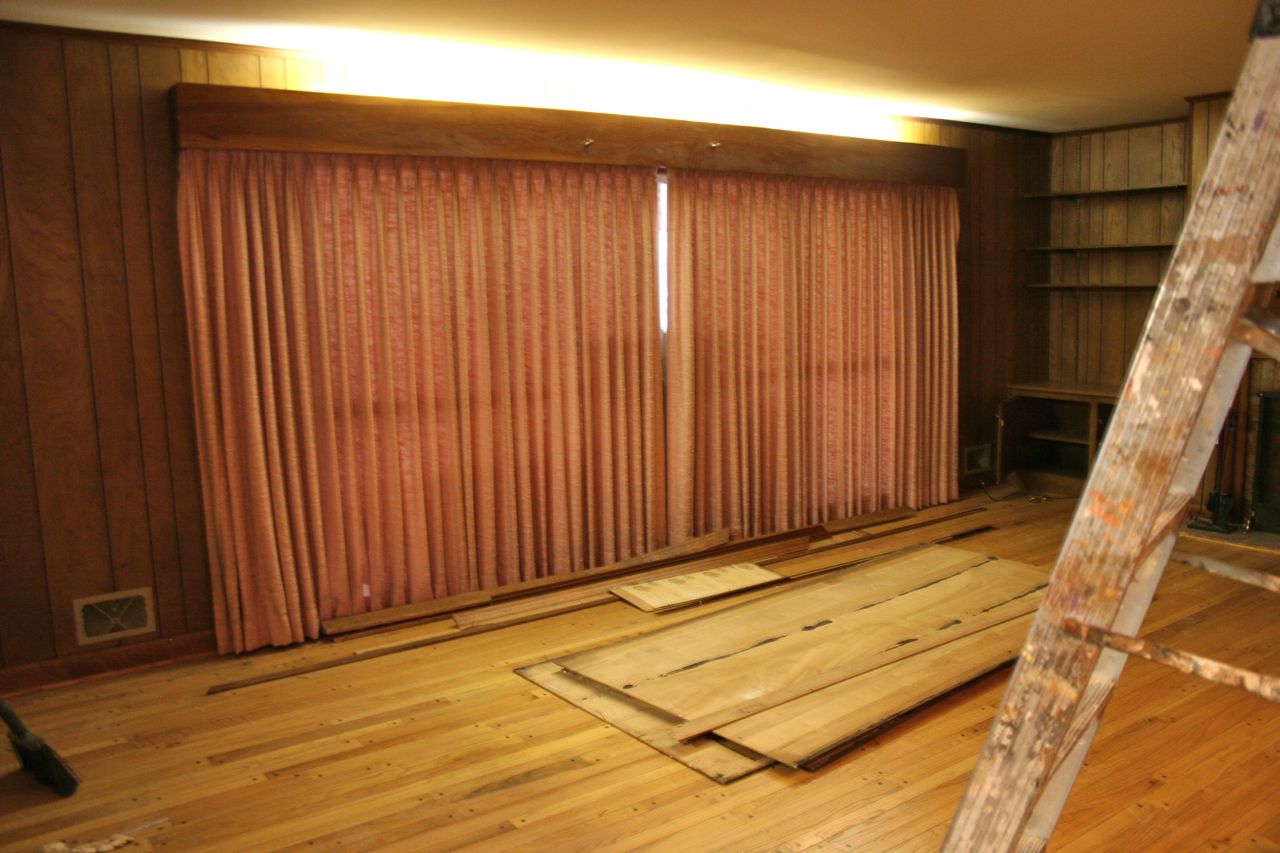 After we closed on the house but before we moved in, we did the vast majority of the painting. We also had a contractor come in and remove the wall between this room and the kitchen, as well as updating all the kitchen appliances (our inspector said, “Don’t use the oven. I’m serious.”). While he was there, I asked him to help me remove the drapes and their valance and uplight. That’s right: I said uplight. That ain’t sunlight coming in above that valance, y’all: that’s the beauty and power of four long fluorescent bulbs, baby. Yes, it is.
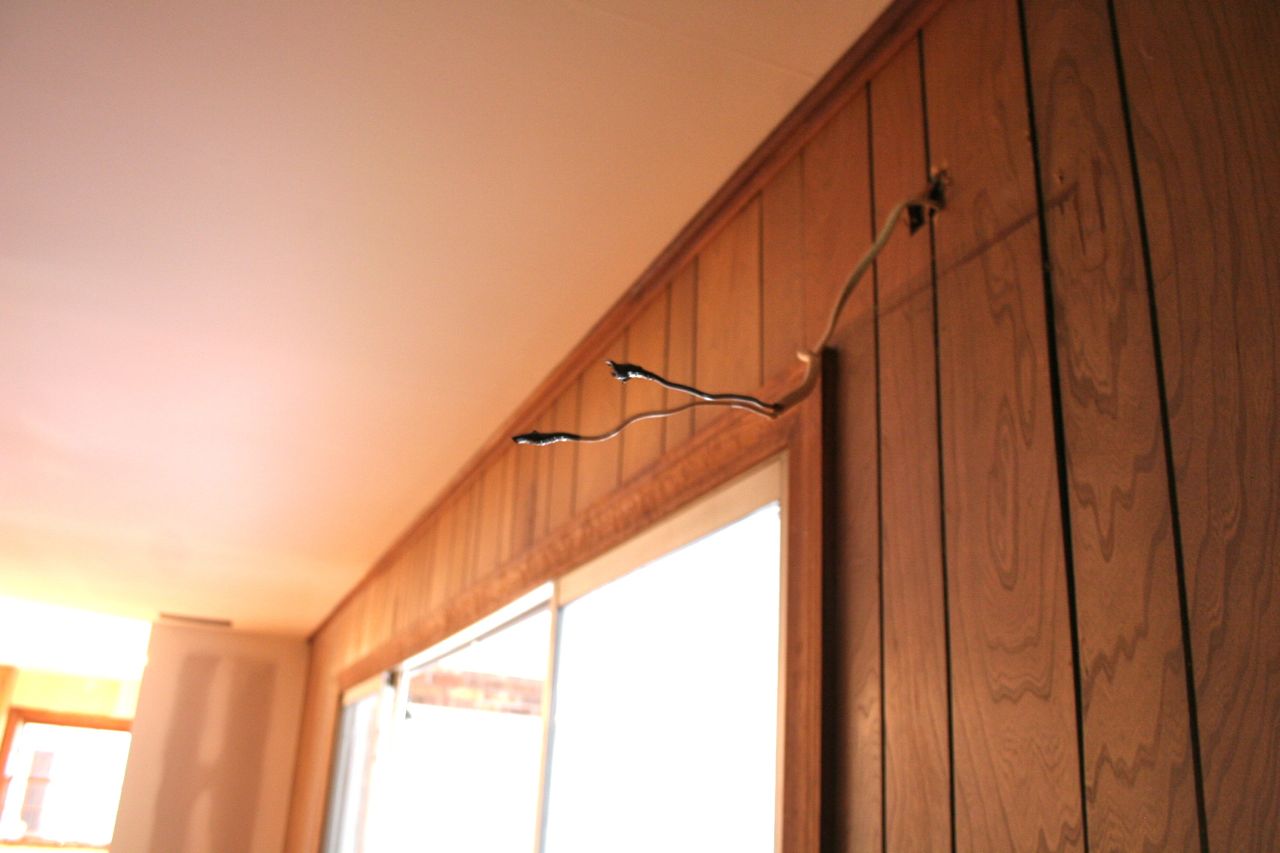 Here you can see the valance down and the wiring from the fluorescents exposed. Totally bizarre–I’ve never seen a light fixture like that, and it was most certainly not invited to stay in our house once we moved in. Neither was the paneling. In the left of this shot, you can also see where we took out one wall leading to the kitchen up to the ceiling, and replaced it with drywall and a cutout for a bar–more light, more light, always more light. No more deep, dark, animal den in our den.
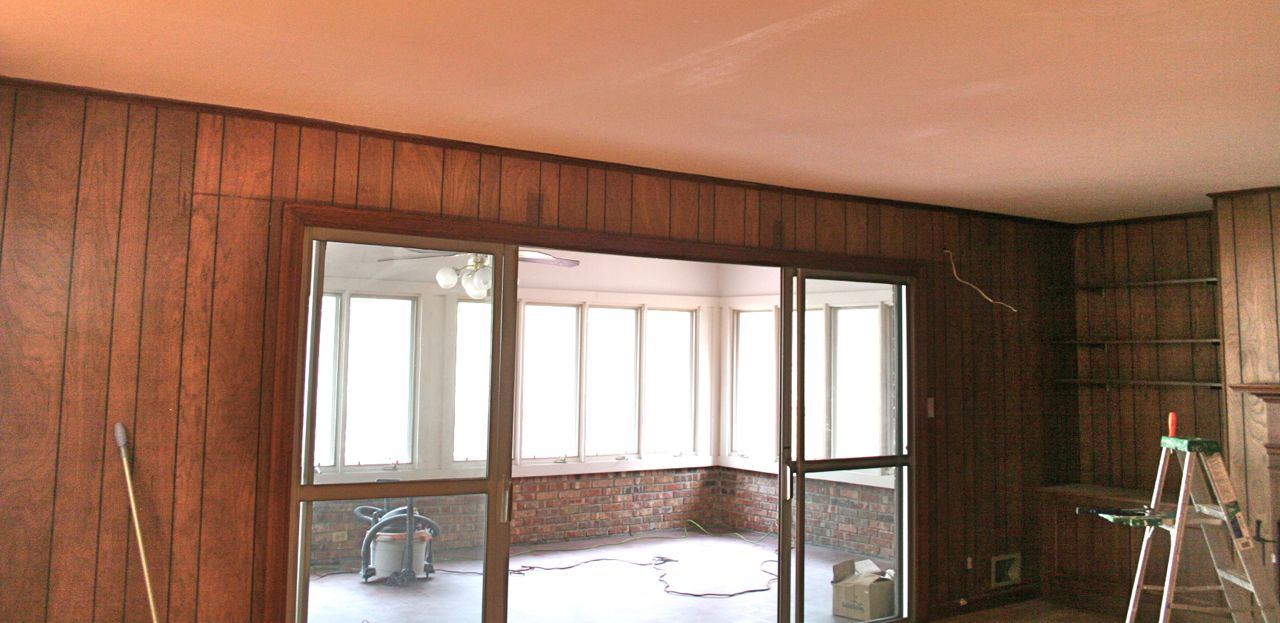
With the valance down, you can see how much brighter it was in here–but the paneling is still dark. (And the book shelves are tragic–I mean, someone explain to me why you would build in cabinets below, but then do brackets on metal track above for the shelving? Does not compute.)
In our last house, we finished the basement. It took my husband and me about six weeks to choose a wall color we both loved. So for this house, rather than go through all that again, we decided to just use that same color from the last house on ALL the public rooms in this one. It’s Homestead Resort Parlor Sage from the Valspar National Historic Trust collection, and it changes in the light as the day goes along in a way that’s really rich and textured. Plus, it brightens the heck out of this dark room–this was a few days before we moved in, when we were finishing up the painting. You can see the bookshelves, where we decided to make them look more built-in by coating the paneling at the back with the same paint we used to paint the trim throughout the house–high gloss Pure White–and then change out the hardware. World of difference, and we didn’t replace a single bit of wall.
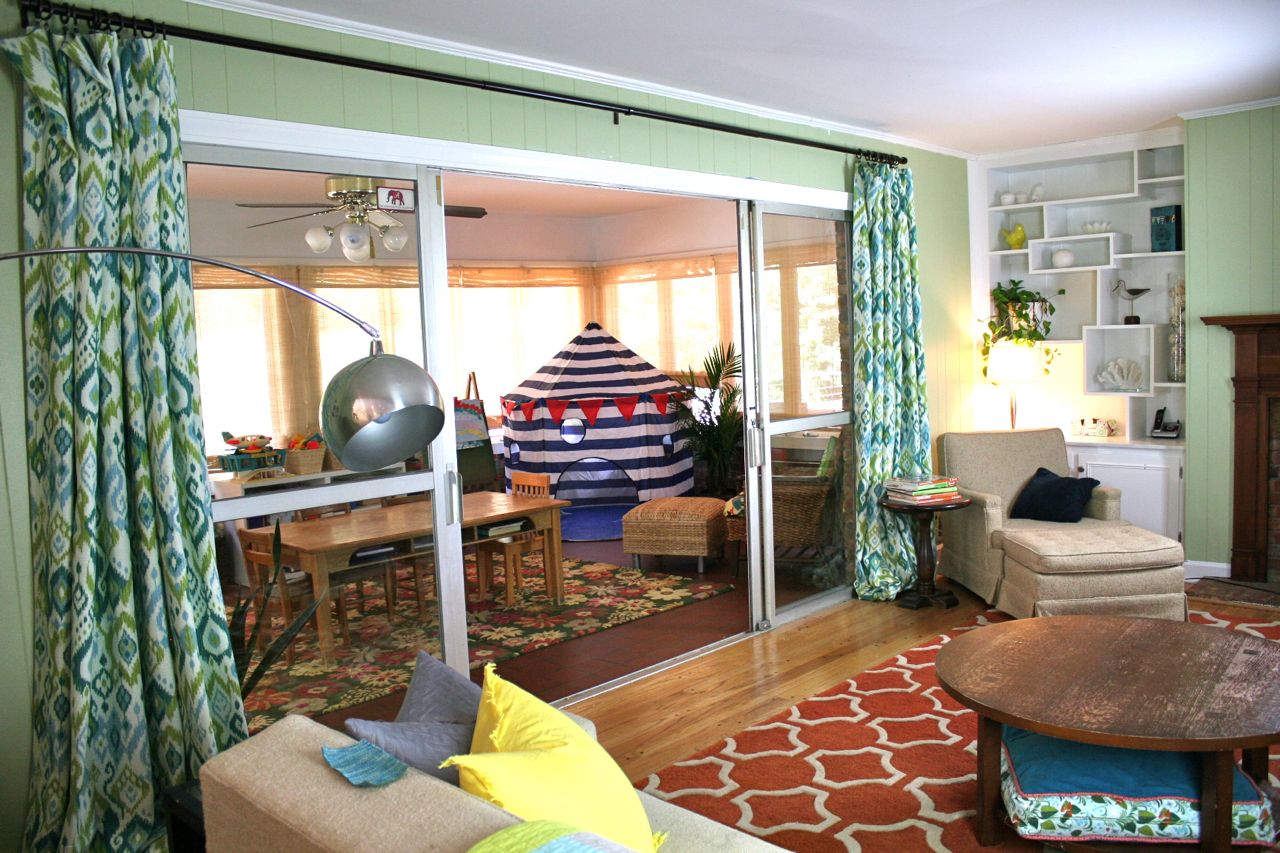
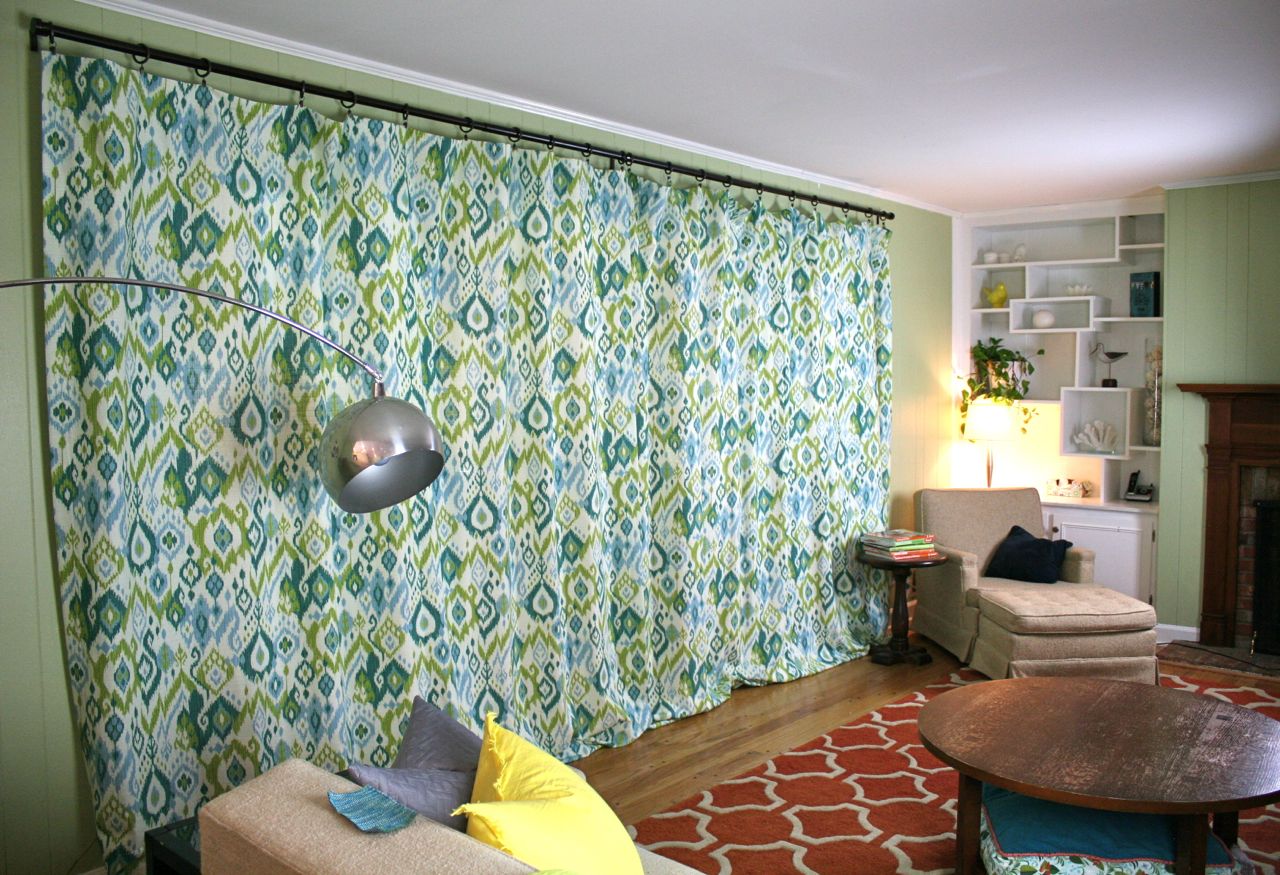
So long story slightly less long, this is what the room looks like now, with the updated paint and book shelves and NEW DRAPES! Circuitous route, but there are relevant details that had to be shared before you could really appreciate what a big deal these drapes are. They’re not just curtains. They’re sunshine and HOPE.

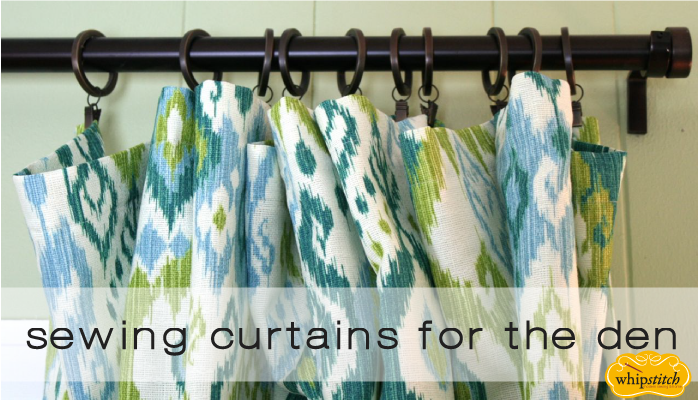
The fabric is a heavy cotton ikat with a slub textured weave that I adore. It has all the colors that I love best, on a softly creamy background. I ordered 14 yards of it and spent a ton of time thinking through how I would construct the curtains themselves.
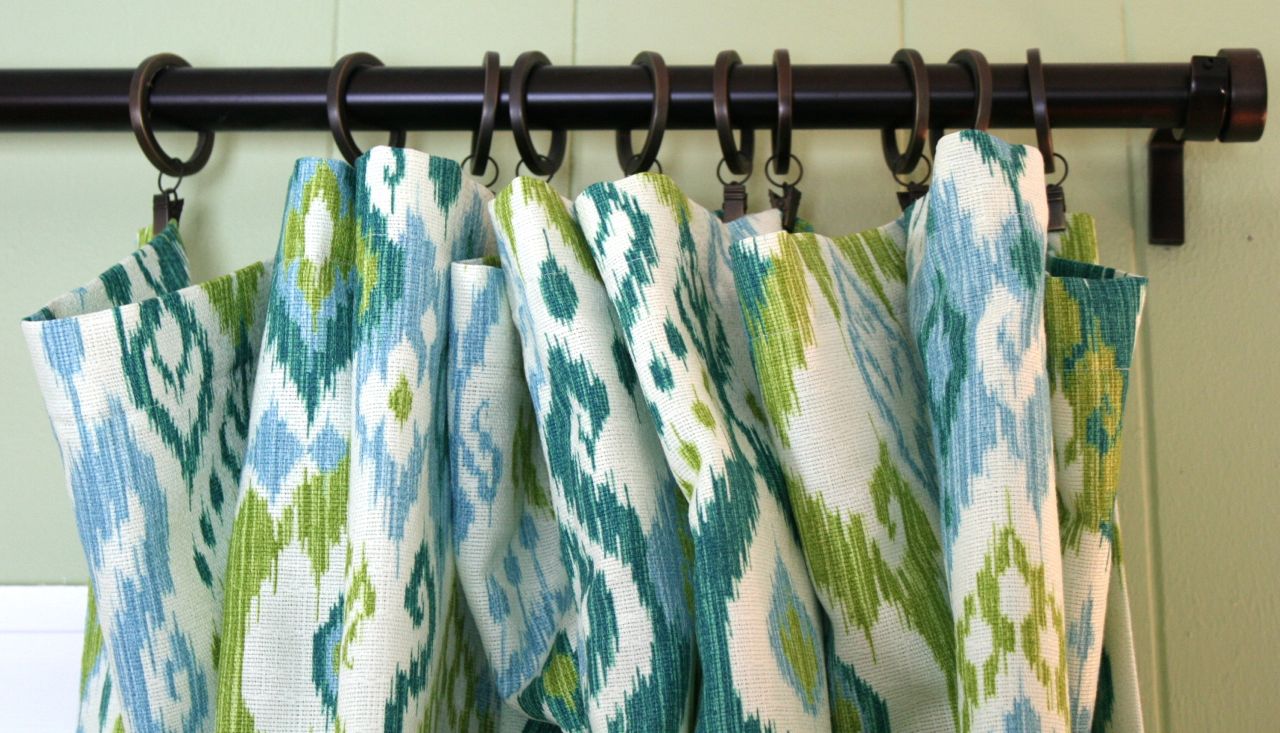
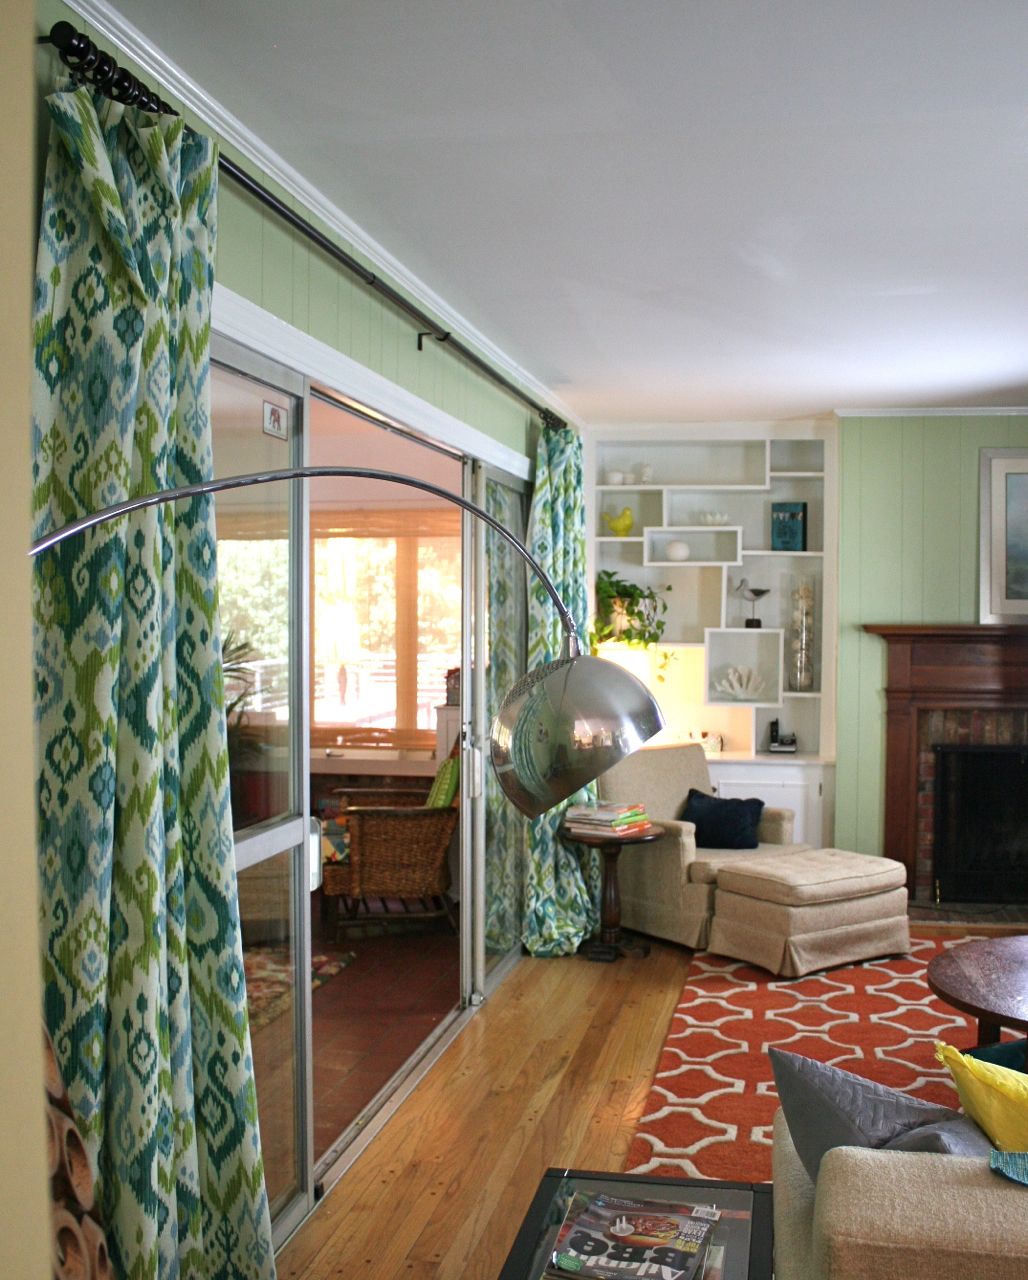
The curtain rod was the hardest part. Can you even imagine how tough it is to find ANY kind of traverse rod for a window that measures 16 feet wide? Much less one with some style and panache? Custom rods are absurdly expensive, and I knew we’d rarely feel compelled to completely draw these drapes–we can close them when we’re watching a movie or when our oldest has someone sleeping over and they want to stay up late in the den, but for the most part, we leave them open. I don’t need something with a ton of muscle, just something LONG enough that looks great. Crate and Barrel, of all places, came to the rescue and had just the right thing for a very reasonable sum compared to what else we had seen while searching.
The curtains, though, had to be made with this rod in mind. Because it’s two rods with a connector in the center (and a small center support bracket), I didn’t want to have a ton of weight on the rod, either when they’re open or closed. I had initially thought I would line the curtains entirely, but worried the rod would warp with too much weight. In the end, the sides are turned under 1.5″–first 1/2″ and then another 1″ in a double-turned hem–and the upper edge is turned under 3″ with a strong seam. (The lower edge still isn’t hemmed–I wanted to check the length and I loved them so much I still can’t bear to take them down!) I used the clippies that came with the rings for the rod to hold them up–very strong, much better quality than a lot of the drapery clips I’ve tried in the past.
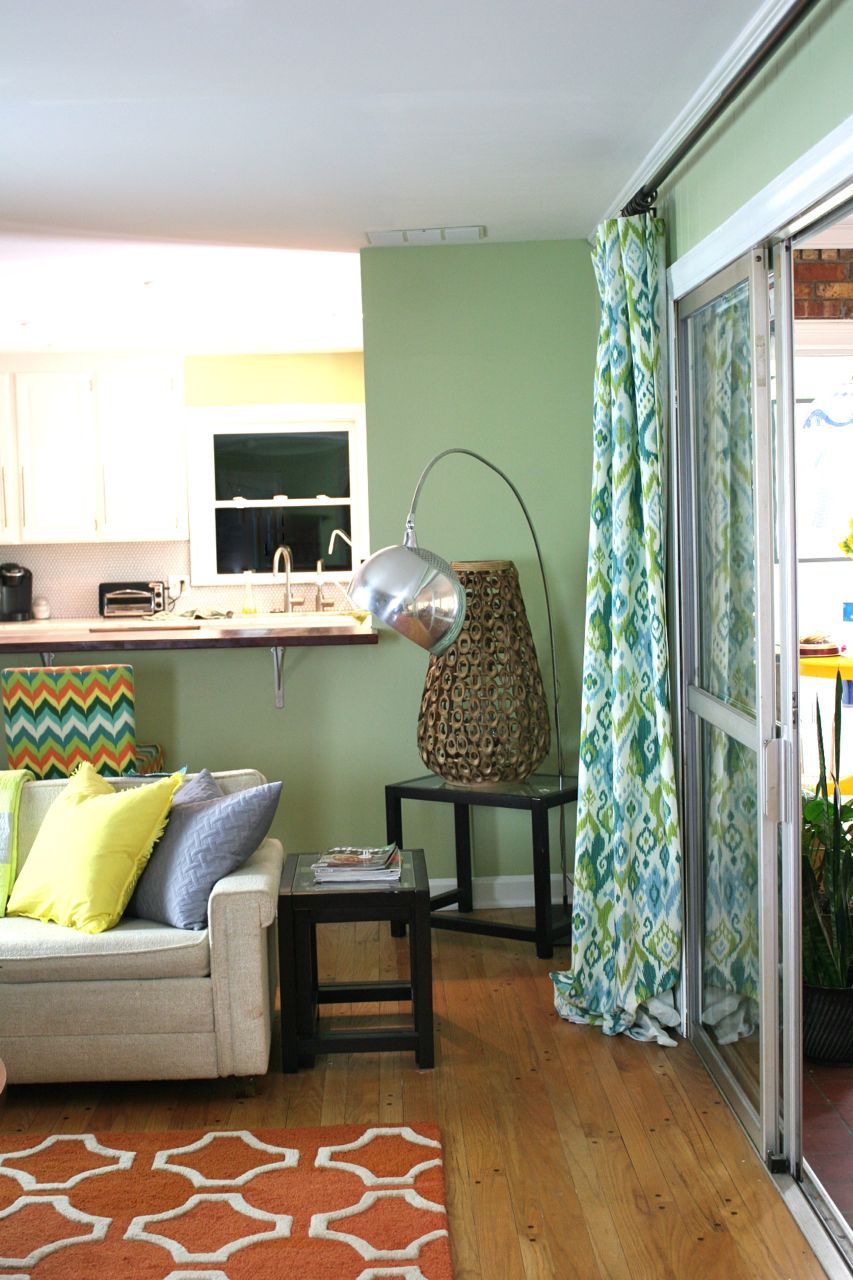 It is immeasurable how different this room is with the light and the paint–even I don’t recognize the room in the old photos from above. But these curtains really do make a much bigger impact on the room than you might think. They bring in more color and lightness, they tie together other elements in the room, and they are a great contrast for the orange rug we chose for the floor. They also create a really vivid frame around the sliding doors as they pass into the playroom, and because we hung the rod nearly at ceiling height, they make the whole room seem taller and more airy.
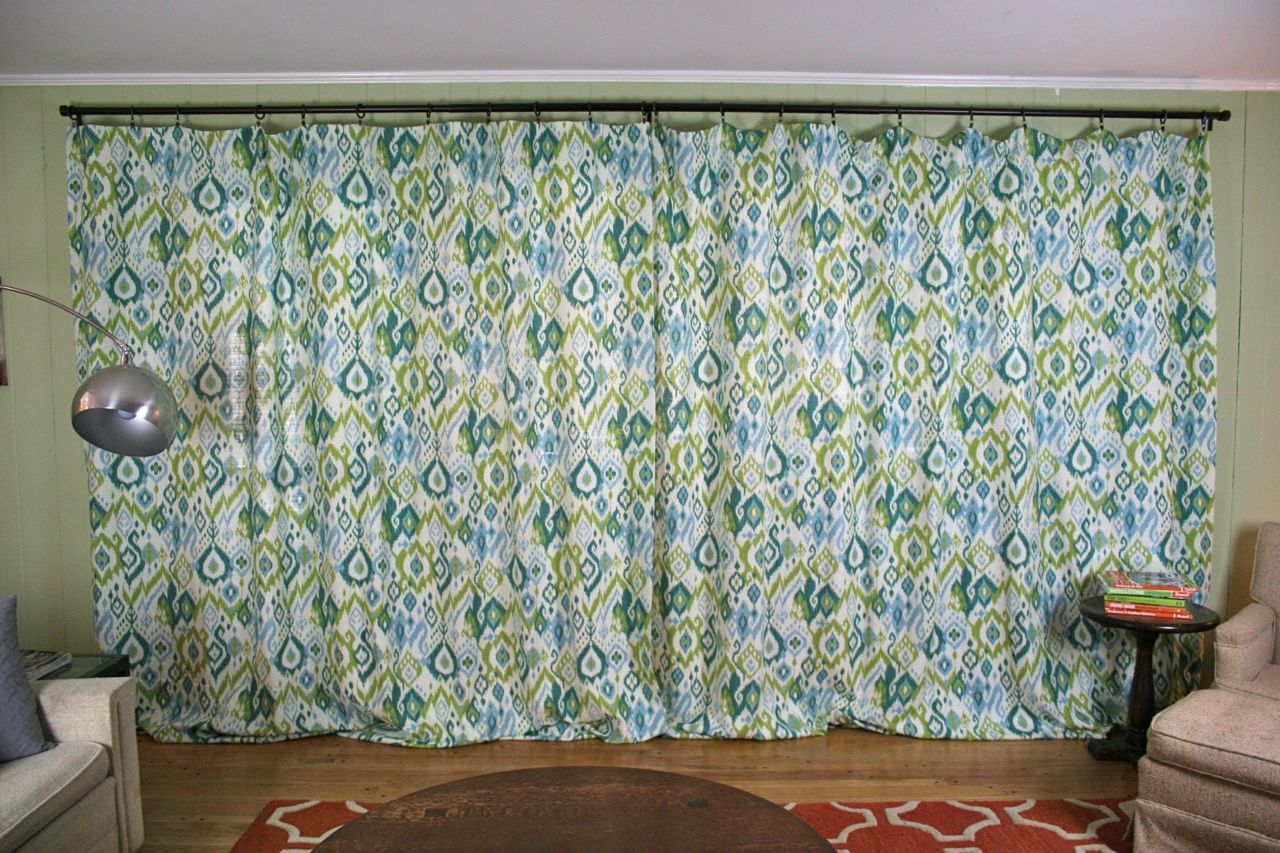
While I was sewing, I made a conscious effort to match up the design across the panels as I sewed. Each of the two panels is made up of two cuts of fabric, 2.5 yds long. Because the fabric is 60+” wide, I used four to cover the whole width of the doors. I matched the pattern across the two cuts in each panel, and across the two panels where they meet at center–which is why I bought 14 yards, just for the extra yardage to match the pattern. Plus, it came in handy when our son got jiggy with the scissors one day while Mommy was in the bathroom and chopped a giant chunk out of one nearly-complete panel. I ended up using all my “extra” fabric to cut a new section and attach it with a nearly-invisible French seam–it’s over at the lower left, and I bet you can’t see it. (At least, I hope not!)
We’re still working on the furniture in here, so that these drapes don’t get wasted on a room filled with sad upholstery. You can just see the swatch in the lower right of this photo for the mid-century sofa–it’s getting this fabulous aqua-and-peacock tweed treatment. I just got the call today that the fabric has arrived (special order, thankyouverymuch) and it’s time to get cracking! The chair and ottoman in the upper edge of the photo has gotten an updated pillow, and once the sofa is done, will be re-covered in a yet-to-be-found nubby grey boucle about which I am unreasonably excited. Once those arrive, I’m pretty sure the sofa will be the star of the room, but until then, the curtains have the floor.


Tera
July 18, 2013 at 2:10 pmLove them! Are you planning to use drapery weights? I just finished bedroom curtains but they need some weight to hang just right and I wondered if you have a recommendation.
Lynn
July 18, 2013 at 3:08 pmMy mother in law has “up lights” like that in every room of her house. It was built in 1961, I think.
I love your changes!
Karen
July 19, 2013 at 7:45 amWow, what a change you’ve made in that room with some paint and light! Love your decorating style – pure fun! You are one Crazy Sewing Lady! Keep it up!
Hilary
August 13, 2013 at 2:55 pmThe room looked nice before) But after remodel it’s great! Good job! Thanks for sharing.
Lynn Clark
August 19, 2013 at 10:52 amI love this fabric. Would you please tell me the name of the fabric and where you purchased it? Thank you so much. I love the den. GREAT JOB!!
Deborah
August 19, 2013 at 11:44 amI love it, too! I ordered mine from Fabric.com, but it looks like they’re out of it. I found one other place online that seems to still have some, but at a higher price than I paid (sorry!):
http://www.pillowperfect.com/fabricbytheyard/indoor-gunnison-grasshopper-fabric.html
Hope that helps!