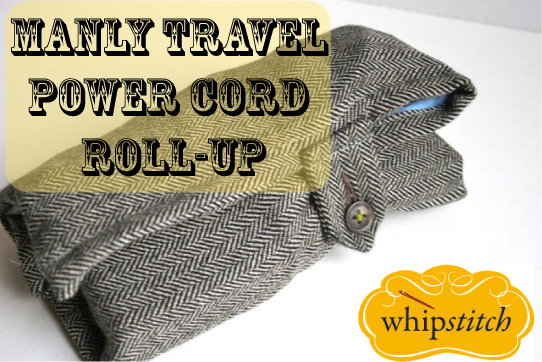
Took a little longer than I anticipated, but it turned out super cute! I’m delighted to share with you: The Manly Travel Power Cord Roll-Up, just in time for Valentine’s Crafting!
This tweedy little wrap has space for multiple laptop/phone/digital music accessories and cords, and bundles up nice and tidy to fit in a corner of a suitcase for travel. Plus, it’s masculine enough to make husbands want to use it, but sweet enough to look good no matter what. Woot!
I made my version from a pair of thrifted suit pants, but you could make it from a couple of fat quarters with no trouble (which means that if you like it enough, you can make a girly version for your lady friend, too).
Easy peasy steps and sewing!
You’ll need:
- a piece of wool tweed measuring approximately 18″ x 22″ (or a fat quarter of fabric)
- a cotton fabric for lining, same dimensions
- thread
- one 1/2″ button (I harvested mine from the same suit pants I cannibalized for the tweed)
- (optional) piece of cotton batting measuring 18″ x 22″
Prep your fabric
 Because I harvested my fabric from a pair of pants, I had to begin by prepping it–I chopped off both legs, thinking I’d need two, but settled on just using one. I slit up the inseam and pressed and steamed as much as was reasonable. I left the cuff intact–it’s an interesting detail and I wanted to utilize it in the new design.
 Square up the fabric. I began by guesstimating the dimensions of the pocket I wanted to make–by eyeball, but it’s right around 6″ deep. I folded that up, then trimmed the sides even, followed by squaring off the top.
 The obvious selections for a lining might have been white or black, but since both of us have both white and black power cords, I wanted to choose something that would contrast and make them easier to dig out–no point in making a cord tote that makes it tougher to locate your cords. I chose a soft, masculine blue that reminds me of dress shirts. This is a fat quarter of Kona cotton.
 Open out the cuff of the pants, if you have one. If not, sew the edge of the lining right side to wrong side with the opposite edge of the main fabric. In this case, the lower edge of the tweed, which will become the upper edge of the pocket when this is assembled, is sewn to the upper edge of the lining. Use any seam allowance you like–this is 3/8″.
 Flip the lining over so that pieces are wrong sides together. Press the seam nice and crisp–use plenty of steam. You can see in this image that there’s a lip of tweed sticking out–that’s the cuff from the pants, which I’ll be using to make a folded edge on the pocket front.
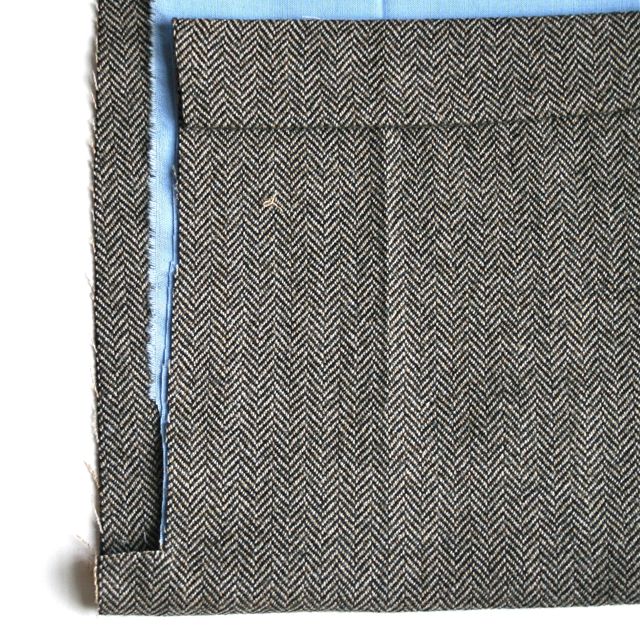 Fold up the pressed edge to create your pocket. (If you’ve looked at Stitch by Stitch at all, you’ll begin to recognize this as a distant cousin to the picnic placemat project–not deliberate, but I guess my mind tends to work through problems in similar ways!) At each side, cut away a small chunk from the top down to about 3/4″ of an inch above the fold. We’re going to create a self binding, and you’ll need to leave that little chunk behind for the mitered corner.
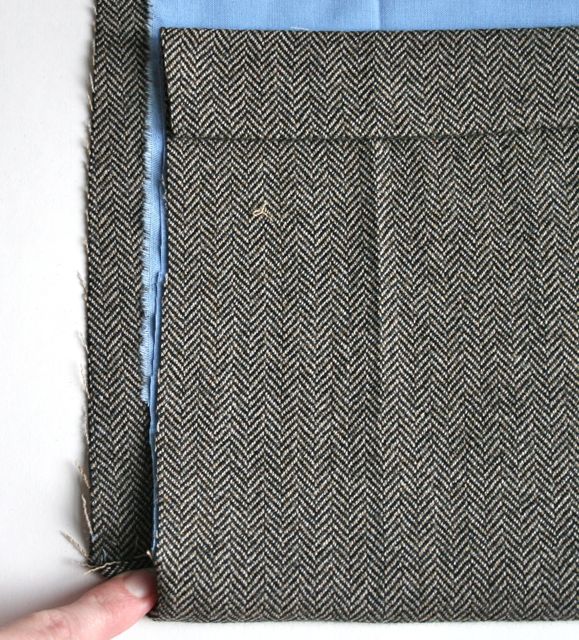 Press in that little corner with the tip of your finger until it forms a triangle. Then fold the raw edge in 1/4″ and press. Fold again another 1/4″ and press again.
 As you press, pin the edge in place, heading up toward the top of the wrap. Remember, you’re folding the edge OVER the pocket, so you’ll want to be certain that the pocket depth is right where you’ll want it later. Repeat on the opposite side; once both right and left are done, you can do the upper edge.
 At the upper edge, fold in the corner again, making a triangle like you did before. Press in place.
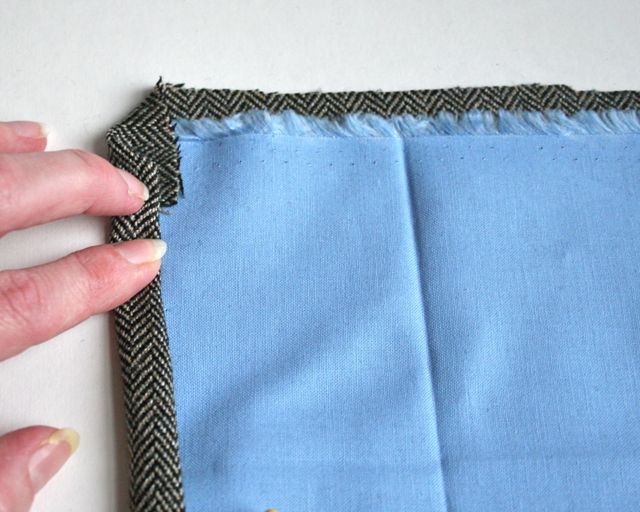 Fold the side in, double folded, until it meets the triangle you’ve pressed.
 Fold the upper edge the same way, catching the upper edge of the lining as you do. Press in place–don’t worry that the tip of the triangle is poking out a bit, we’ll fix that in the next step.
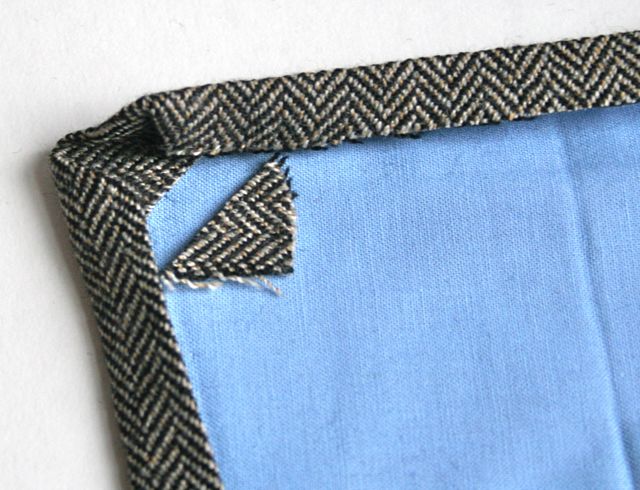 Open the side and top back out, then trim off the tip of the triangle so that you’ve cut it below the creases left from pressing in the sides.
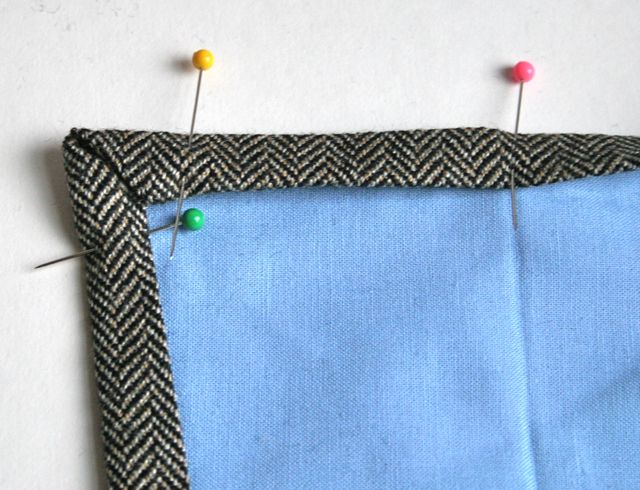 Re-fold the sides and upper edge and pin in place. Repeat all this on the other upper corner.
 Now that everything is pinned and ready, you can stitch! Begin at one lower edge, backtacking securely, then sew up one side, pivot at the miter, sew across the upper edge, pivot again, and sew down the opposite side, backstitching when you get to the bottom. Press, press, press.
 You’re in the home stretch now! Time to mark your pockets to sew the channel stitches that will form them. The upper portion, where the lining is visible, will become a flap to cover the cords and keep them inside the roll-up, so we don’t need to stitch there, just on the pocket itself. I used my Clover chaco liner, because its sharp “teeth” allow it to place chalk on the nubby tweed without pilling it or dragging across it the way tailor’s chalk might. Use a ruler to help you keep your lines good and square with the lower edge of the roll-up.
 As you’re drawing your lines for your pockets, think about what’s going in them. I made sure to have one that was at least 4.5″ wide, since both my husband and I take our Mac chargers with us when we travel. Remember that you’ll need more than the width of the object, since these things are all three-dimensional, and will take up more space than just the measurement of their width. I like having sections of varying sizes, so I mixed it up some.
 Head to your machine, and simply straight stitch on top of your lines, backstitching at each end to secure the stitches.
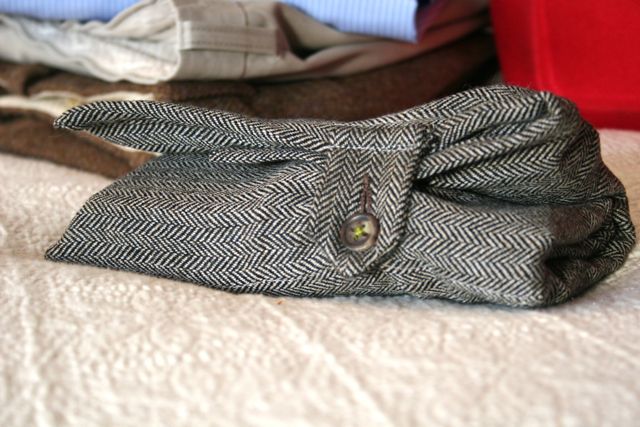
 And you’re done! You can tuck in a cell phone charger, an iPod accessory cord, a large laptop charger, even ear buds. The flap folds down to cover the whole thing and keep everything secure so it won’t slip out when the baggage guys snatch your bag from you while you’re trying to board the plane and toss it carelessly beneath into the luggage compartment.
 I really like the menswear feel of this project, and how the lining genuinely reminds me of a shirt inside a man’s suit front. Sexy businesswear! For your cables and cords!
 For a closure, I took the tab off the waistband of the pants and repurposed it as a button loop–I loved the feature on the pants, and wanted to find a way to include it in the design. If yours don’t have one, or you’re working with straight fabric and not thrifted goods, you can make a tab, or you can use a hair elastic stitched through to make a small elastic loop to go around the button. I filled and rolled up mine before marking the button placement, then hid the stitches inside one of the pockets so they’re not visible from either side of the roll.
 It’s traveltastic! We two are heading to the mountains this Valentine’s Day weekend for a couples’ retreat. This will be his travel gift (despite the fact that we’ll get no reception up there–at least his cords and cables will have a nice place to rest while the two of us are reconnecting!).



Rebecca S
February 9, 2012 at 8:49 pmI totally see a hair straightener going in this 🙂
Deborah
February 9, 2012 at 8:52 pmHa! That’s hysterical!! 🙂
Claudia
February 9, 2012 at 11:15 pmYou are amazing. That is so fabulous! Have to say I agree, I see the curling iron in addition to the Kindle cord, phone charger, etc!
I love the wool and using the button tab for the outside and the cuff for detail is icing on the cake!! Thanks so much for taking the time to work this out and share it. A bright spot in my day!
Melany
February 10, 2012 at 10:41 amBrilliant! I love it.
michael moebes
February 10, 2012 at 1:06 pmIs this what was sitting by my ipad last night? Didn’t know it was for me…thanks!
Debbie
February 11, 2012 at 11:24 amThis is great! I love that you kept the hem of the pants as an awesome detail! Deborah I swear you are “Super Woman”! How you manage to do everything and still have time to do this tutorial for us is just amazing.
Manly travel power cord roll-up « Hands off my hem gauge
February 12, 2012 at 10:29 am[…] to a girly-girl clutch. Something I definitely want to explore. Thanks to Whipstitch for the How-to. And yes, you can finally use that pair of trousers the man in your life refuses to wear. Share […]
Sarah
February 14, 2012 at 10:08 amNice. I have a suit jacket and a couple of shirts waiting for re-purpose that will do for fabric. Time to tame those snakes!!
Amy
February 15, 2012 at 3:13 amHi I gave this a go with an old suit jacket, used the existing lining. The fabric was really slippery to work with but it still turned out well. Thanks for the tutorial!
Michelle Cherry
March 27, 2012 at 11:41 pmJust made one for my sister who does a lot of traveling for work. I used a silky red for the inside lining. Only for her, as I would not work with a silky lining again.
Thanks for the easy directions. I’ll be making one for my son and his partner out of mens tweeds.
Michelle
Deborah
March 28, 2012 at 1:15 pmOh, I’m so glad!! Please do add photos to the Whipstitch Flickr group–I’d love to see your finished results! 🙂
suhaila
August 17, 2013 at 6:03 pmthanx so much for this query solving tutorial,i mean to say those frustrating qeustions we ask during our travel ”where’s my charger gone?”errrrrrrrrrr!
this is just perfect for a father’s birthday gift
Therese
January 20, 2014 at 12:02 pmSilky lining? Couldn’t this be tamed with temporary adhesive spray? Love the tute! I have an old wool coat I’ve been saving for projects. Thanks.
Deborah
January 20, 2014 at 6:41 pmI generally steer away from any adhesive or basting spray when I’m sewing–over-spray is always an issue, and my children tend to track it all over the house. Plus, even when used outside, I greatly dislike the smell–and the idea that the chemicals from the spray will live forever inside my project. Having said that, I know and respect a great number of stitchers and quilters who swear by basting sprays–and in this case, I don’t see any reason why it wouldn’t work well! 🙂