
 This is the story of a problem and a solution. And it all starts with house hunting. Join me, if you will, on a (short-ish) journey all the way back to 2011.
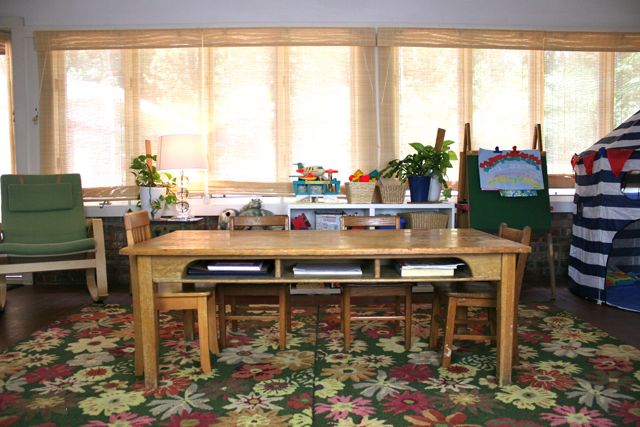
When we very first were shopping for a new home and came across this house, I pored over the images in the listing online. I was really struggling, from the photos the realtor had posted, to put together the floor plan and figure out what was where in this place. There are so many houses out there, and it was just totally impractical for us to take four kids ranging from age 15 to just-over-1 and drag them to every open house and potential listing we cam across, so we did a ton of that on the web in advance, trying to narrow down the search to something more reasonable–it also helped prevent us from wasting time looking at the same listing twice, so that we could be as efficient as possible. I got pretty good, I’m not gonna lie, at fitting together images like a jigsaw and trying to get a feel for the overall floor plan of a house just from the (decidedly biased) photos that realtors tend to include. In this house, I knew before we ever set foot into it that there was a sunroom; and I hoped that it would be situated in a way that would make the perfect playroom for the children. Lo and behold:
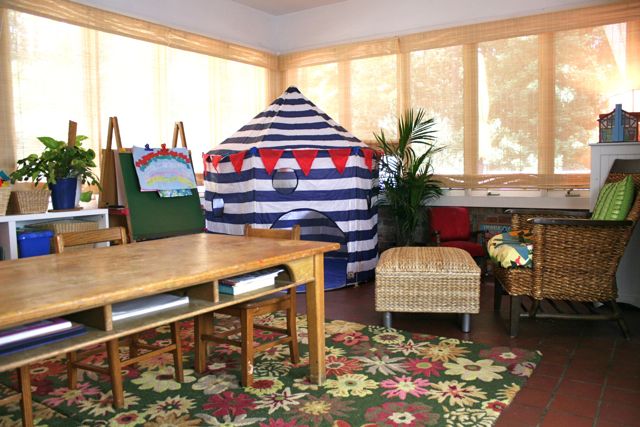
My mother gifted us a kindergarten table from a church rummage sale (from their Sunday School classrooms), along with some tiny chairs. We made that the centerpiece, right in the middle of the room for the children to do art projects and eat snacks and watch a Disney epic. There’s a fabulous wicker reading chair with fluffy cushion that I scored for $20 on Craig’s List, along with an Ikea wicker foot stool, purchased originally to fit the slip cover from Stitch Savvy. Art easel, play kitchen, even a giant play tent (found on a daily deal site for $20 last fall and gifted to the children “from Santa” at Christmas) all fit in here without it feeling too crowded. The 100% wool rugs (there are actually two small ones pushed together to make a larger area rug) were house-warming gifts from my mom. It’s a far, far cry from how it looked when the previous owner was living here:
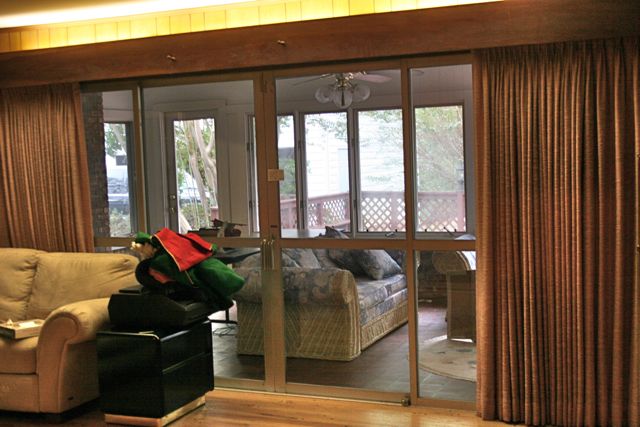
The curtains were nearly always drawn, and there was a LOT more furniture, both in the den and in the sunroom. The previous owner also kept an “office” out there, complete with a folding-table desk, a hole drilled in the tile floor (not joking) to drop down extension cords for power and a phone line for his fax (yes, indeedy), plus a fully-stocked beer fridge, right next to his desk chair. Keeping it klassy, y’all.
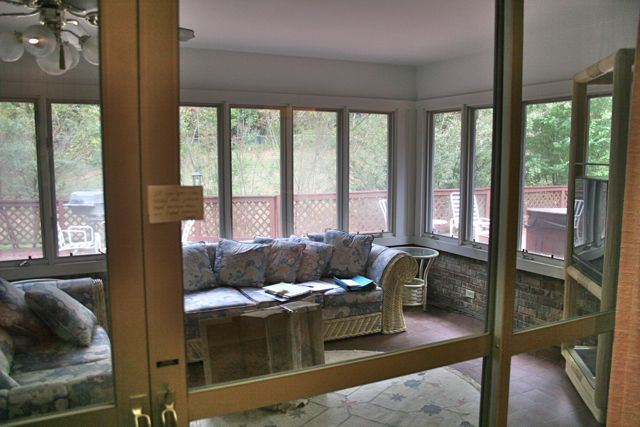
There was also a sitting area and a television, but no blinds of any kind. And based on our experience with this room, it gets sweltering hot in the spring and summer–these are south-western facing windows, y’all, and that afternoon sun beats on you like an anvil. I can’t even imagine what it must have felt like out here in the summer, and can only assume he used it to entertain in the cooler months. You know, when he couldn’t have guests over to party in his twelve-seat hot tub (you can see it on the deck just outside the window–jealous, much?).
Needless to say, this room feels night-and-day different now, and it should: the previous owner was an older gentleman with no small children. Now, this house is filled with kids under 6 on a regular basis, and only recently hosted a birthday party with 15 seven-year-olds, PLUS a quilting bee day with no fewer than nine children ranging from 2 to 12. We see a lot of playtime around here.
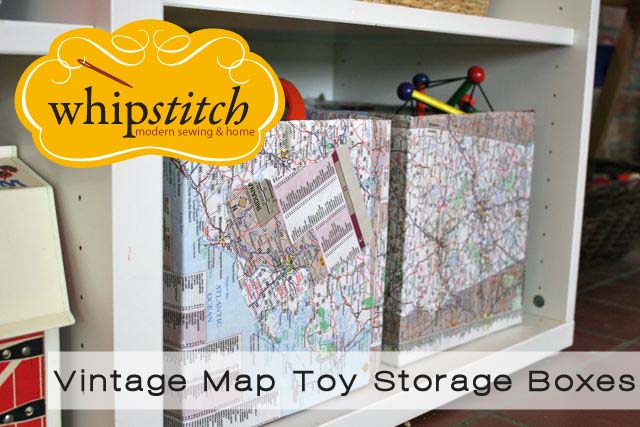
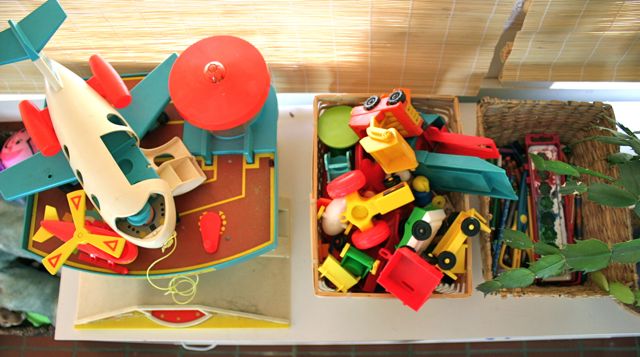
Play time means toy storage, which was one of my first concerns when we moved in and started making this house our own:
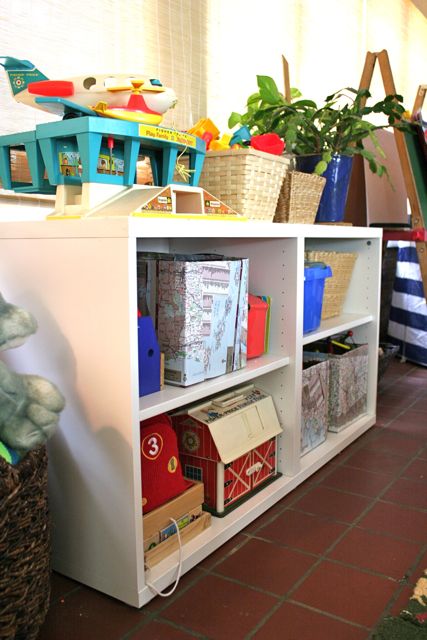
This Ikea bookcase used to be in my studio, holding pattern drafts on card stock and baskets of stashed fabrics. It went here–temporarily, of course–when we first moved in, because in my head, this room got wall-to-wall 30″ bookcases built in below the windows. It didn’t take too long after we started living here before I realized that we didn’t actually have the floor or wall space to spare to make these built-ins–we just had more furniture and large pieces than I pictured in my head. So the Ikea shelf is now permanent and houses all the children’s smaller toys, in baskets and on shelves. Just after the new year, I was struggling with how messy it got, though, and was really, really (REALLY) frustrated with how the children had a tendency to shove toys willy-nilly into the shelves, leaving them tangled and un-playable. Plus, Santa really went to town with the vintage Fisher-Price Little People toys at Christmas last year, and I wanted to keep those nice. A solution was necessary.
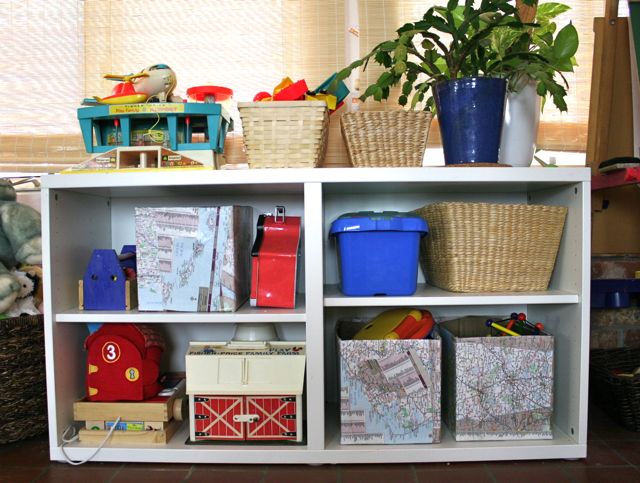
These map boxes are the solution. They’re actually just diaper boxes, leftover from when #4 was still getting her Huggies in bulk at the grocery store (we lasted with cloth diapers through all four kids, but this last one wore them for the shortest period, and we moved to all-disposables with her once she started school). It turns out, these boxes are the perfect size for an Ikea bookcase, and they hold just enough stuff to allow us to “categorize” the toys–play phones and laptops in the “office” box, Potato Head parts in another–without them becoming junk piles. We all love maps around here (find me someone who doesn’t!), and I had a 1995 atlas in the car that was just taking up space, so I Mod Podged the outsides to cover the cardboard and make these more beautiful.
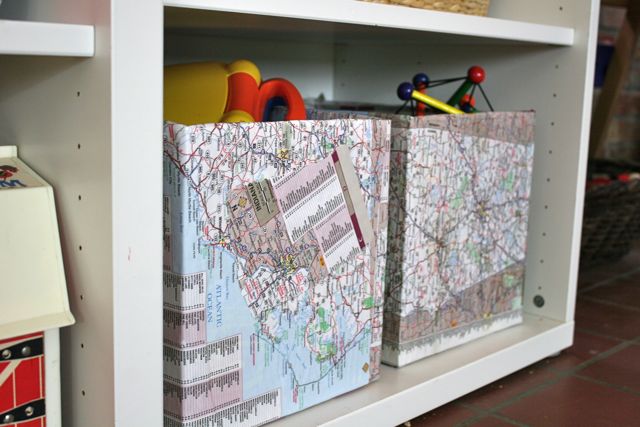 The map pieces are rough-torn rather than cut, making the edges nicely irregular and allowing me to mix up the lines a bit. I did choose states that have some special meaning to us–Alabama on one, Hawaii on another–and gave them a good shellacking with the Mod Podge.
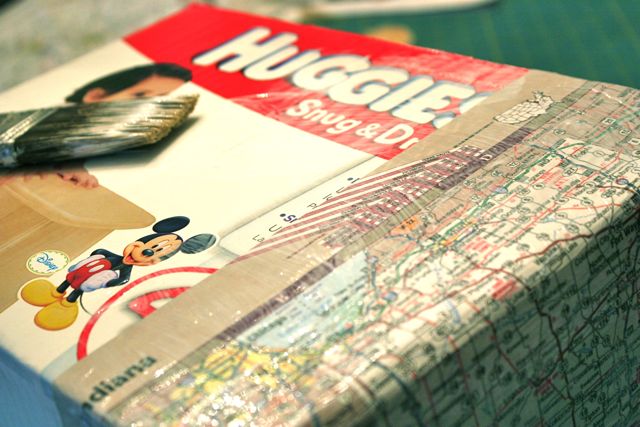
After they dried, they’re not tacky at all and have a good stiffness to them that should hold up well to little sticky baby fingers (of all the things people warned me about before I had children, I wish someone had taken the time to tell me just how sticky they would be).
The Mod Podging was pretty straight-forward, but the insides of the boxes still needed a little help. Next up, a step-by-step tutorial leading you through how I measured and sewed liners for each box, to keep them pretty and prevent the edges of the map pages from coming un-glued!
What’s the best toy storage solution you’ve ever figured out? We’re doing our best to keep things divided by categories, but our struggle is getting the kids to remember what’s what–especially the littlest ones who don’t read. Should I be laminating pictures of what toys go in what basket and tagging the fronts to keep things picked up around here? Anyone ever tried that? Oooh! Maybe Instagram your ideas!! I’d love to pick your brains–one of these days, we will win the Toy Wars. #momsunite
Karen
August 14, 2013 at 2:15 pmNot entirely a storage solution, but a genius idea I came up with when my kids were little: I invested in a couple of the large Rubbermaid totes, and would store away toys on occasion, and “rotate the stock” every 6 months or so. Bringing out the “new” toys again renewed their interest, and I put current toys away for a rest.
For day-to-day organization, I did have smaller, clear plastic, lidded bins filled with cars, play food, etc. It helped somewhat, but I did have to get on the floor occasionally and sort the bins, while the kids thought I was “playing” with them!
Deborah
August 18, 2013 at 12:46 pmWe do that, too! Less so now than with my oldest, but rotating the toys with her always made sure they got played with, instead of getting trashed because they were the “same old toys.” We totally need to do that more often…