
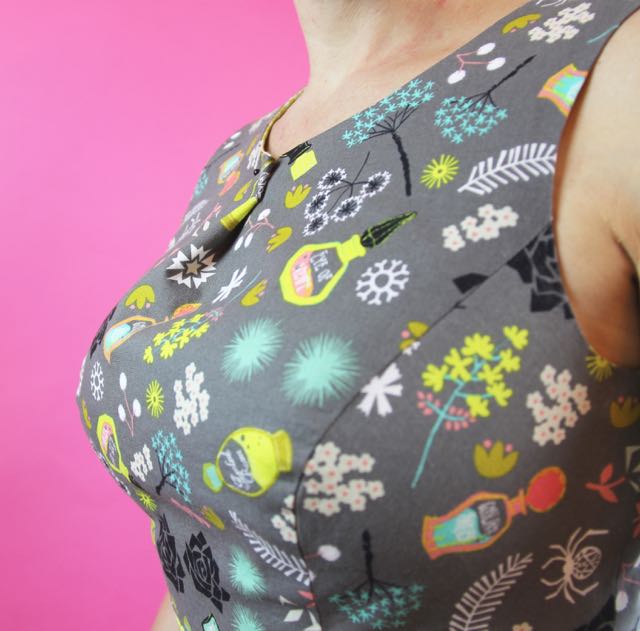
When I looked at the photos I took of my Halloween dress, I noticed some puckering at the princess seams that made me feel unhappy:

I didn’t notice it when I was wearing the dress–probably distracted by the gaping neckline–but in the images, it seems to GLARE at you.
I assumed that I had neglected to snip the seam allowances when I assembled the dress. Snipping seams is just what it sounds like: you take a little clip into the seam allowances to release the fabric along the seamline and prevent it from pulling on the wrong side when the garment stretches over a curve.
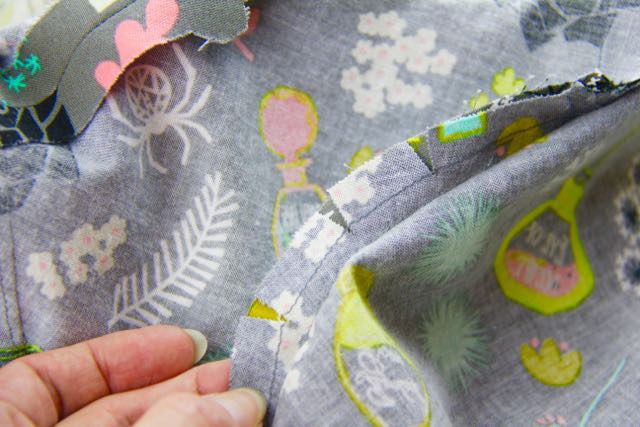
In order to correct the problem, I had to open up the bodice (where I had taken the time to hand-stitch it in place, wouldn’t ya know) to access the princess seams along the bustline. And what did I find?
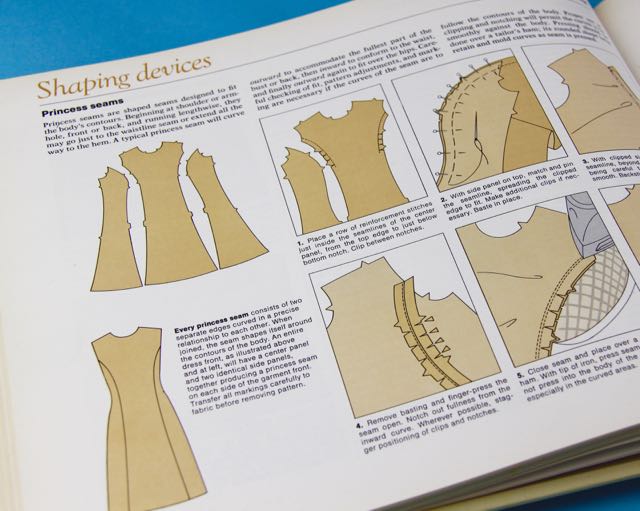
I snipped the seam allowances along the center panel, but not the side panels. That tells me that I made the snips as I was joining the panels in order to get them to fit one another, but failed to snip after they were joined. More proof: the snips went up to the staystitching, which stabilizes the curve so it doesn’t get stretched out of shape before sewing, but they don’t go through it to the actual seamline. As a princess seam is assembled, the concave–inner curve–portion may be shorter in linear measurement (that’s the number of inches long it is, y’all) than the convex–outward curve–portion; snipping into the seam allowances up to the staystitching allows that edge of the fabric to spread and makes it possible to accurately match the two pattern pieces to one another. You can see that in this image here:
The best guide I’ve found to using this technique, and getting really professional princess seams, is in the Reader’s Digest Complete Guide to Sewing:
I love, love, love this book. I included it as a MUST-HAVE in my list of books for building a sewing library, and I find it super unlikely I’ll ever change my mind about that. The writing is detailed and practical, but also accessible and non-judgmental–I never feel foolish for making a mistake or missing a step described in one of their lessons, just guided to do the best sewing I can do.
The longer I sew and the more I realize I just don’t need more stuff–which means I’m not really sewing for the stuff–and the less I care about being FASTEST. I care so much more now about doing a GOOD JOB than I do about working quickly. Part of doing the best quality sewing I can do is just sewing often and trying new shapes and techniques. Another part is taking the time to correct mistakes, even if it’s a pain–which this was. But I think it’s worth it.
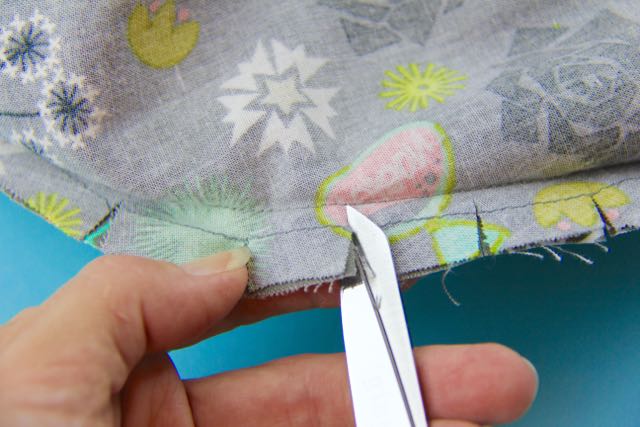
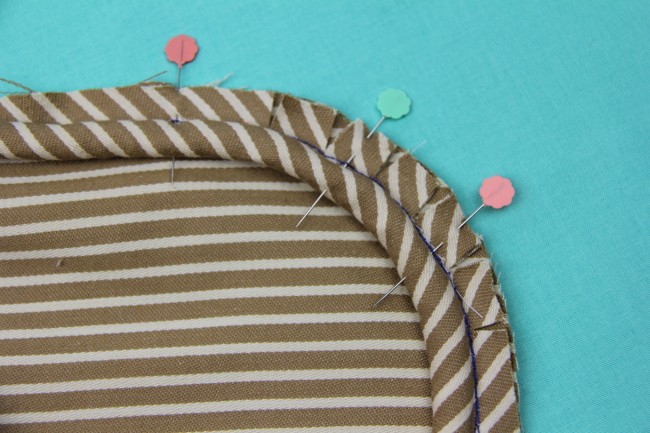
With the bodice on my Halloween dress open to correct the puckering that comes from an improperly prepared princess seam, I snipped into the seam allowances along the seams on both the bodice and the lining. I only needed to be concerned with the curve at the bust, not the straight portions of the seam closer to the waist. Snips go to the seam line but not through them.
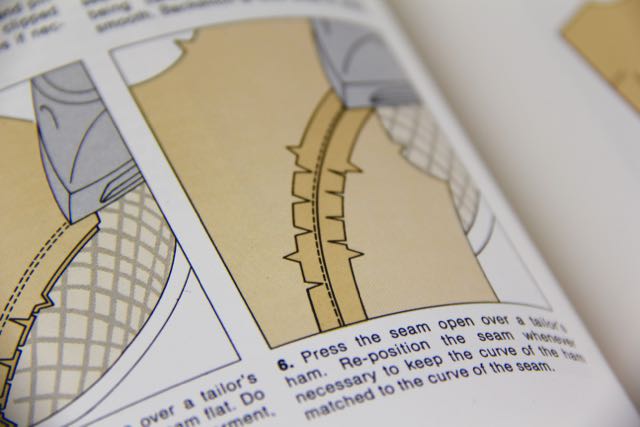
Please note: the Reader’s Digest Complete Guide suggests staggering these snips, which I have NOT done in these photos–staggering would mean snipping each half of the seam allowance separately, and making sure the snips don’t line up with one another. This serves both to make for a stronger seam, since the snips won’t be weakening the stitches from both sides simultaneously, and also preventing any “stepping,” where the bulk of the snip can be seen as a ridge through the fabric from the exterior of the garment–this is along the same thinking as grading a seam so there’s a gradual change in thickness rather than a chunk of bulk that makes an ugly lump.
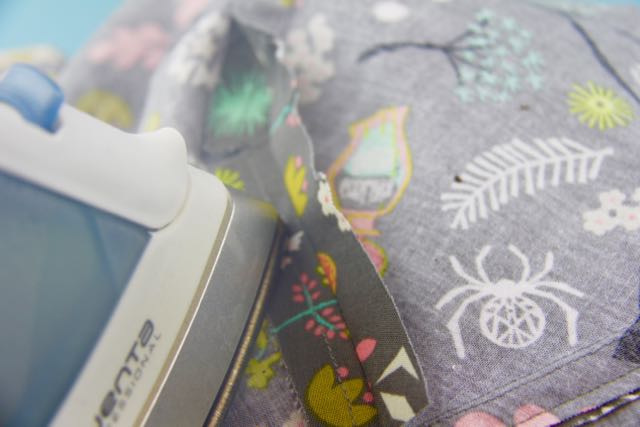
With the seam allowances snipped, and using lots of steam (which you can clearly see in this image, and how cool is that??), I pressed my seam allowances open. The essential part to remember here is that you’re NOT pressing flat–this is a curved seam, where the shaping in the entire bodice is created from the seam itself. So pressing flat is counter-productive. Instead, you’re pressing the seam open while maintaining the shape and roundness. There’s even a nifty tool for making this simpler:
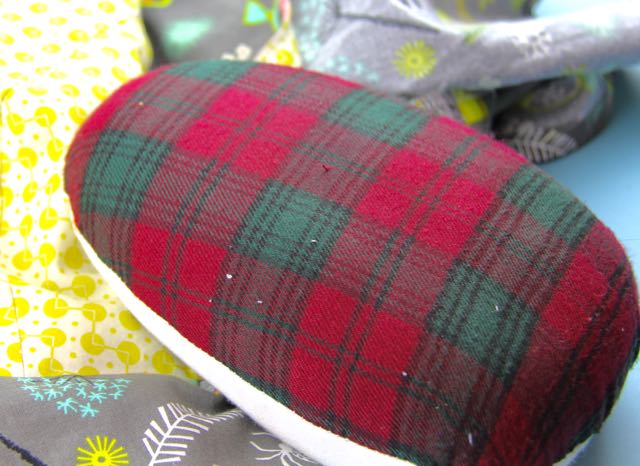
This is a pressing ham, also called a tailor’s ham. Because it’s shaped like a ham. It’s a VERY firmly stuffed egg with cotton duck fabric on one side, and wool flannel on the other. It allows you to use lots of steam while shaping a piece of fabric, and to lay the curved portion of your garment over the curve of the ham while pressing, to make the task easier without negating your efforts. Lay the garment right-side down on the ham, with the seamline centered. Using the tip of the iron, open up the seam and press the allowance flat, but do not press the body of the garment. You may need to move the seam along the ham in order to keep it centered and work in small sections as you go.
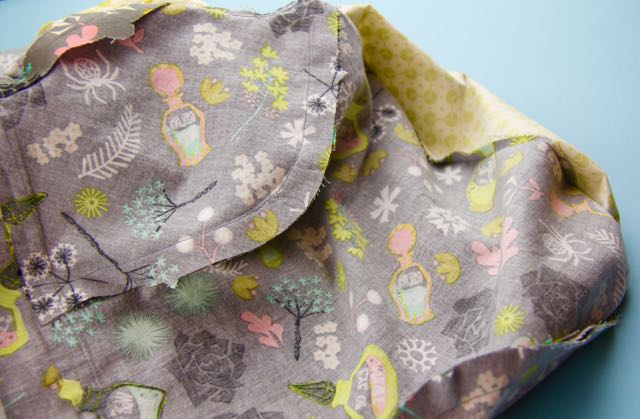
The final product looks like this:
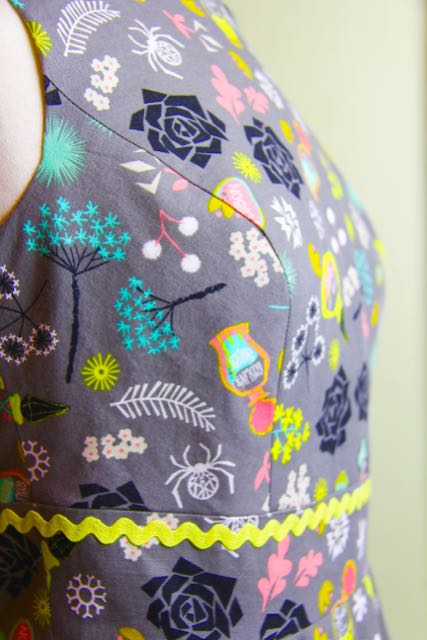
Because the tension on the seam allowance on the concave curve is released by the snips, it can spread more completely, and the bodice fabric doesn’t pucker. Much, much cleaner and smoother. It may not seem crazy dramatic, but it’s the details that make a garment really stand out, and I the challenge of aiming for the best construction I’m able to produce is one of those “obviously invisible” details that people may not THINK they notice, but that makes the difference in the quality of the finished piece.
Jonilou
October 28, 2015 at 7:55 pmThe quality is all in the details and I’m with you on making less and making it better, so it looks like it was worth the effort. Thanks for explaining it! I like the way you fixed the gaping neckline–it looks like an intentional detail.
Deborah
October 29, 2015 at 10:52 amExactly! I think I got caught up in how exciting it is to hold a finished project, and to share it, but if I don’t use/wear them, then the fun sorta fades. I don’t want to trade one form of over-consumption for another. By making fewer things that are of higher quality, I can be more invested in each piece, and I love that. So glad I’m not alone in that! 🙂