Meanwhile, back at the ranch, I’m still plugging away at this jacket. I’ve cut all the pieces for the muslin, and I’m starting to read through the instructions and mentally prepare myself for the construction. Part of that was an extensive (OK, 20 minutes, but still) review of the pattern pieces.
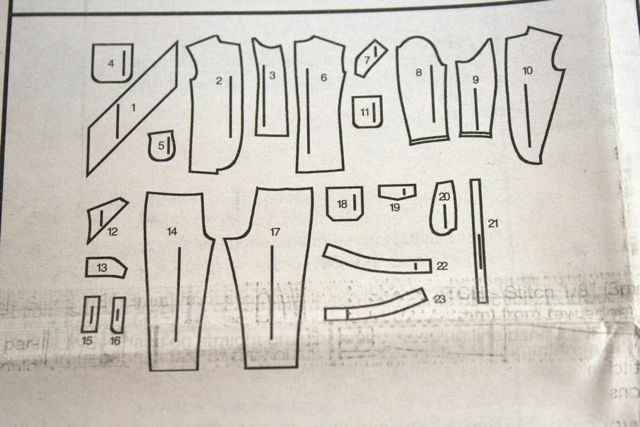
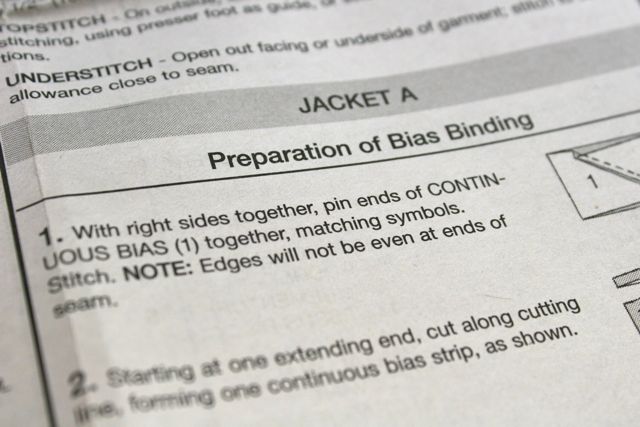
Like most printed patterns, there are line drawings of both the finished garment and the individual patterns pieces on the instruction sheet inside the envelope. When I’m shopping for a new sewing pattern, I usually look for either (1) a really unusual line and silhouette that I haven’t seen previously or (2) a really classic staple that I can adjust and transform into something I already have in mind. In either case, I like to open the envelope (virtually, if I’m shopping online) and check out the shapes of each of the pattern pieces. As you sew more and more, you’ll begin to see that there really are only so many ways to shape fabric to fit the human form, so you’ll see certain themes pop up again and again in the pattern pieces. For example, I like to know if I’m working with a two-part pants pattern or a one-part; if a fly is a mock or a true zip fly; and whether a button-up shirt has a stand collar or a “Hawaiian” collar. You can tell all those things from checking out the pattern pieces–which is nice, because a lot of the time, the description fails to adequately explain just how the garment is made.
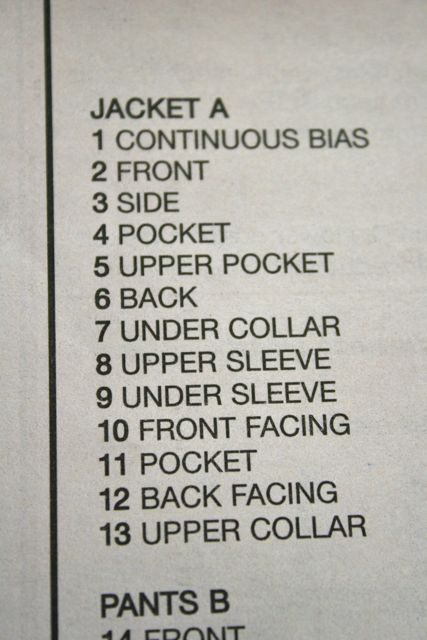
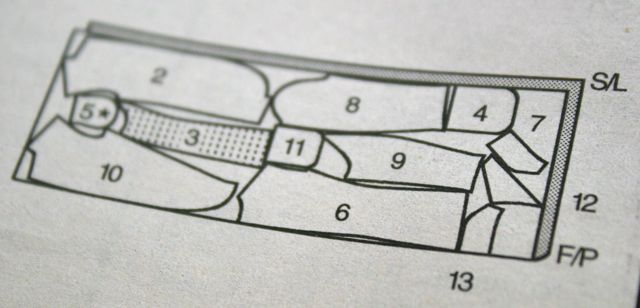
The instruction sheet also has a list of each pattern piece and its name, which made it possible for me to confirm with this pattern that it’s a two-part sleeve (you might remember that was a deal-breaker for me) and that the collar is a two-part collar (more on how that works as I sew it all up). I wanted to choose a pattern for my husband that was a close to a store-bought (well, boutique-bought) jacket as I could get, and those two elements were pretty important to me. So, woot! that this pattern has them.
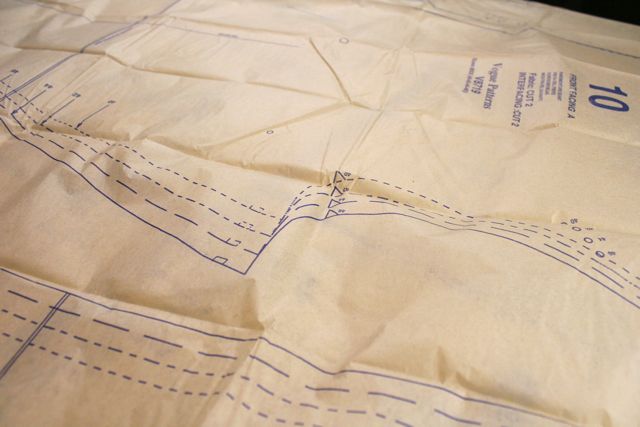
From there, I was ready to select the pattern pieces I needed–this envelope includes a pants pattern, too, which I’m not sewing up–and get those ready to go. It has been fifteen (15!!) years since I had my first major sewing epiphany: pressing the pattern pieces with a hot iron before cutting out my fabric (I think I told that story in Stitch by Stitch? Maybe?). It CHANGED MY SEWING FOREVER, no lie. Between that and pressing the fabric before cutting, the world of difference in my results was night and day, y’all. So I went through the (many, many, way so many) tissue paper sheets that Vogue has so generously provided me and selected my individual pattern pieces, rough-cut them out by just chopping in the blank space between pattern pieces, and then pressed each one up ever-so-gently with an iron with the steam setting OFF. It smooths out the fold lines and makes it much easier to work with the pattern pieces. From there, I pressed up my muslin (which I didn’t pre-wash, since it’ll never be worn beyond the test-fitting stage) and pinned out my pattern pieces.
Now, I know I said I was learning to trace. But for reals: I don’t see much point in spending the time necessary to trace out all these pattern pieces on a Big Four pattern that I got for $2.99 on sale. It would take me a good hour to get that tracing done, and it wouldn’t save me from any of the pressing (I’d need to press the originals in order to trace them accurately), and an hour is worth more to me than $2.99, to be honest. So I went here with my usual cut-from-the-tissue approach. I have still been tracing PDF patterns (soooo much easier than working with printer paper) and patterns from books (I really want the pages to stay together with the books forever, for posterity and stuff); a couple times, I’ve also traced independent patterns, or older patterns that I know I can’t get any longer (did you know that some of Liesl Gibson’s awesome Lisette patterns have gone out of print? Get them while you can!). Otherwise, I just pin and cut like I’ve been doing since I learned to sew. Sometimes comfort is where it’s at, yo.
The instruction sheet provides a handy layout guide, which I know perfectly well NO ONE ever uses. I’d have to be preeeety close to having not enough fabric to use this bad boy when laying out my pattern pieces. BUT! It’s a good idea to always look it over, because they illustrate here if there are any squirrely pattern pieces that have to be flipped and cut on a single layer or that need to be placed on the fold, and I’d rather learn that now than realize it as I’m sewing and none of my parts will go together right. Right?
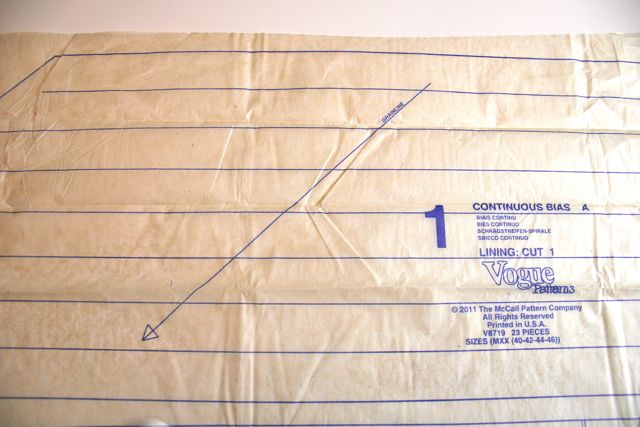
The one pattern piece on this project that I did away with altogether was the continuous bias (piece 1). Because: seriously. Do these people even know me? I mean, they don’t, but I looooove bias tape and am obsessed with CBT. So. But it’s nice to know that such a pattern piece exists, right? I remember years ago a student told me I ought to invent a special ruler for CBT, and that I’d make a mint. Looks like Vogue already has a paper version of that. But maybe I’ll still invent a ruler. A girl can grow.
So that’s where I am. With my muslin pieces all cut out and ready to go. I skipped the pockets, and just cut the major pieces here, since I most want to check the fit and will worry myself with the pockets in the final construction. Hubs is anxiously awaiting his first fitting, where I’m expecting to adjust the darts and bring the waist in a bit, and where we’ll evaluate his desire to leave out the shoulder pads (I really don’t think we can get away with it, but I’ll let the photographs decide for us). Am off to do some serious basting!