UPDATED! You can now watch this tutorial as STEP-BY-STEP video on YouTube, and download a PDF tutorial guide with measurements and written instructions. Have fun sewing!
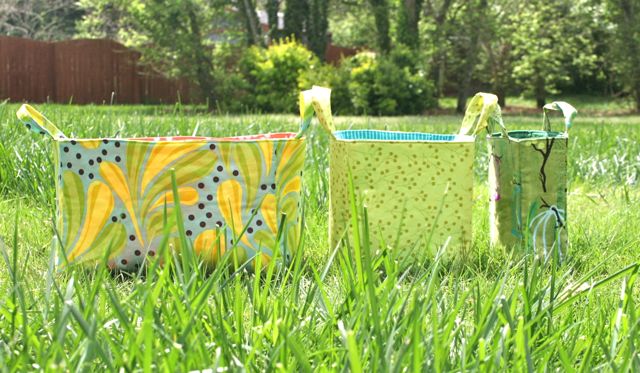
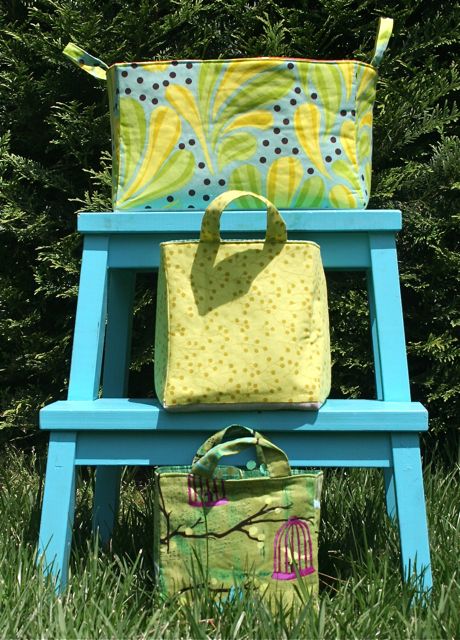
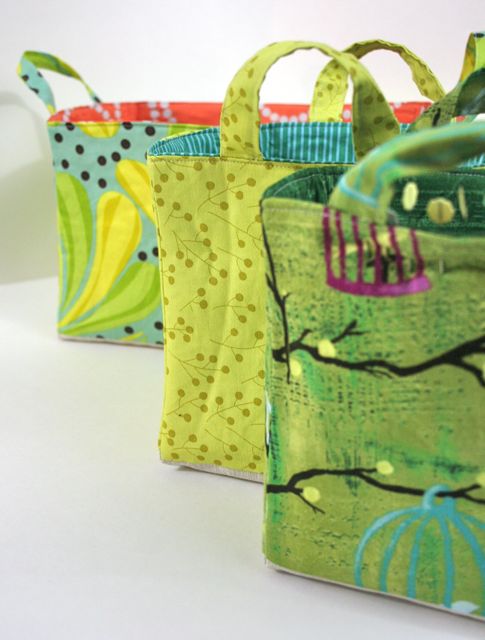
 I didn’t invent the idea of the fabric basket/bucket–nothing like–but I am certainly more than happy to walk you through how I made the ones I’m using in my studio. After discovering–purely by accident–that a smaller (prototype) bucket fit neatly inside the larger size I settled on, it occurred to me as I prepared to put together a tutorial that a set of nested buckets would be pretty cool. So, here they are: a set of three nested fabric buckets to mix-and-match at will. I’m even thinking the littlest size would make a sweet handbag for the spring, don’t you?
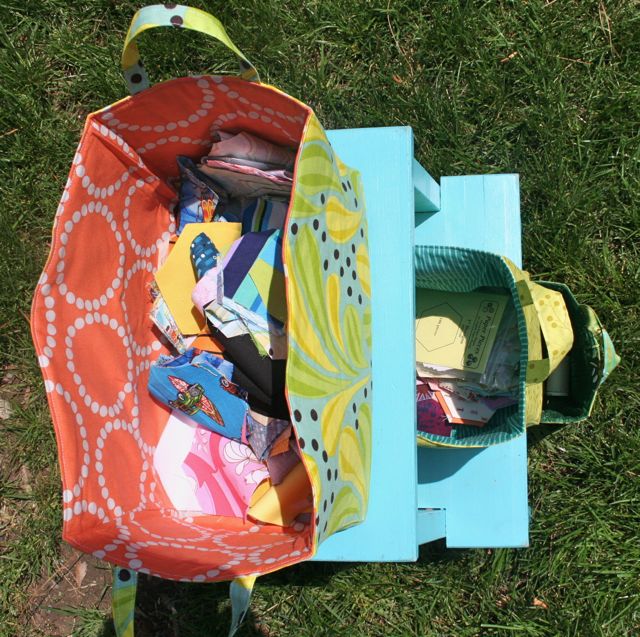
I’m really digging on the graduated sizes, and still completely in love with the idea that these can be used as dividers, so that the biggest basket isn’t so super huge that there’s a ton of wasted space. I’ve moved over all the hexies from their shared basket to this set, with the cut pieces (piles and piles and piles of them) in the largest bucket, the paper foundations and the finished hexies in the middle basket, and my embroidery scissors, thread, needles and an assortment of pins all in the itty-bittiest, most portable basket.
These are all batted with a fusible fleece that I had on hand (supplemented when I ran low with some off the bolt at the shop), so they’re fairly soft-sided. Shooting photos was no easy feat on this blustery day we’re having! The flexibility of the shape makes them even more useful for me, though, since they can be filled with handwork and then smooshed up into a bag to take in the car or off to the in-laws. Heaven forbid I leave my sewing behind.
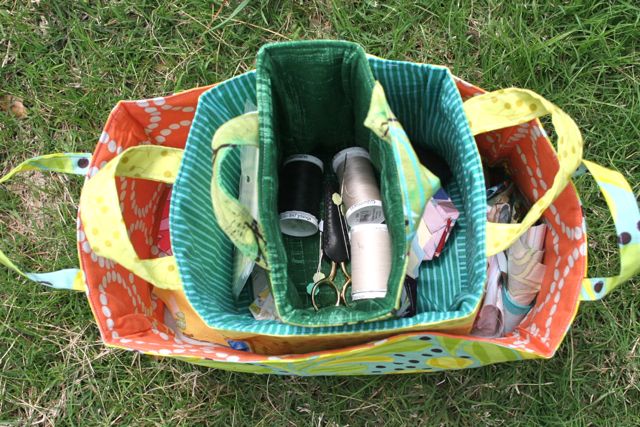 The steps are delightfully simple–I made all three of these in a single evening, between when supper ended and when I went to sleep. The tutorial (after the jump) gives finished sizes, but really, you can make them to accommodate whatever scraps you have on hand! I used the same fabrics for all four sides, but imagine how fun one would be in a different fabric from each angle? Delicious!
Gather up your supplies and let’s Learn As You Sew ™!
Supplies
There are three bucket sizes: large, medium, and small. If you’re shopping for fabric, you can make the outer bucket of even the largest size out of a single fat quarter if you’re willing to make the base of a different fabric–I so love a project that doesn’t take a ton of fabric! The two smaller sizes can easily be made of one fat quarter for the outer fabric and one fat quarter for the inner, lining fabric.
 I liked using a heavier, Waterford linen for the base of these, both because I like the fabric and think it’s got a great look, and also because I think it will wear better over time. You are certainly free to make the base of the same fabric as the sides, or to use another quilt-weight print–no worries!
For these images, I used the middle size, but construction is the same regardless of the dimensions.
Step-by-Step Instructions
Begin with your base piece. You’ll notice that the side pieces, both long and short, are slightly smaller than the base piece is. That’s to allow the base to have sides in all four directions. Take your two short sides, place one right sides together and raw edges even with the base piece, and center the side so that you have approx. 1/4″ of “extra” base piece at either side of the centered side panel. Stitch a 1/4″ seam allowance through the double thickness. Repeat on the opposite side with the other matching panel.
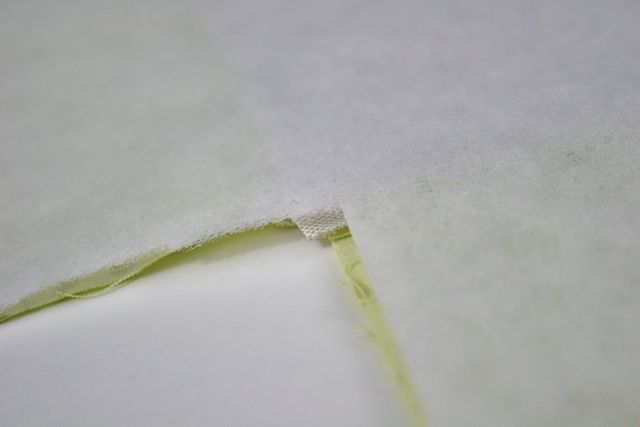
 See that teeny overhang at the corners? That’s good–we want that. Now, take the remaining side pieces and repeat on the remaining sides, placing the raw edges of the remaining side pieces flush up against the seam you just stitched, and centering the panel on the base piece. Stitch the side panel with a 1/4″ seam allowance. Repeat with opposite panel.
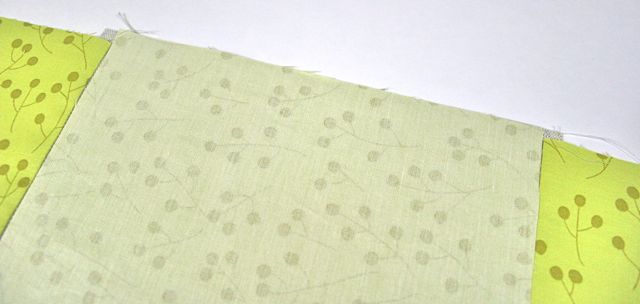 Press the seam allowances toward the side panels, keeping the base piece nice and flat. Press again from the right side, opening out those seams so they’re really crisp. You should now have a T-shaped construction. Repeat all these steps with the lining fabric so you have two T-shaped pieces that are the same size as one another.
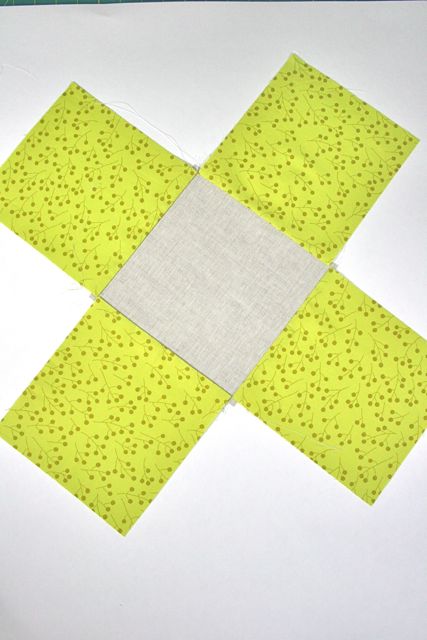 Lay this piece wrong side down on a piece of batting or fusible fleece. For extra stiffness, you could use Peltex or Timtex or something along those lines (or interface the lining in addition to batting the outer fabric). I’m only showing the batting here. Cut around the T-shape of your bucket and make a duplicate of your batting, all one piece.
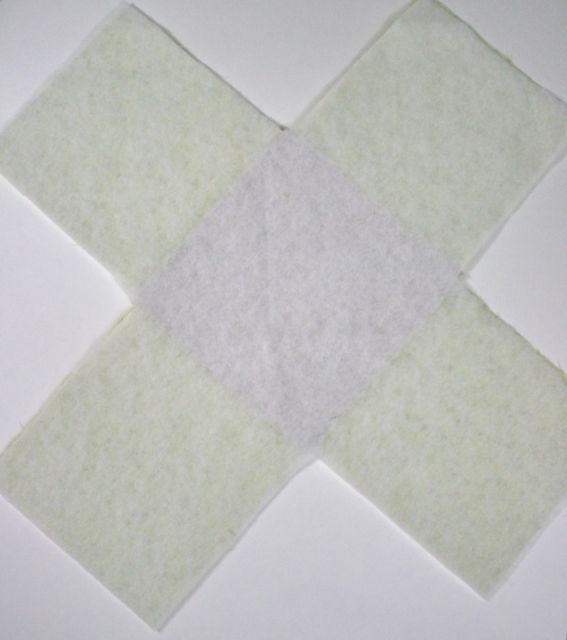 Fuse, if your batting or fleece is fusible. This is nice in that it stabilizes the whole piece, since in the next steps, we’ll be treating the two as one. Having said that, it’s about the same level of difficulty whether your batting is fusbile or not, so if you don’t have access to fusibles, don’t sweat it.
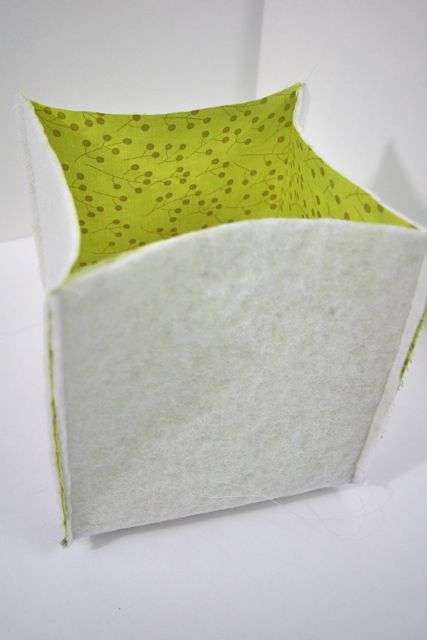
Fold the T-shape right sides together so that two of your edges come together at the corner. This is how we’ll make the sides stand up on your bucket. Pinch them where they intersect with the base and begin stitching there, using a backstitch. Sew all the way up the side seam (the image shows only the outer fabric, not the batting, for clarity). Repeat for the other three corners.
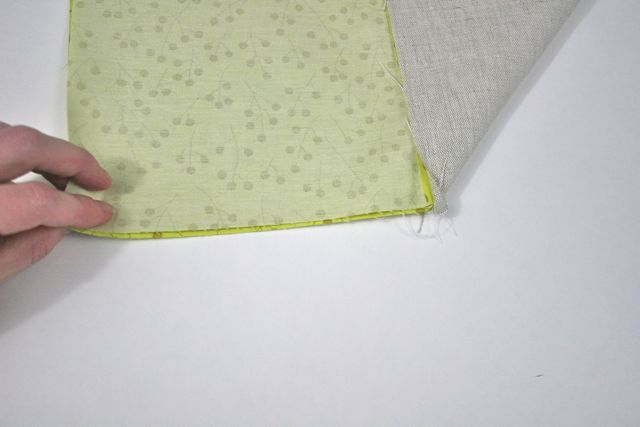 Now you should have a boxed shape that stands up on its own! Repeat with the lining (except that one probably won’t stand up on its own–unless you interfaced it, but again: your call).
Now for the straps. These are entirely optional, and can match your bucket but don’t have to. Cut two scrap pieces that measure about 7″ x 2.5″ish–give or take. Press in about 1/4″ along each long edge, then press again in half so that the two folded edges lie on top of one another.
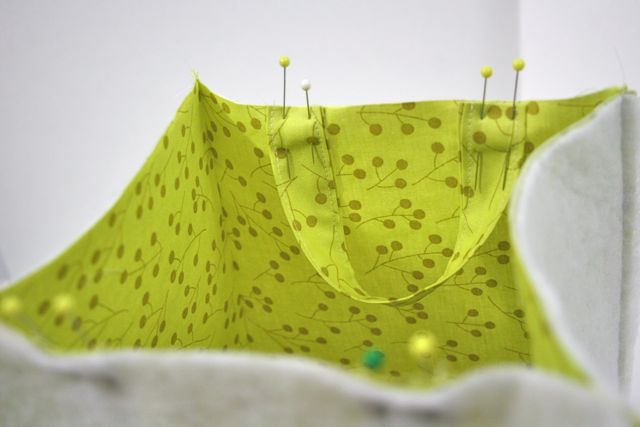
Topstitch close to both long edges, catching the strap closed as you do. Then, pin them to the bucket, right sides together and raw edges even. Spacing is by eyeball–just put them as far apart as you think they’ll look pretty. For all three sizes, straps should be pinned to the 7″ x 7″ish end.
Take the lining, all boxed and seamed at the corners, and place it right sides together with the main fabric, sandwiching the straps between the two, keeping all your raw edges even (if you’ve done the tote bag project in Stitch by Stitch, this is the same concept as how the handles are attached for that project).
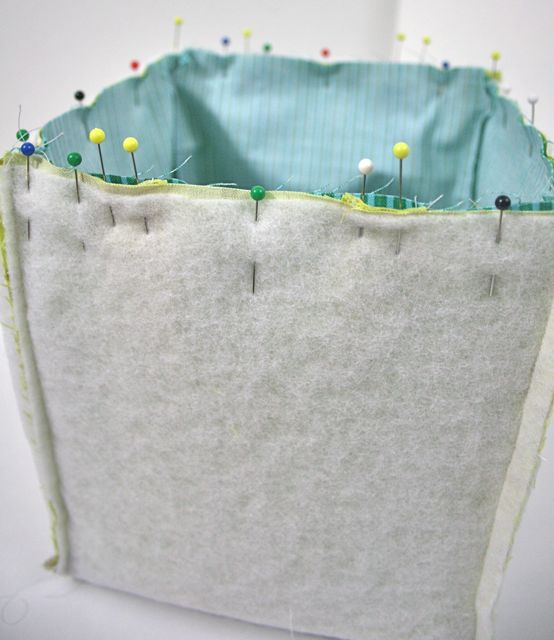
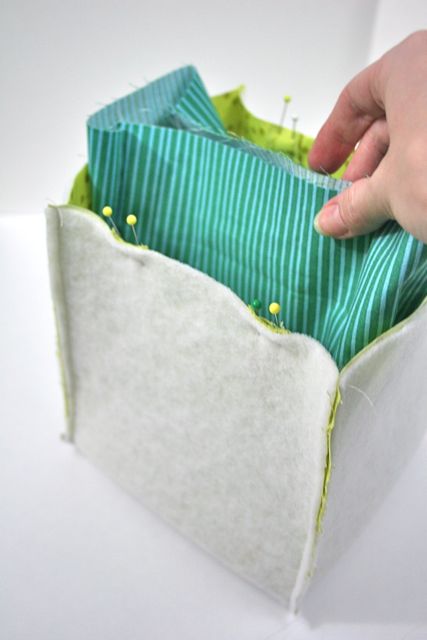 Pin all the way around the upper edge, matching corner seams as you go.
Stitch a 1/4″ seam all the way around the upper edge, leaving an opening along one side through which you’ll turn the bucket right-side-out. Backtack at the beginning and end of the opening to give it some strength.
Ready to turn this puppy right side out and see some magic happen? Reach in through the opening you left and grasp the outer fabric. Pull it through the opening, bringing the lining along with it, until both fabrics are right side out.
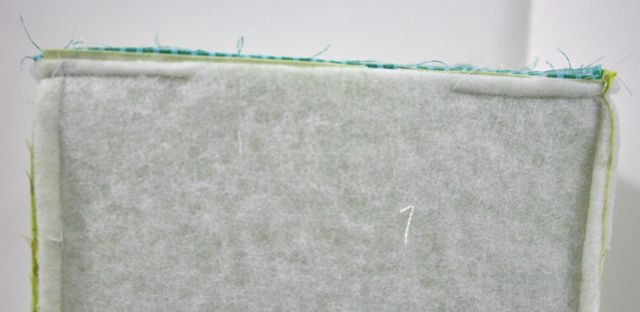
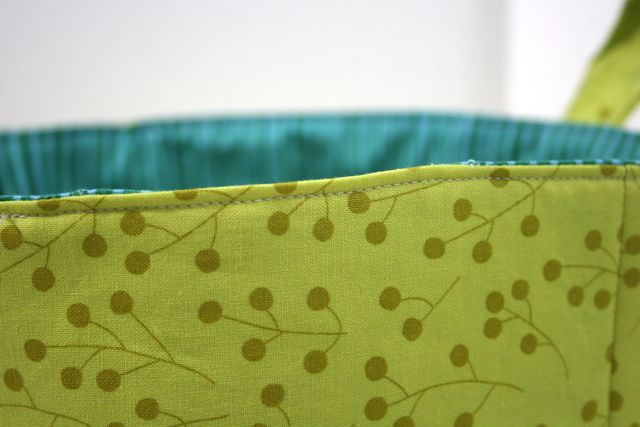
 With the outer fabric and the lining right side out, tuck the lining back inside the outer bucket. Press, press, press all the way around that upper edge to make it nice and smooth, tucking in any seam allowances that are still peeking out from the opening you left for turning your work. Then, topstitch all the way around the upper edge, close to the edge, catching the opening closed as you do. Voila!
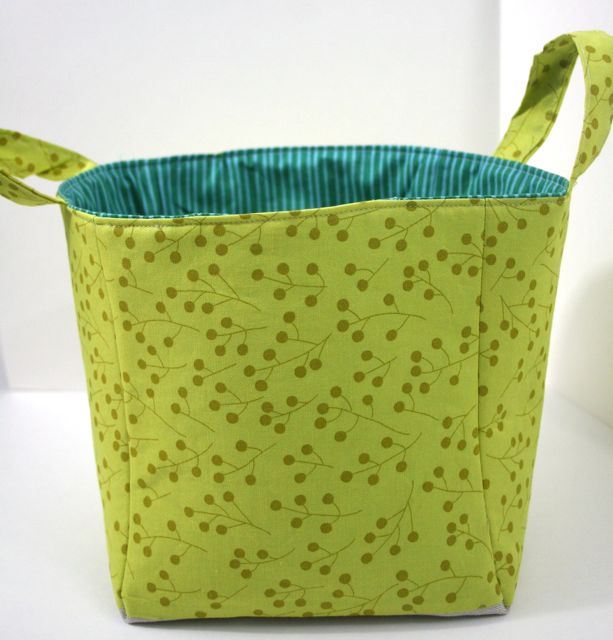 Repeat for the other two bucket sizes to make a nested set! Easy, huh? I knew you could do it.
 I am currently updating the tutorials page, and once it’s all done (no promises on when that will be), you’ll be able to find this tutorial by clicking the link at the top of the page. Have fun, y’all!



Kim
April 12, 2011 at 6:53 pmIt’s the bucket tute! Yay! Thank you! Now I must leave. I have buckets to make.
Kristy
April 12, 2011 at 7:47 pmLove these! I think a set would be a cute gift!! This is definitely going on my project list!
Cassandra
April 12, 2011 at 9:23 pmAwesome!!! I can’t wait to make some!
Megan
April 12, 2011 at 9:47 pmI love the buckets and can’t wait to make some. I also love the orange fabric that you lined the biggest basket with. Is that fabric available for purchase in your Etsy store? It would go perfect in the nursery we’re decorating 🙂
Deborah
April 12, 2011 at 10:37 pmMegan–
That fabric is Pearl Bracelet, from Lizzy House’s Red Letter Day collection. It’s all sold out at Whipstitch, since it’s an older collection of fabrics, but you might be able to find some online through another vendor! I love the print, and had a hard time sacrificing what I had left–good thing now I get to see it all the time! 🙂
Jodi B.
April 12, 2011 at 11:25 pmThanks for the instructions!! Just made one! of heavy linen and heavy sew in fusible ( what I had on hand). I was pretty darn sloppy about it, but hey, it just looks more “organic” when its not perfect 🙂
Trish
April 13, 2011 at 1:14 amPerfect timing!! We are redoing my daughter’s room as she transitions to her big girl bed and I was going to buy fabric bins. Not anymore!!!! Sewing machine here I come!
linda
April 13, 2011 at 3:10 amCool, thanks for sharing your process…I was just wanting to create baskets to hold odds and ends, but wasn’t quite sure how it all works with the flipping inside/out thing…ahah… thanks!
Stephanie Richards
April 13, 2011 at 8:54 amThese bags are great for carrying sewing supplies to sewing class or to a friend’s house to sew. For some reason, they also remind me of picnicking! They would be great for carrying cups, plates, a couple of sandwiches, etc.
Janimal
April 13, 2011 at 2:36 pmThanks for posting these! The dimensions are all super helpful. And HOW CUTE!
Renee
April 13, 2011 at 2:48 pmThese look like they would make good Easter baskets; I’d like to customize them for my boys in some boy-friendly fabrics, since most of the Easter baskets out there are pretty girly! This will probably have to be a project for next Easter since I’m working nearly every day until Easter. Thanks for the easy instructions!
Lorraine
April 13, 2011 at 4:14 pmHi. Thanks for putting this tute together. Fabric buckets were on my “to make” list but pretty low on that list. Seeing your post on fabric buckets inspired me to make some (erm, and the fact that I need storage, like yesterday). I just recently found your blog when I was doing a search on etsy for some sort of fabric and found your shop. Love!
Sara
April 13, 2011 at 6:33 pmThank you, thank you, thank you for the tutorial. I’ve been wanting something like this to use for diapers/baby stuff for our soon to be here baby #4. I always keep baby in our room for a few weeks and I wanted something for the “baby stuff” and I had these in mind and didn’t want to come up with something myself or go looking for a tutorial. So thanks again. I can’t wait to get started on these.
Patty Murphy
April 14, 2011 at 2:49 pmToo cute! I love the baskets!
Karen
April 15, 2011 at 8:13 pmThanks Deborah for a great tutorial. I really enjoy your blog and enjoy the topics you post about. I don’t always have time to comment but do appreciate the time you take to write your posts.
sparkling74
April 15, 2011 at 11:10 pmLove them. I have just the fabric for a big one and maybe a small one too!! Can’t wait to make these.
Ginger
April 17, 2011 at 9:19 pmThank you so much for the bucket tutorial. These have moved to the top of my “to sew” pile. They will be very useful in my sewing studio.
little scrap bucket | Biscuits and Bobbins
April 22, 2011 at 9:01 pm[…] this fun little quickie project on Whipstitch’s always interesting blog and had fun grabbing materials I had on-hand and […]
The name’s Fashion – ReFashion « SewObsessed
April 23, 2011 at 3:45 am[…] E’s birthday doll & wardrobe, a skirt for me (!!!), random skirts/dresses for E, and fabric bins. I love those bins, and with cribs sheets that have no more crib…I continue to refashion! […]
Holly Day
April 26, 2011 at 8:20 amThese nested buckets are so cute! I should take some time to make a few myself, they’re extremely decorative and useful too…
Tasha
May 1, 2011 at 12:06 pmThanks for the fun tutorial! I’m going to make these for Mom for Mother’s Day!
Shane
May 10, 2011 at 9:23 amI love this ……..I can’t wait to make many of them for me and for gifts 🙂
Kate
May 10, 2011 at 12:17 pmWow. That is amazing. So beautiful and yet so simple. Thanks so much for sharing this with us. 🙂
Nesting Baskets | DIYing to be Domestic
May 19, 2011 at 8:07 am[…] For Mother’s Day, I made these nesting baskets for my Grandma who volunteered her sewing machine for my learning curve. I used this tutorial. […]
Melissa @ Love Affair With My Brother
June 16, 2011 at 3:58 pmI followed your tutorial with a few minor tweaks on my end and posted the results on my blog if you are interested: http://loveaffairwithmybrother.blogspot.com/2011/06/testing-tutorial.html
Thanks for the tute 🙂
happyapple
March 4, 2012 at 11:26 pmBrilliiant! Thank you so much for sharing this project. Your instructions and pictures were clear and understandable and I can’t wait to try this! 😀 yippeeeeee!
sandyb720
April 25, 2012 at 7:34 pmMy daughter just sent me this link – hint- hint. Thank you for this wonderful tutorial. I just think I will make some of these.
Kim F
July 11, 2012 at 1:20 pmWhat a great tutorial! Thank you so much for sharing. I know I can make use of these. Wish me luck since I’m a newbee!
Leslie
November 1, 2012 at 9:23 pmThis looks SO easy! Can’t wait to try it. I have some laminated fabric that I have been looking for just the right pattern to get it sewn up. This will be it. 🙂
Deborah
November 1, 2012 at 9:37 pmI’m so glad! It’s such a quick and simple project, but the rewards are pretty awesome–and it looks like you worked so much harder than you did! Hope you love them when they’re done!
Kay
January 18, 2013 at 3:43 pmI love this!! I have seen instructions in other places but yours are idiot proof. I am pretty much a beginner but i know that I could do this easily. Enjoying the Stitch Savvy book tour and looking around your blog, so glad I found you.
Deborah
January 19, 2013 at 10:39 amThank you so much!! I’ve been really excited to see how well people have responded to this tutorial–it was a lot of fun to put together! Hope yours turn out lovely–and thanks for reading!
Storage Basket Tutorials | Bailey Marie and Me
July 22, 2013 at 10:20 am[…] Whip Stitch Fabrics – Nesting Storage Baskets with Handles […]
Carol
September 6, 2013 at 6:34 amThe small one is perfect for teacher gifts!!! LOVE IT!!
amanda
September 6, 2013 at 7:52 amWoW
thanks so much for making it look easy with that gorgeous fabric too.
xxx
More Fabric Baskets | Christine Doyle
December 3, 2013 at 9:05 am[…] first one I made for Jenny to get my feet wet was the large basket from the same Whipstitch tutorial I used for my previous basket. It’s about 12 inches long, 9 inches wide, and 7 inches […]
Suzie
January 5, 2014 at 4:08 pmGreat tutorial, thank you! On the to-do list!
Marta
February 22, 2014 at 4:08 pmÓtima ideia!!! Vou fazer… Já está na lista
Deborah
February 23, 2014 at 6:58 pmThank you!! They’re so much fun to make–and they’re really good gifts. Hope you love sewing yours!
Pauline
April 17, 2014 at 9:21 amI love these now going to make my set and will make for my friends as presents. Thank you for sharing.
Top 10 DIY Fabric Storage Bins
July 29, 2014 at 4:14 pm[…] via whip-stitch.com […]